-

- Forums
- Chatrooms
- Gallery
- Gameplay Videos
- Upload
- Articles
- Mod Reviews
- Shop SP: Games, Movies, Books
|
|
| Pillars of Eternity 2 Video-Based Walkthrough by David Milward |
Neketaka
*Evil* Mapping the Archipelago: The Burning Shoals
The evil party sails northwest from #25 on the World Map. I attack a Vailian Master Captain. He closes in on me once he realizes what my intentions are with respect to using Magranite Flame Throwers on him. I take out four of his crew members with a volley before he crashses his ship into mine, leading to a favorable boarding battle that's all good.
I continue north and board a Crookspur Captain and another Vailian Master Captain.
I also board a Deadfire Merchant Ship as I approach Neketaka. That allows me to replenish my Ship Supplies.
I now switch in Serafen, Maia, Rekke and Konstanten as the companions with the least amount of xp.
I go to Sanza's Emporium, which is at #20 on the map of Queen's Berth. I get 5,000cp and 30,000+ xp for completing the Quest called Mapping the Archipelago: The Burning Shoals. He next gives me his last Quest, Mapping the Archipelago: Razai Passage.
Rekke takes Unflinching on his 17th level-up. It provides Resistance to Constitution, Dexterity and Might Afflictions while his Health is above 50%. That makes for a worthwhile benefit in its own right. The appeal for a Barbarian is that will at least prevent either the Staggered (-5 Might, cannot Engage) or Sickened (-5 Constitution, -25% Healing Received) Afflictions from negating his use of Frenzy.
Konstanten takes Bull's Will on his 17th level-up. He is at this point, and in my view, starting to run out of meaningful choices by way of Phrases and Offensive Invocoations. So I now take the opportunity to add passives that increases his Defenses other than Deflection. And those passives will stack with bonuses provided by his Cloak.
Zarathos gains two abilities on his 19th level-up. One of them is Bloodthirst. Landing a killing blow triggers the Barbarian enjoying instant Recovery after any and all actions for 10 sec. There will be the usual Recovery Time immediately after the killing blow itself. But once that Recovery Time elapses, that's when the 10 sec of instant Recovery begins. It often means Zarathos landing lots and lots of blows in a short period of time. In fact, it can often set off a chain reaction. He lands a killing blow to get temporary Instant Recovery. He lands several highly damaging blows on his next target in rapid suceession, and that kills another target, and that extends the period of Instant Recovery, and the next and the next. The chain reaction can sometimes wipe out whole groups of enemies faster than any area-of-effect offensive spell could.
He also takes Heartbeat Drumming. It's a passive whereby any Melee Critical Hit has a 25% chance to instantly trigger an extra Melee Attack. The ability to trigger extra attacks through both this and Swift Flurry is the incentive to maximize Zarathos' ability to land Critical Hits.
Mapping the Archipelago: The Burning Shoals
The good party boards a Crookspur Captain and a Vailian Expert Captain, and then sinks a Vailian Master Captain, while wailing back to Neketaka.
I bring in Ydwin, Fassina, Rekke and Konstanten as the companions with the least xp once I reach Neketaka.
Rekke takes Spell Resistance on his 17th level-up, after I get rewarded by Sanza. It gives him a 10% chance to avoid the effects of any spell outright.
The evil party arrives at #1 on the map of Neriscyrlas' Lair. My allies are here too, but they can only use their powers if Neriscyrlas is close enough for it.
The soul of St. Waidwen will be at #2. He can use the Fire Storm spell.
The soul of Inquisitor Naxiva will be at #3. She can use a chains power that can Immobilize the dragon.
The soul of King Winguaro will be at #4. He can Daze the dragon.
Neriscyrlas will be waiting for me at #5, and there's multiple ways to handle the situation. The easiest way is to convince her that centuries of her undead state must surely be wearying by now, and that it's time to embrace oblivion and succumbing to the White Void. She'll then end her existence willingly. You won't need to make any skill checks to convince her of it. You just need to keep pressing the point multiple times until she's convinced.
The obvious way is to fight her. This can be a tough fight, even for high level parties. She has a power similar to Llengrath's Safeguard that she can activiate at least twice during the battle, which will boost her Armor Rating considerably. She can also use an enhanced version of Concelhaut's Corrosive Siphon without limit in order to both damage the party and heal herself. One type of strategy for her emphasizes Interrupting the use of her powers. The other type of strategy depends on either boosting the Penetration of your warriors, or lowering her Armor Rating, or both.
I manage to outlast her with the Salvation of Time-Ancestor's Memory Loop, with Barring Death's Door put on everybody besides Mirke. But I still have to be careful though. She can debuff, at least early in the fight. I did at one point have to have Zarathos put his buffs back up, and Xoti put Barring Death's Door back on him. Also note how Ancestor's Memory allows Tekehu to use Taste of the Hunt without limit against a singularly powerful target.
Either killing her or convincing her to succumb to the White Void will lead to the acquisition of both an Amulet called Neriscyrlas' Hope and a Trinket called Whispers of Neriscyrlas. *NOTE* Killing Neriscyrlas requires making an Athletics check of 15 to get Neriscyrlas' Hope from her dying body without sustaining an Injury. But Mirke makes that check easily.
Bounty on Uamoru the Pretender
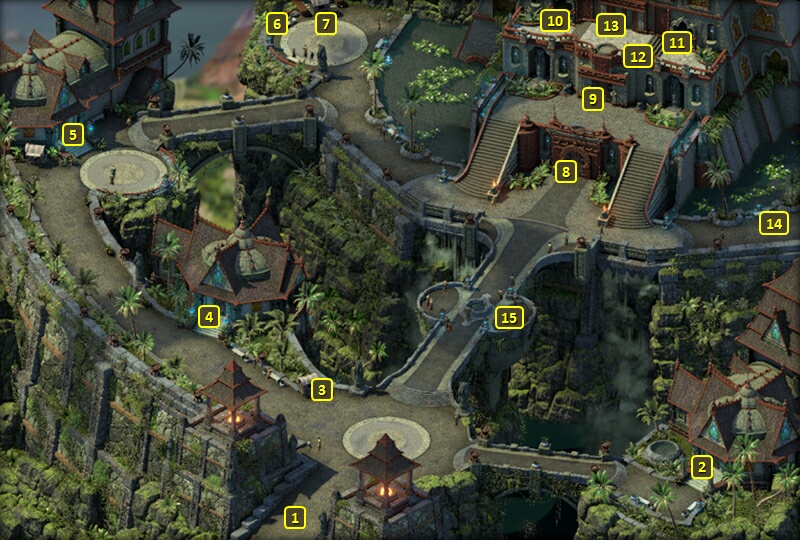
The good party travels to Serpent's Crown.
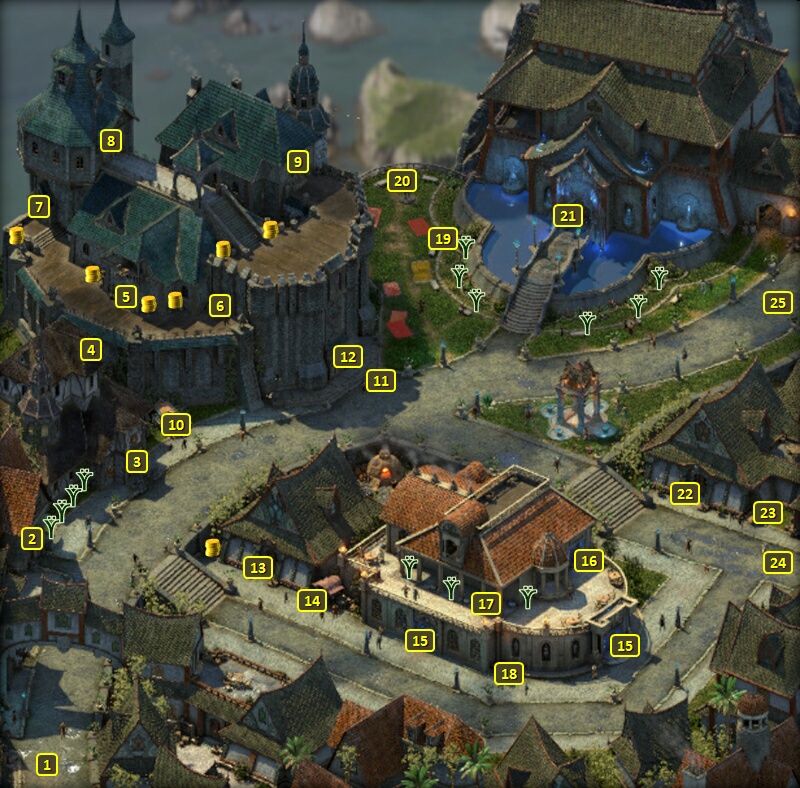
I start off at #1. I buy gems from Una at #3.
I continue northwest and speak to Nungata at #6. I receive a minor gain in positive reputation with Neketaka, 6,000cp and 20,000+xp for the Bounty on Uamoru the Pretender.
Konstanten takes Tough on his 17th level-up. More Health is always a good thing for any character, but especially a character who packs a two-handed weapon in the thick of combat.
Alliria takes two abilities on her 19th level-up. One of them is Stoic Steel. It increases her Armor Rating by +1 for each 6 sec that she remains in the same spot without moving, and to a maximum of +3. That will often come into play when she's in pitched battle with either a boss or numerous enemies. It ends temporarily should she move. As a passive it will stack with all of her other Armor Rating bonuses.
She also takes Wall of Draining. It creates a wall that drains at least 1 sec of beneficial effects of all enemies who touch it, every sec. And every drain also adds at least 1 sec to the duration of the caster's beneficial effects. Alliria, up until this point, simply kept Arcane Veil going with the help of Blood Sacrifice when she was immersed in Melee combat. Getting this spell allows her to take things to the next level. She'll rely on Zandethus' Dragon-Scaled Grimoire Melee heavy fights. She'll start with Infuse with Vital Essence followed by Blood Sacrifice. She then casts Zandethus' Draconic Fury followed by Blood Sacrifice. I check to make sure my 7th-level spell has been recouped. If it hasn't, I repeat Blood Sacrifice until I get it back. I proceed with the rest of the sequence once I do get that 7th-level spell back. I put up Llengrath's Safegard, Spirit Shield, Flame Shield, Eldritch Aim and then Arcane Veil. I then carefully place the Wall of Draining to catch as many enemies as possible, with the intention that the Wall massively pumps up the duration of all of the buffs I just put up.
Now I go east to the entrance to the Kahanga Palace at #8.
The Last Sanctuary
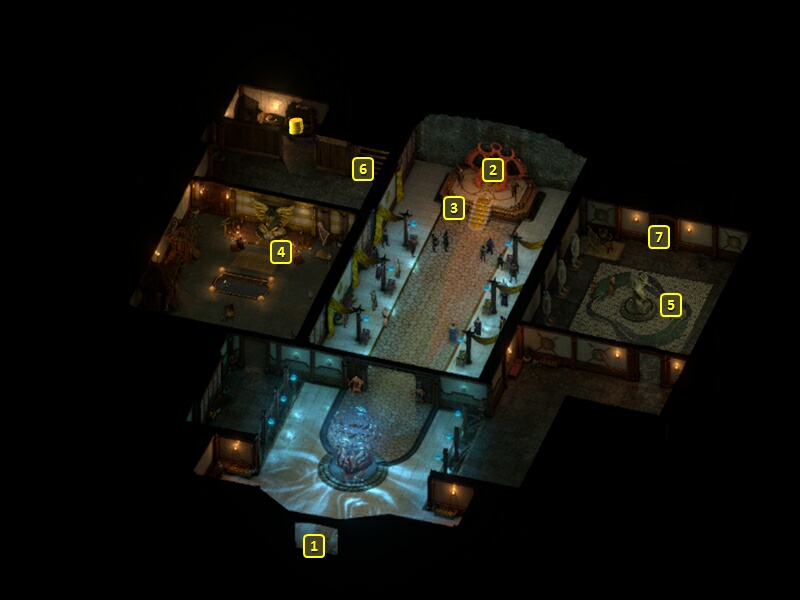
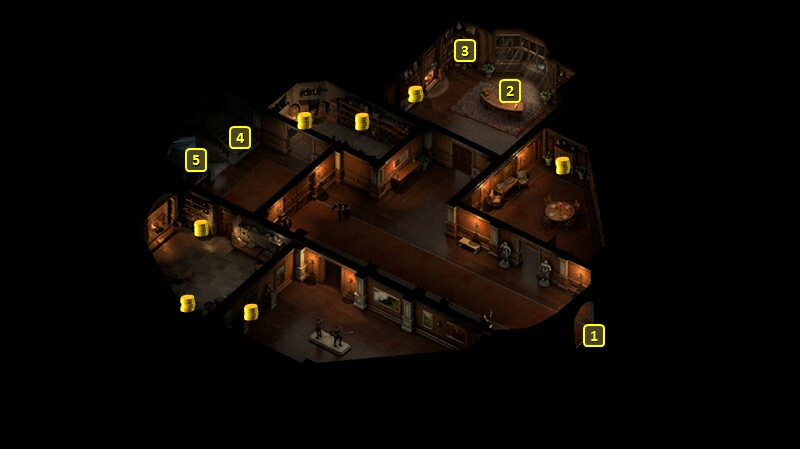
I am now at #1 on the map of the main floor of the Kahanga Palace. Alliria reports her findings on Motare O Kozi to Prince Aruihi at #3. I get 10,000+ xp an a major gain in positive reputation with the Huana was rewards for completing The Last Sanctuary Quest.
Prince Aruihi indicates that Queen Onekaza will send for me when she has need for me. So I go back out the door at #1, and then east to the exit at #14 on the map of Serpent's Crown.
*Evil* The Last Sanctuary
Prince Aruihi doesn't take it well when he learns that Zarathos both handed over the Huana Chart to the Royal Deadfire Company, and destroyed the Stone Disc at Motare O Kozi.
*Evil* Woedican Agents
I temporarily switch in Eder, and have him take Tough on his 18th level-up. More Health is always a good thing, especially for a warrior with a two-handed weapon who is himself going to get hit a lot.
I reassemble my core party and head for The Sacred Stair. That's when the evil party fights the Woedican Agents and Skaen Sabotuers. The Salvation of Time-Ancestor's Memory loop works, but Xoti needs to be ready to insert a Barring Death's Door in between castings of Salvation of Time when enemy Monks or Rogues threaten Tekehu and then Ydwin.
Aloth takes one of the Gauntlets of Accuracy. More Accuracy means not only increased damage with his offensive spells and effects, but also increased probability of Afflictions and other debuffing status effects that are caused by his spells.
Maia gets the second Gauntlets of Accuracy. She already has other items and abilities that add Accuracy to her ranged attacks. Adding more Accuracy through these Gauntlets makes her even deadlier.
And Konstanten gets the third Gauntlets of Accuracy. A Skald as always wants to land Critical Hits as often as possible in order the accumulate the Phrases for Offensive Invocations as quickly as possible. That makes these Gauntlets an easy choice.
I keep these characters, plus Rekke in the party for now.
*Evil* Bounty on Urnox the Rathun
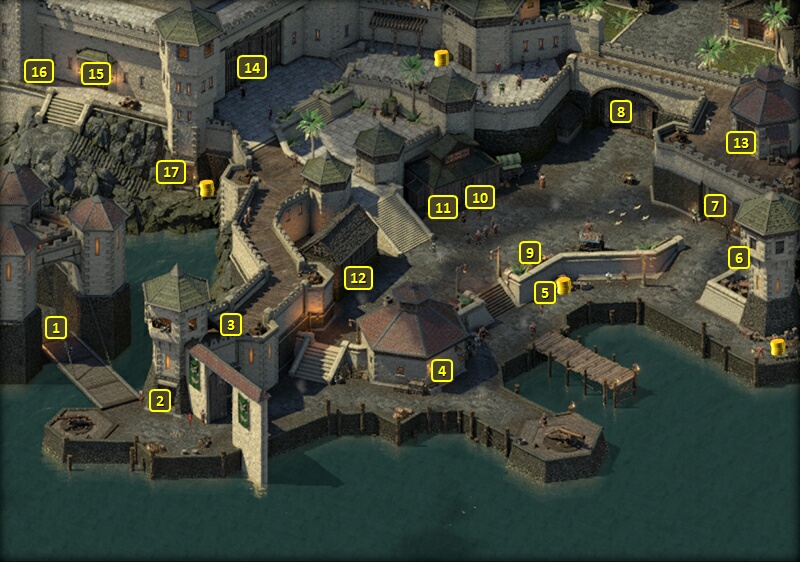
The evil party starts off at #1 on the map of The Sacred Stair. I speak to Okauro at #3, and receive 4,500cp and 16,000+ xp for the Bounty on Urnox the Rathun.
Aloth takes Quick Summoning on his 18th level-up. It helps him summon either his Essential Phantom or his Substantial Phantom a little faster.
I thereafter travel directly to the lower floor of the Imperial Compound in the Brass Citadel.
Clearing Out Crookspur
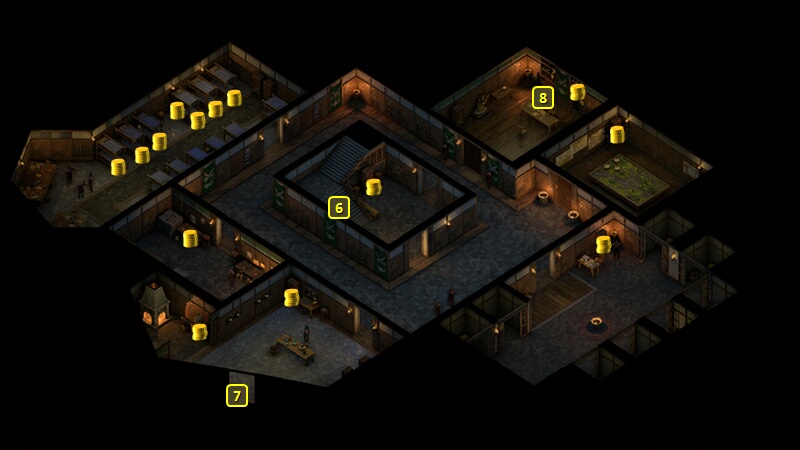
The good party starts off at #6 on the map of the lower floor of the Imperial Command. I speak to Atsura at #8. He congratulates Alliria on helping out Okaya, but now wants her to clear the Crookspur Slavers out of the Deadfire for good. It is a request that she agrees to without hesitation. *Evil* Zarathos agrees to the request for now too, but ultimately intends to betray Atsura and help the Slavers cements themselves in power in the Deadfire.
I go up the stairs at #6.
That brings me to the stairs at #5 on the map of the main floor of the Imperial Command. I go out the door at #1.
That brings me to the door at #14 on the map of the Brass Citadel. I go the exit at #8.
*Evil* Bekarna's Folly
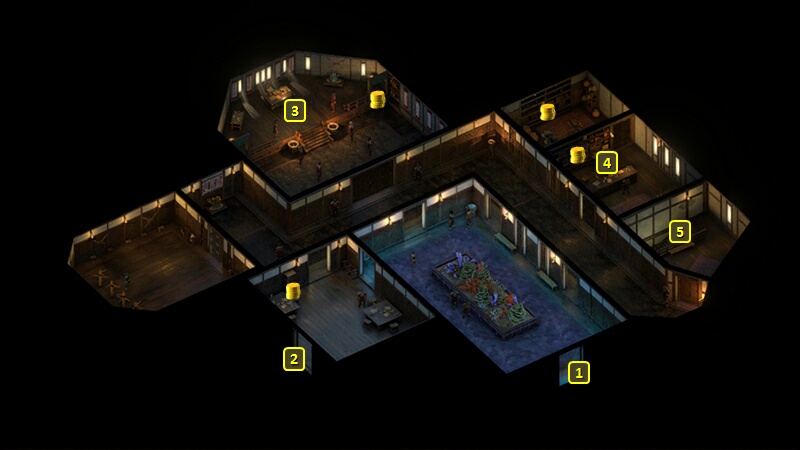
The evil starts at #1 on the map of the main floor of Arkemyr's Manor. They speak to him at #2, who bids them to join him at his scrying pool. They then go down the stairs at #5.
That brings me to #1 on the map of Arkemyr's Laboratories. I go east and click on the scrying pool at #12. That begins a lengthy scripted interaction with the members of the Circle of the Archmagi. The end result is giving themBekarna's Research, and gaining 5,000cp, 18,000+ xp and a Grimoire called Arkemyr's Illuminating Discoveries as rewards for completing the Quest called Bekarna's Folly.
Xoti gains three abilities on her 19th level-up. She automatically gains Wall of Thorns automatically, although I hardly if ever use it.
She takes The Dichotomous Soul. It summons two replicas of herself, one made of fire and the other of ice. They inherent her armor and accessories, but use unarmed attacks with one scoring bonus Burning Damage and the other scoring bonus Freezing Damage. There are some fights where bringing lots of summons can be helpful. And there are some fights where I want to summon the Dichotomous Souls non-stop, with Enduring Dance passively replenshing the needed Wounds.
She also takes Shields for the Faithful. Adds +20 Deflection for all allies within a 1.5m radius. It's one of her starting buffs, and it will get extended endlessly by Salvation of Time.
*Evil* Arkemyr
The evil party decides to murder Arkmeyr. The Salvation of Time-Ancestor's Memory Loop, with plenty of Barring Death's Doors thrown in, is sufficient to outlast Arkemyr and his Steelclad Constructs.
*Evil* Arkemyr's Grimoire
I loot Arkemyr's body for the following:
That brings me to the door at #12 on the map of Periki's Overlook. I buy crafting ingredients from The Dark Cupboard at #3 and Cuitzli's at #2.
Serafen acquires Threatening Presence on his 18th level-up. It's a passive that prevents enemies of lower level than him from Engaging him.
Arkemyr's Grimoire will become Aloth's Grimoire for the rest of the game. It has plenty of Illusion spells like Ryngrim's Repulsive Visage, Llengrath's Displaced Image and Arkemyr's Wondrous Torment that will benefit from the bonus Illusion Power Levels provided by his Whitewitch Mask and The Eye of Wael. That also includes Arkemyr's Brilliant Departure, which both hits enemies with the Confused Affliction but also turns him Invisible. And the Invisibility in turn allows him to use Backstab. I preferred it to the similar and more immediately available Arkemyr's Illuminating Discoveries for a couple of reasons. One, Arkemyr's Illuminating Discoveries has Llengrath's Warding Staff in it. I don't want Aloth to use any summoned weapon besides Kalakoth's Minor Blights, which has the advantage of leaving the The Eye of Wael in his off-hand. Llengrath's Warding Staff also has the additional annoyance of knocking everyone back friend and foe alike when it is first cast. The other reason is that Arkemyr's Grimoire has Arcane Veil, which is one of the best Deflection-enhancing spells in the game.
I reassemble the core party, but with the difference that Aloth will replace Tekehu for the time being. I leave the city by ship.
Bekarna's Folly
The good party likewise pays Arkemyr and the Circle a visit to complete the Quest, but Alliria is content to leave without any further hostiles with Arkemyr.
Ydwin takes Tough on her 18th level-up. More Health is always a good thing, but especially for a character who fights in Melee but is a little light on Health herself.
I likewise buy up ingredients from The Dark Cupboard and Cuitztli's, and then make to leave Periki's Overlook.
Woedican Agents
I put my core party together, and head back for the ship. That's when the good party has its encounter with the Woedican Agents.
It's in this battle that Alliria first uses the sequence I described above using Zandethus' Dragon-Scaled Grimoire. She starts with Infuse with Vital Essence followed by Blood Sacrifice. She then casts Zandethus' Draconic Fury followed by Blood Sacrifice. It recouped the 7th-level spell. Now I proceed with Llengrath's Safegard, Spirit Shield, Flame Shield, Eldritch Aim and then Arcane Veil. I then carefully place the Wall of Draining to catch as many enemies as possible. All of her buffs get prolonged considerably.
The early parts of the battle prove somewhat difficult. The enemies are more spread out, so Mirke starts with her secondary gun set. She also gets hounded at times, so Pallegina sometimes has to use Greater Lay on Hands on her. Furthermore, I am so far only able to attack the more resilient Fighters and Paladins in their group, so I don't make much progress to begin.
But the tide eventually turns once a few things come into play. The rest of the party members, especially Eder and Aloth, start to lock down multiple foes through Engagement and not having to worry much for their own safety. That means a bunch of enemies are locked in a tight group together and fearful to depart from my tanks for fear of Disengagement attacks, and thus no longer chasing down Mirke. And that also means Mirke can keep her distance, switch over to her primary gun set, and start spamming Stunning Surge with abandon.
I have Alliria, once I sense this is going to be a long battle and that her first Wall of Draining will soon expire, use Blood Sacrifice repeatedly until she regains all of her spells. She sets another well-placed Wall of Draining to keep her buffs going. And I repeat the process of Blood Sacrifice and another Wall of Draining to keep her buffs up for the entire fight.
Once the ideal conditions are in play, I take out the Rogues and spellcasters first and foremost as opportunity allows. It is only once they're gone that I set about to gradually wearing down their Fighters and Paladins one by one. I loot the dead bodies, including the two pairs of Gauntlets of Accuracy.
I briefly switch in Xoti and Konstanten. Xoti takes Uncanny Luck on her 18th level-up. It provides a 5% chance to avoid any Attack. It also provides a 5% chance to convert a Hit into a Critical Hit, and that means improving even if slightly the odds of another Attack through either Swift Flurry or Heartbeat Drumming.
Xoti also gets one of the Gauntlets of Accuracy. It helps offset somewhat the Accuracy penalty for using the Savage Attack modal with a Great Sword. And she has multiple items and abilities that can convert Hits to Critical Hits for purposes of triggering extra Attacks through Swift Flurry or Heartbeat Drumming. So even improving the chances of a Hit through a bump to Accuracy is helpful.
Konstanten gets the other pair of Gauntlets of Accuracy, and for the same reasons he does in the evil party.
I put my core party back together and return to ship. It is now time to set sail for Hasongo.