-

- Forums
- Chatrooms
- Gallery
- Gameplay Videos
- Upload
- Articles
- Mod Reviews
- Shop SP: Games, Movies, Books
|
|
| Pillars of Eternity 2 Online Walkthrough by David Milward |
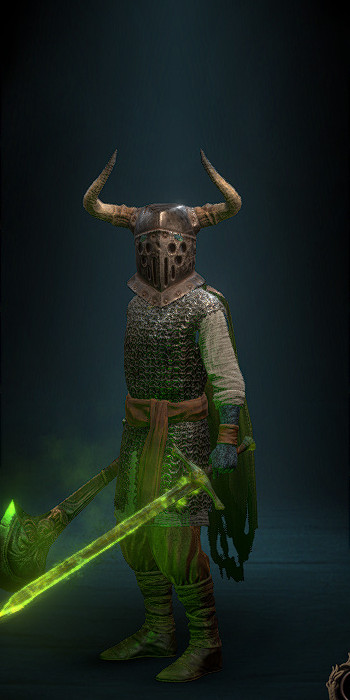
SERAFEN, M ORLAN BARBARIAN (EVIL VERSION)
Stats
Abilities
1st Level - Frenzy: Default starting ability. The Strong Inspiration provided by it will be upgraded to Tenacious (+5 Might, +2 Penetration) by the Battle Axe called Slayer's Claw.
2nd Level - Blooded: Provides a +25% bonus to Damage while the Barbarian is himself at 25% Health or less. I certainly don't mind a passive like this for a character who's restricted to mostly ship combat.
3rd Level - Thick-Skinned: Always a good passive for a Barbarian to take.
Two Weapon Style: - His fighting style will be based on dual-wielding a Battle Axe and a Sword. He also takes the Sword weapon proficiency at this point.
4th Level - Accurate Carnage: Increases the Accuracy of Carnage, and therefore a standard choice for a Barbarian.
5th Level - Bloody Slaughter: 20% chance of converting Hits to Critical Hits and +50% Critical Hit Damage, both against Near Death targets. This is a good ability to take when you have other abilities or benefits that trigger on landing the killing blow, including ...
Bloodlust: +20% Action Speed for 10 seconds after landing a killing blow. Also a standard choice for many Barbarians.
6th Level - One Stands Alone: It adds +20% Damage when he's within melee range of more than one enemy, and it will take at least three enemies to put the Flanked status on him. It's pretty much a staple passive for Barbarians.
7th Level - Blood Frenzy: Sometimes Spirit Frenzy is preferable if you can also take advantage of Brute Force through Spirit Frenzy and also have a way to inflict Constitution Afflictions to effect a -20 Fortitude penalty. Absent that, the advantange of Blood Frenzy is that it can be upgraded to Blood Storm, which means that killing targets will prolong the duration of Frenzy.
Unflinching: It provides Resistance to Constitution, Dexterity and Might Afflictions while the Barbarian is at 50% or more Health. This is often a staple Passive for Barbarians as it can prevent the Staggered and Sickened Afflictions from undoing the benefits of Frenzy.
8th Level - Barbaric Blow: It's a Full Attack with +20% Damage, +50% Damage on Critical Hit, a 30% chance of converting a Hit to a Critical Hit, and a +50% area of effect for Carnage. Any concerns about expending Rage points can be mitigated when it gets upgraded to Barbaric Smash.
9th Level - Barbaric Smash: It will completely recoup the Rage cost for using Barbaric Blow should it also be a killing blow. Bloodthirst, which also erases Recovery for a brief period of time following a killing blow, makes Crushing Blow redundant. That makes Barbaric Smash the easy choice.
Interrupting Blows: It has a 50% chance of causing an Interrupt on a Critical Hit, which makes it another staple for Barbarians.
10th Level - Tough: More Health is always good for front-line combatants.
11th Level - Improved Critical: Improving Critical Hit Damage by 15% is always a good thing for a melee character.
Brute Force: This passive means that Melee Attacks will target the Fortitude Defense instead of Deflection if the former is lower than the latter. And that can come into play quite often, especially if the Barbarian himself has methods to force the reduction of Fortitude. Serafen will get one of them through Leap, which can force the Dazed (-5 Might, cannot Engage, -4 Penetration) Affliction on its target. The other will be through a weapon that he acquires later in the game.
12th Level - Leap: It basically involves a Barbarian jumping up and landing, causing damage to all enemies in a 2.5m radius around the landing point. It also Dazes (-5 Might, -4 Penetration, cannot Engage) its targets, so it becomes a way for Serafen to inflict a Might Affliction in addition to a Constitution Affliction that he'll be able to inflict through a Sword he finds later in the game. And both together will allow him to make use of Brute Force if both Afflictions reduce a target's Fortitude by -20 and below its Deflection.
13th Level - Blood Storm: It upgrades Blood Frenzy so that killing blows will extend its duration.
Blood Thirst: Scoring a killing blow will result in a brief benefit whereby any actions taken by the Barbarian will have instant Recovery, with no Recovery Time at all in between those actions. It's pretty much an obligatory choice for Barbarians when the 7th-tier abilities are reached.
14th Level - Spell Resistance: A straight 10% chance to avoid being affected at all by a hostile spell is not a bad passive to take, especially if you're running out of meaningful choices as a single-class character.
15th Level - Uncanny Luck: It's a passive that provides a 5% chance to avoid any attack outright, and a 5% chance to convert a Hit to a Critical Hit. A distinct incentive for Serafen to take it is that Critical Hits from him will trigger both Interrupting Blows and Raw Damage over time through Blood Frenzy.
16th Level - Heart of Fury: It makes a Full Attack against every enemy within his vicinity, and with 25% bonus Damage. It does require the expenditure of 4 Rage. But my willingness to take this ability is encouraged by another ability that can recoup Rage.
Vengeful Defeat: A passive whereby he'll make a Full Attack against any enemy next to him should he reach 0 Health. And given that this build encourages Critical Hits against him, and he won't suffer any Injuries as a result during ship combats, I don't mind if this ability triggers.
17th Level - Panther's Leap: It upgrades Leap so that affected targets take Raw Damage over time. I find it preferable to Dragon's Leap, because the Burning Damage can be substantially reduced by Burning Armor.
18th Level - Threatening Presence: It's a passive that prevents enemies of lower level than him from Engaging him.
19th Level - Barbaric Retaliation: It's a passive whereby the Barbarian makes a free Full Attack against any attacker who scores a Critical Hit on him. It is the foundation of this particular build. The Full Attack by itself is not necessarily a big deal. But a Critical Hit on Serafen will trigger additional effects from the Horns of the Aurochs, Sisyfo's Stone, the Ragged Cloak, Magnera's Chain and Ngati's Girdle. The penalty to all Defenses from his Sandals of the Water Lily and -15 penalty for using the Half-Sword weapon modal encourage Critical Hits against him. This build only really comes together once I get this passive, along with the items to give it extra punch. It's also a very risky build, as it condemns the character to taking Critical Hits with regularity. But I don't mind either point for a character who is primarily a ship combatant, with no risk of any Injuries from getting knocked unconscious.
Blood Surge: A passive that has a 25% chance to replenish a single point of Rage whenever the Barbarian lands a killing blow. It's pretty much obligatory for any single-class Barbarian.
20th Level - Prestige: The +1 bonus to Power Levels will enhance his use of Carnage and Panther's Leap.
Inventory
Hel's Beckoning: Looted after killing Captain Aeldys at #6 in the Deadlight Donjon. The Half-Sword modal that provides +2 Penetration, but with a -15 penalty to Deflection, ties in with his build that actually encourages Critical Hits against him. It can ignore the Deflection bonus of any enemy buff like Arcane Veil, and it acquires a +2% Corrosive Damage bonus that stacks with each hit up to 10 times. I enchant it with the Noxious Hel power. Should he happen to land a killing blow on a spirit, it unleashes a Noxious Burst which can Sicken (-5 Constitution, -50% Healing Received) anyone caught in it. I also enchant it with Hel Sickness. Once he hits his maximum 10 stacks, any subsequent Critical Hits will Sicken the target. His Panther's Leap power can Daze (-5 Strength, cannot Engage, -4 Penetration) its victims. If he puts both Dazed and Sickened on his targets, that means a -20 penalty to Fortitude. And if his target's Fortitude is lower than its Deflection, that's when his Brute Force passive can come into play.
Horns of the Aurochs: Looted from Champion-Ascendant Grymgaer at #10 in the Outcrop on High. His build is premised on encouraging enemies to score Critical Hits on him. This helmet means his next attack will enjoy a 10% bonus Freezing Damage whenever he's either Hit or Critically Hit. Immunity to Push and Pull effects is sugar on top.
Sisyfo's Stone: Purchased from the Spindle Man at #13 in Delver's Row. The key reason being that it will impose a -2% Action Speed penalty on the attacker whenever the wearer is Hit in melee combat. That will also stack with a similar penalty imposed by an armor that I'll find later on. And both of these together fit into the broader theme of packing as much negative consequence as possible for an attacker who scores a Critical Hit on Serafen, and thereby augment the power of Retaliation.
Ragged Cloak: Obtained by killing Lueva Alvari in the Vailian Trading Company. The +1 to Resolve is nice. The key perk is Raw Damage against an attacker when the wearer receives a Melee Critical Hit. It's yet another effect that triggers on Critical Hit that will enhance Serafen's Barbaric Retaliation, in addition to those provided by other items that he uses.
Magnera's Chain: Part of Captain Henqua's Treasure near Junvik Village. The key benefit is that it imposes a +5% penalty to Recovery Time to the attacker whenever the wearer is Critically Hit by a melee attack. And that penalty can stack up to 3 times on the same attacker. It, along with his other items, augments his Retaliation passive by packing as much consequence as possible for anyone who Critically Hits him in combat. The penalties to Recovery Speed will also stack with the penalties to Action Speed from Sisyfo's Stone and Finality's Claim.
Gauntlets of Ogre Might: Purchased from the Well-Supplied Traveller at #5 in Port Maje. Gauntlets of Accuracy may strictly speaking have been preferable. But other characters in my opinion had better claims on those Gauntlets of Accuracy that were available. That is to say I felt Accuracy was more integral to the class abilities of other characters. So Serafen gets these gloves more or less by default.
Finality's Claim: Given by Harbinger Nyrvardir at #6 in Harbinger's Watch as a reward for completing the Toasting the Dead Task. The ring itself has a 25% chance of reflecting any elemental attack back on the attacker, which makes it a pretty worthwhile ring as it is. I upgrade it with three Void Shards found in Shattered Passage so that all enemies that Engage the wearer and within 1.5m of the wearer suffer a -7% penalty to Action Speed. The point there is that it will stack with the Action Speed penalty imposed by Sisyfo's Stone whenever he's Hit, and the Recovery Time penalty imposed by Magnera's Chain when he's Critically Hit. I don't mind encouraging Critical Hits against Serafen when enemies get around to attacking him, but there's nothing wrong with improving his relative survivability by reducing how often those Critical Hits occur either.
Ring of Greater Regeneration: Looted after defeating the Bog Wanderers in Boot-Suck Bog, at #2 in the Northwest Island of Rikihu's Maw. He's going to get hit a lot, so this ring makes natural sense for him.
Ngati's Girdle: Stolen from a chest in Iolfr's Raiments, the entrance to which is at #22 in Periki's Overlook. The bonuses to Athletics and Crushing Armor Rating are nice. But the key point is that his build is based on making as much happen as possible against enemies when he himself receives a Critical Hit, in addition to the Retaliation ability that he has his sights set on.
Sandals of the Water Lily: Purchased from Sautara aboard the Deck of Many Things. The immunity to Dexterity Afflictions is nice. But the -10 penalty to all Defenses ties in with the theme of encouraging Critical Hits against him.
Alternatives: A Berserker armed with Slayer's Claw could be the basis for Interrupt builds. It elevates the Berserker's version of Frenzy to provide Energized (+5 Might, +2 Penetration, Interrupt on Critical Hits). The Interrupts will recoup Discipline if you multi-class Berserker with Tactician.
Slayer's Claw does come very late in the game. But in the meantime you could take the Interrupting Blows passive during one of your levels, and then change it to something else on a retrain once you get Slayer's Claw.
I don't touch the Barbarian / Cipher multi-class for Serafen for previously stated reasons. A Soul Blade can be multi-classed with other melee builds like Fighter and Paladin. But it is an especially good fit for a Barbarian / Cipher multi-class. Soul Annihilation expends all remaining Focus and adds it as Raw Damage to a Melee Attack. It is best used as a killing blow. Landing a killing blow with it adds Concentration and temporarily raises Maximum Focus by +10 when the Soul Blade normally suffers a -5 penalty to Maximum Focus.
The Barbarian's Bloody Slaughter passive would add bonus Damage against Near Death targets, and make Critical Hits more likely against Near Death targets. Death Godlike would be the natural race for such a build. And Bloodlust would trigger on a killing blow, in addition to Soul Annihilation.