-

- Forums
- Chatrooms
- Gallery
- Gameplay Videos
- Upload
- Articles
- Mod Reviews
- Shop SP: Games, Movies, Books
|
|
| Pillars of Eternity 2 Online Walkthrough by David Milward |
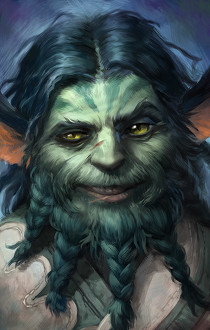
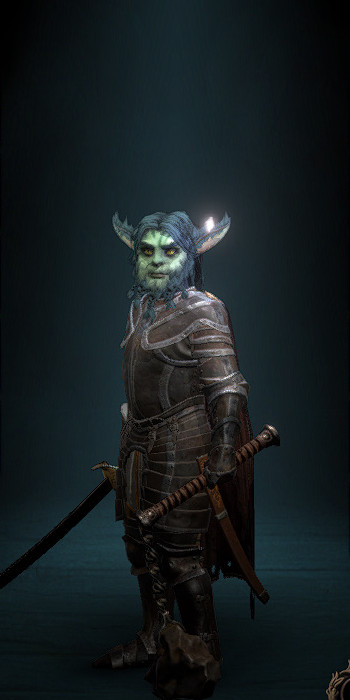
SERAFEN, M ORLAN BARBARIAN (GOOD VERSION)
Stats
Abilities
1st Level - Frenzy: A starting ability by default.
2nd Level - Blooded: It provides a +25% bonus to Damage while the Barbarian is himself at 25% Health or less.
3rd Level - Thick-Skinned: It's always a good passive for a Barbarian to take. But it has special meaning for this particular Barbarian build, which emphasizes building up Armor Rating to the maximum extent possible.
Two Weapon Style: His fighting style will be based on dual-wielding a Sabre and a Flail, so this passive is a natural choice.
4th Level - Accurate Carnage: A standard choice for pretty much any Barbarian.
5th Level - Bloody Slaughter: A passive ability that provides a 20% chance of converting Hits to Critical Hits and +50% Critical Hit Damage, both against Near Death targets. This is a good ability to take when you have other abilities or benefits that trigger on landing the killing blow.
Bloodlust: It provides a bonus +20% Action Speed for 10 seconds after landing a killing blow. Also a standard choice for many Barbarians.
6th Level - One Stands Alone: It adds +20% Damage when he's within melee range of more than one enemy, and it will take at least three enemies to put the Flanked status on him. It's pretty much a staple passive for Barbarians.
7th Level - Blood Frenzy: It upgrades Frenzy so that its duration is extended whenever he lands a killing blow.
Savage Defiance: It provides the Robust (+5 Constitution, +2 Armor, regenerate Health every 3 sec) Inspiration for 30 sec. It's Serafen's active ability for raising his Armor Rating even further.
8th Level - Barbaric Blow: It's a Full Attack with +20% Damage, +50% Damage on Critical Hit, a 30% chance of converting a Hit to a Critical Hit, and a +50% area of effect for Carnage. Any concerns about expending Rage points can be mitigated when it gets upgraded to ...
9th Level - Barbaric Smash: It will completely recoup the Rage cost for using Barbaric Blow should it also be a killing blow. Bloodthirst, which also erases Recovery for a brief period of time following a killing blow, makes Crushing Blow redundant. That makes Barbaric Smash the easy choice.
Interrupting Blows: It has a 50% chance of causing an Interrupt on a Critical Hit, which makes it another staple for Barbarians.
10th Level - Unflinching: It provides Resistance to Constitution, Dexterity and Might Afflictions while the Barbarian is at 50% or more Health. This is often a staple Passive for Barbarians as it can prevent the Staggered and Sickened Afflictions from undoing the benefits of Frenzy.
11th Level - Improved Critical: always a natural choice for a Melee character.
Leap: Another activated option for him to use during ship combat whereby he can leap up into the sky and crash down on several enemies, giving them Dazed (-5 Might, cannot Engage, -4 Penetration) in the process.
12th Level - Tough: More Health is always good for any Melee character, especially one that's inevitably going to get struck multiple times.
13th Level - Blood Frenzy: It upgrades Blood Frenzy so that killing blows will extend its duration.
Blood Thirst: Scoring a killing blow will result in a brief benefit whereby any actions taken by the Barbarian will have instant Recovery, with no Recovery Time at all in between those actions. It's pretty much an obligatory choice for Barbarians when the 7th-tier abilities are reached. But it will have special meaning for this particular Barbarian build that's based on maximizing Armor Rating. The Patinated Plate, once I get it, will provide a +2 bonus to Armor Rating. But that comes at the expense of an aggregate +75% penalty to Recovery Time. Blood Thirst, when it triggers, allows the Barbarian to completely ignore that penalty and instantly Recover from any Attacks or other actions he takes for the duration. It very often means having your cake and eating it too.
14th Level - Stalwart Defiance: It allows him to use Savage Defiance at a reduced cost of 2 Rage instead of 3.
15th Level - Uncanny Luck: In his case it's more about the 5% chance of converting a Hit to a Critical Hit than the 5% chance to avoid any Attack.
16th Level - Heart of Fury: It makes a Full Attack against every enemy within his vicinity, and with 25% bonus Damage. It does require the expenditure of 4 Rage. But my willingness to take this ability is encouraged by another ability that can recoup Rage.
Dragon Leap: It upgrades Leap so that it also causes Burning Damage to enemies in a 2.5m radius emanating from the Barbarian outward on impact. I objectively regard it as inferior to Panther's Leap, which causes Raw Damage over time that isn't reduced by Armor. And that actually does resonate with the Raw Damage / bleeding theme of Serafen's build in the Evil party. But I chose Dragon Leap anyway because it fits in with the Fire theme of this build, which includes a weapon that Serafen will find later on as well another Barbarian ability.
17th Level - Threatening Presence: A passive that immunizes the Barbarian against being Engaged by any enemies that are lower level than himself.
18th Level - Spell Resistance: It provides a 10% chance to avoid the effects of any spell outright.
19th Level - Blood Surge: A passive that has a 25% chance to replenish a single point of Rage whenever the Barbarian lands a killing blow. It's pretty much obligatory for any single-class Barbarian.
Prestige: The +1 bonus to Power Levels will enhance his use of Carnage and Dragon Leap.
20th Level - Instrument of Boundless Rage: It hits its initial target for at least 45-60 Crushing or Piercing Damage. It then unleashes a Fireball-attack that causes at least 37-48 Burning Damage to enemies only in a 2.5m radius. It's an activated ability that costs 3 Rage that also fits in with the fire theme of this particular Barbarian build.
Inventory
Sungrazer: Looted from a dead body at the entrance to Kohopa's Fang, which is at #5 in the Razai Passage. It deals +15% Burning Damage and reduces the target's Crushing Armor Rating by -1 on a Critical Hit. I add the Extinction Event enchantment, which causes Burning Damage in a small area of effect whenever a killing blow on a Critical Hit is landed with the weapon. It certainly fits with the fire theme of Serafen's build. I also enchant it with Return Orbit, which has a 10% chance of instant Recovery with each Hit. It fits in with the theme of taking advantage of maximized Armor Rating through the Patinated Plate and other items, while also maximizing the possibility for instant Recovery that avoids the Recovery penalty that comes with wearing the Patinated Plate enchanted with Bronze Juggernaut.
Pearlescent Rhomboid Helstone: Purchased from Una at #3 in Serpent's Crown. It confers one of six random defensive benefits at the start of each fight: Concentration, +1 Armor Rating, +3 all Defenses, -5% Damage Taken, additional +10% chance to reflect spells. Any of them would be beneficial, but it's the +1 Armor Rating that will have special relevance for Serafen when it does happen.
Dragon Pendant: Obtained as a random item from an Abandoned Village on the way to Fort Deadlight. The per Rest abilities don't mean anything to me. It's for the +1 bonuses to both Burning Armor and Slashing Armor, which fits the overall theme of this Barbarian build that emphasizes maximizing Armor Rating to the greatest extent possible.
Stormturner Cloak: Purchased from Vektor at #2 in Tikawara. It provides bonuses to Armor Rating against elemental damage that rises in proportion to lower Health for the wearer. It's consistent with an Armor-based build, like for Serafen.
Patinated Plate: Purchased from the Merchant at #3 in Crookspur. It starts off as a Legendary Plate Armor with an additional +1 Armor Rating, but with the downside of +15% Recovery Time. I add the Bronze Juggernaut enchantment so that the Armor Rating bonus increases to +2, and the penalty to Recovery Time increases to +20%. It's all consistent with the theme of maximizing Serafen's Armor Rating to the utmost. And he'll be able to have his cake and eat it too by frequently triggering instant Recovery, either through his Bloodthirst ability, or through landing Hits with Scordeo's Edge and Sungrazer.
Woedica's Strangling Grasp: Found at an Old Battleground at #7 in the Ofecchia Channel Islands. They provide +2 to Might. And they also provide +2 Burning Armor Rating, which fits in with the Armor-heavy theme of Serafen's build.
Ibis: Obtained by defeating Lord Admiral Imp at #23 in Queen's Berth. The key point is the +3 boost to Burning Armor Rating, which will stack with his other Armor Ratings. The +10 to Defenses to Fire Attacks is sugar on top. There is a mild concern of an Interrupt and a -10 penalty to Will should he get Critically Hit by a Fire Attack. But I can overlook that, both on that Critical Hit being made less likely by the +10 Defenses to Fire Attacks, and that he's a ship combatant.
Ring of Regeneration: Purchased from the Spindle Man at #13 in Delver's Row. Any warrior who isn't packing a shield is going to take damage, so equipping this ring is a natural choice.
Blunting Belt: Obtained from an Old Battleground on Maje Island. It adds +1 to both Piercing and Slashing Armor Rating. Serafen's build is based on maximizing armor, so I go all in on any item that can provide Armor bonuses.
Rakhan Field Boots: Obtained by defeating the Mercenaries that attack the Spire of Soul Seers after the party returns from Pahowane. It does have an interesting power that can be used once per Encounter, whereby the wearer teleports to a target and emits a small wave that can Interrupt nearby enemies on arrival. The real point here is the +3 Corrosive Armor Rating, which ties in with the theme of maximizing Serafen's Armor Ratings to the greatest extent possible.
Improvements: Fire Godlike would be the natural race for this kind of build. Another +1 to Armor Rating would enter the mix once the Barbarian reaches 50% Health or less. And since Deflection isn't emphasized, Fire Damage against anyone who hits the heavily armored Barbarian comes into play as well.
Even so, I might prefer NOT to take Frenzy for such a build, so that I wouldn't have to spend Rage on Frenzy in addition to Savage Defiance. That means another party member might have to provide the Might Inspiration. For example, the Bard's Invocation, ... Each Kill Fed His Fury, could provide the +5 to Might. And each killing blow landed by the Barbarian would extend the duration.
Alternatives: A Barbarian built to emphasize Armor Rating can be multi-classed with other classes that likewise emphasize Armor Rating. If you want to tank it, the Fighter's Unbroken subclass with a shield can be a good choice. Bloodthirst as a 7th-tier ability can still be included in a multi-class, and you can still include a weapon that includes chances of instant Recovery. The Goldpact Knight Paladin subclass would be another good candidate. A Monk can be a good candidate, since it would provide its own Might Inspiration through Thunderous Blows.