-

- Forums
- Chatrooms
- Gallery
- Gameplay Videos
- Upload
- Articles
- Mod Reviews
- Shop SP: Games, Movies, Books
|
|
| Pillars of Eternity 2 Video-Based Walkthrough by David Milward |
Razai Passage
*Evil* Aegor's Swift Touch
The evil party sails east until it finds another Plagued Ship at #57 on the World Map. I refuse to board it, because it would mean forcing a Rest that would expire all the until Rest bonuses that I've accrued. But I sink it at a distance with my cannons.
And I still get loot from it. The key item of interest to me is a pair of gloves called Aegor's Swift Touch. Xoti wears them for the rest of the game. The +1 Dexterity helps her to get off her spells even more quickly, and better helps her to insert another spell (e.g., another Barring Death's Door) in between castings of Salvation of Time when needed. The +5% Action Speed with weapons helps her to get in Melee Attacks in between castings of Salvation of Time.
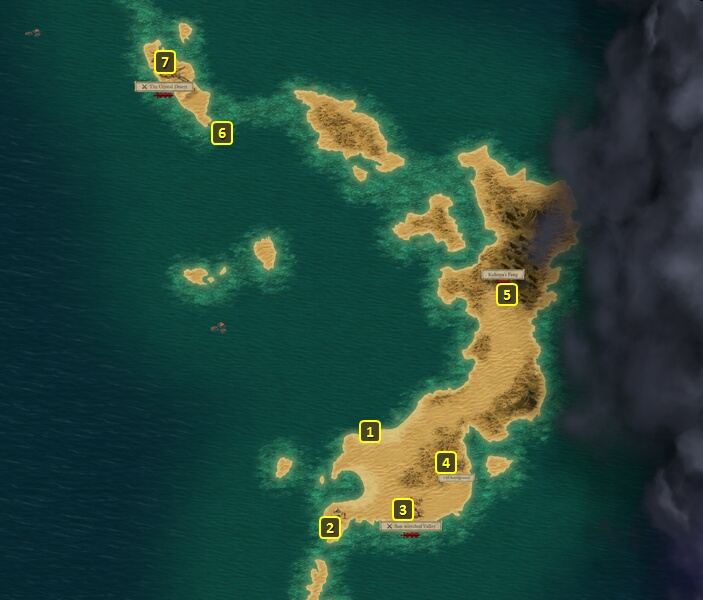
I sail for the Razai Passage at #58.
Sun-Scorched Valley
The good party switches out Aloth for Konstanten. He's due up to advance a level. I then dock at #1 on the map of the Razai Passage.
I go to the Sun-Scorched Valley, which is home to a group of Eotens. I could try to sneak up on them and then kill them. Note that failing the Sneak check will result in the Eotens giving at least one of your characters the Swollen Eye (-10 Accuracy) Injury. But I just straight up attack them, and kill them without much trouble.
Konstanten takes two abilities on his 19th level-up. One of them is Bloodthirst. Landing a killing blow triggers the Barbarian enjoying instant Recovery after any and all actions for 10 sec. There will be the usual Recovery Time immediately after the killing blow itself. But once that Recovery Time elapses, that's when the 10 sec of instant Recovery begins.
The other is Her Tears Fell Like Rain. It upgrades Seven Nights She Waited, so that each bolt triggers a small explosion for additional area-of-effect Freezing Damage when the bolt first hits a target in its path.
Lying in the sand nearby is a Quarterstaff called Street Sweeper. It is an interesting possibility, as it drains time from its target's beneficial effects, and can inflict other status effects depending on which custom enchantments you want for it. It doesn't fit into any of my plans though.
I return to my ship, switch out Eder and Konstanten for Xoti and Serafen. The latter two characters have items to get for themselves from this island.
Sungrazer
I go north to the entrance to Kohopa's Fang at #5. It is Midnight, so Alliria switches over to Ninagauth's Teachings.
I climb up, and everyone in the party makes an assisted Athletics check of 10 to avoid any Injuries.
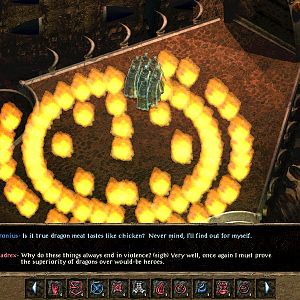
Now I have to fight a Flame Naga Sorcerer, a Greater Flame Blight and several Fire Bats. Pallegina summons Ogres as rearguard. Xoti, Serafen and the Ogres take care of the Fire Bats attacking from the rear. Alliria spams Ninagauth's Shadowflame on the main horde, and Mirke spams Stunning Surges.
Xoti takes Inner Death on her 20th level up. It spends 3 Mortification to launch an attack that does 20-80 Crushing Damage to a single target. The attack will do +300% Damage if it lands a Critical Hit. It's another activated option for when she participates in ship combat.
I loot a nearby dead body for a Flail called Sungrazer. Serafen equips it for the rest of the game. It deals +15% Burning Damage and reduces the target's Crushing Armor Rating by -1 on a Critical Hit. I add the Extinction Event enchantment, which causes Burning Damage in a small area of effect whenever a killing blow on a Critical Hit is landed with the weapon. It certainly fits with the fire theme of Serafen's build. I also enchant it with Return Orbit, which has a 10% chance of instant Recovery with each Hit. It fits in with the theme of taking advantage of maximized Armor Rating through the Patinated Plate and other items, while also maximizing the possibility for instant Recovery that avoids the Recovery penalty that comes with wearing the Patinated Plate enchanted with Bronze Juggernaut. I then go through the entrance.
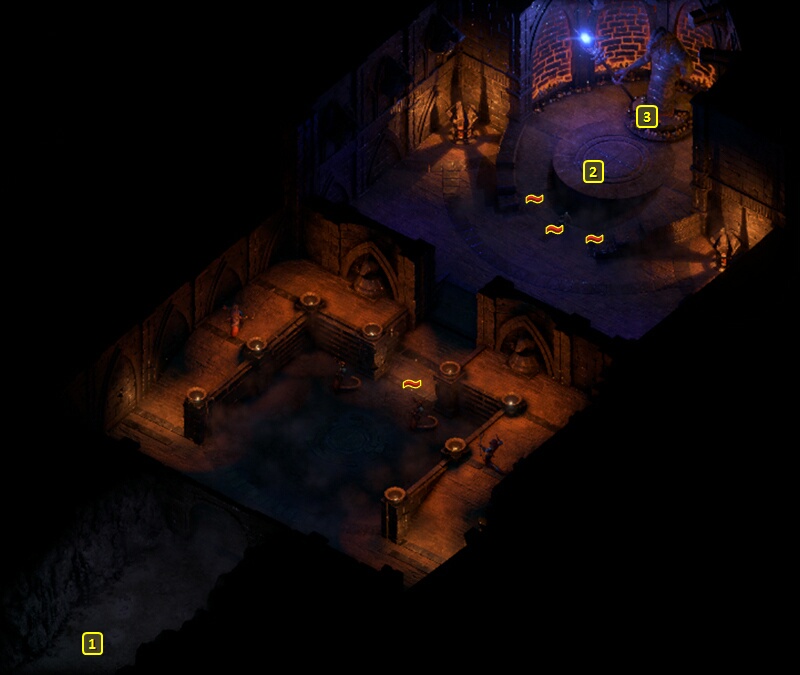
Kohopa's Fang
I make a Stealth check of 10 to sneak in. I start off at #1 on the map of Kohopa's Fang.
There will be three fire wall traps a little ahead, and some Flame Naga Archers and Marauders. I sneak to the right, have Mirke disarm one of the traps, and then sneak further ahead to start a fight. Xoti and Serafen take out a couple of Archers further up the stairs. Alliria and Mirke blast away at the rest that approach from the left.
There are still two fire wall traps left. I go to the one to the left. I have Xoti touch it once, because I want her to have the Serious Burn (-2 Dexterity, -3 Burning Armor Rating) Injury. There's a specific reason why, and it has to do with an item that she will soon obtain. I disarm the fire wall trap in the middle, go into stealth mode and continue on.
The northeast side of Kohopa's Fang has another group of Flame Naga led by a Priestess named Uvaala. Mirke disarms at least 2 of the traps before her cover is blown and the fight starts. I manage to wipe out most of them. But there's an Archer on the other side of the remaining trap. Here I foreshadow and start to show a new kind of tactic. Alliria switches to the Iron-Clasped Grimoire and uses Concelhaut's Crushing Doom on it. Crushing Doom is probably the best single-target spell in the game, because it attacks multiple times and can Prone its target with each Hit. And Alliria can use her Blood Sacrifice ability to recoup her 7th-level spell slot, and thereby place multiple Crushing Dooms on a single-target. Mirke also fires away with her secondary gun set. It soon falls.
Uvaala leaves behind two distinctive items. One of them is an axe called Magran's Favor. Alliria equips it as part of her primary weapon set alongside Sun and Moon. It scores +15% Burning Damage. Its key benefit is +2 to Fire Power Levels, which will augment several of her Wizard spells and some of her Paladin powers like Brand Enemy, Sacred Immolation and especially White Flames. I enchant it with Living Pyre, which adds +5% Action Speed and +5% Burning Damage with a killing blow, and it stacks 4 times. It's an easy choice over Blazing Core. The Health it heals amounts to a fraction of the Burning Damage done with the weapon itself, which itself will be fraction of the base weapon Damage. I also take Burning Burst, which unleashes Burning Damage in a small area of effect upon landing a killing blow. I prefer that over the Burning Damage over time with Enduring Flame.
The other item is Rekvu's Scorched Cloak. It immunizes the wearer against Burning Damage, and actually turns 10% of that Burning Damage into replenished Health for the wearer instead, but only if the wearer has at least one Injury. Xoti equips it as an interim cloak, and it was the reason for giving her the Serious Burn Injury. If anything, the penalty to Burning Armor Rating will actually enhance the healing provided by the cloak. I ultimately have another cloak in mind for Xoti, but it's a good cloak for her to wear in the meantime against enemies capable of tremendous Burning Damage. That includes both the next area, and a Mega Boss I'll fight towards the end of the game.
There's a Flame Naga Hatchling, but I have no use for it.
I leave Kohopa's Fang and rename the island to "Mount Celestia". *Evil* The evil party renamed it "Mount Doom". I return to my ship.
Grisundr
The good party goes a little west and boards a Rathun Longship called Grisundr, captained by Kratunos. I slaughter the crew without much trouble.
Falsud
I sail southeast and grab some random loot from a Shipwreck.
I continue southeast and board another Rathun Longship called Falsud, captained by Luvata. I easily defeat the crew.
I then sail to the Ashen Maw at #60. I switch out Aloth for Xoti for this part. There's another item she'll soon gain.
It is also at this point that I remember to use the Mythical Adra Stone to raise Magran's Favor from Legendary to Mythic.
I then sail to the Ashen Maw at #60.
*Evil* Dreksud
The evil party boards a Rathun Longship called the Dreksud, captained by Gretorix, and slaughters the crew easily.
I then sail to the Ashen Maw at #60.