-

- Forums
- Chatrooms
- Gallery
- Gameplay Videos
- Upload
- Articles
- Mod Reviews
- Shop SP: Games, Movies, Books
|
|
| Pillars of Eternity 2 Video-Based Walkthrough by David Milward |
Dunnage
*Evil* Principi Council
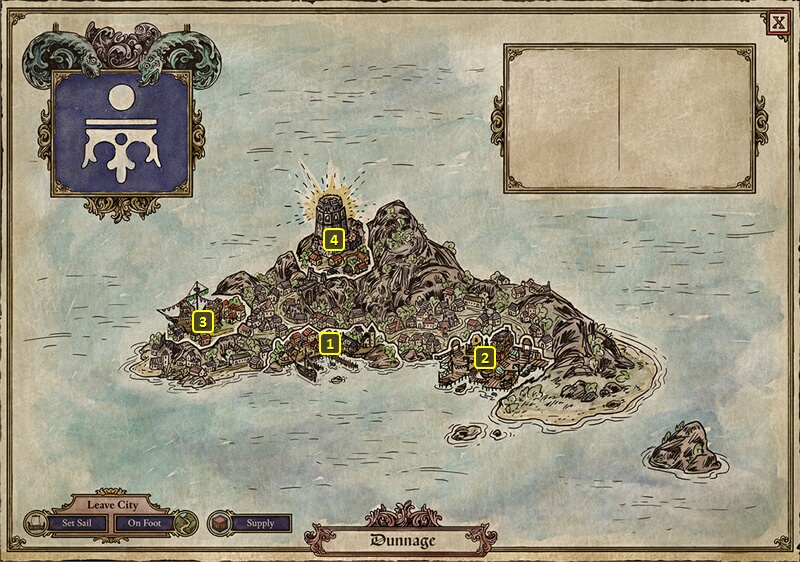
I board ship and sail a little southwest until I reach Dunnage at #9.
I go to both King's Coffin and Radiant Court, buying a few of the more expensive food ingredients as I go around. I thereafter go to the Balefire Beacon.
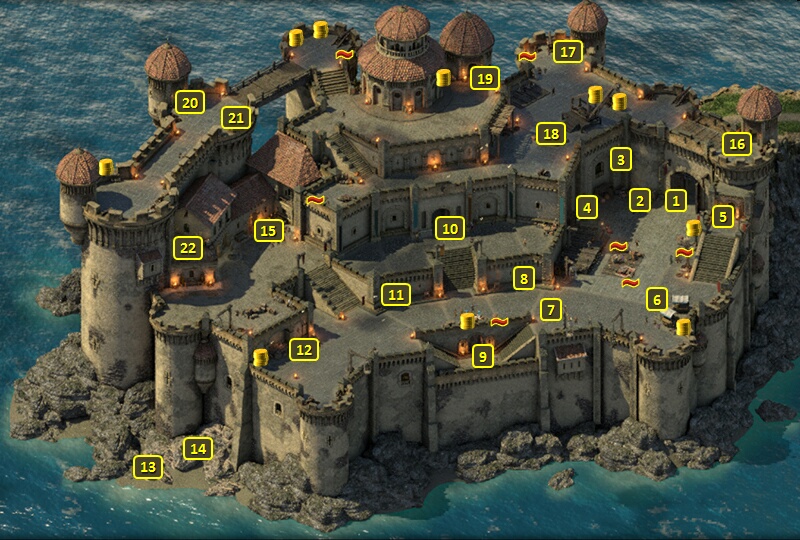
I start off at #1 on the map of Balefire Beacon. They go to #4, where the council of the Principi led by Captain Furrante has sentenced Captain Aeldys to death. He wants The Watcher to kill Captain Aeldys and obtain from her the secret to summoning The Floating Hangman. I could make an Insight check of 12 or an Intellect check of 16 to convince Furrante to let Aeldys take Clussa's Voyage, which is basically a last suicide voyage that lets her go out with dignity. But my preference is for Zarathos to agree to kill Aeldys. This conversation starts the Honor Among Thieves Quest. I thereafter return to my ship.
Principi Council
The good party switches out Aloth for Serafen for the time being.
The conversation with Captain Furrante is pretty much the same. A key difference is that Benweth lets on that he betrayed Aeldys and had a hand in capturing her. Furrante also indicates that Aeldys is being interrogated and tortured in the Tower above.
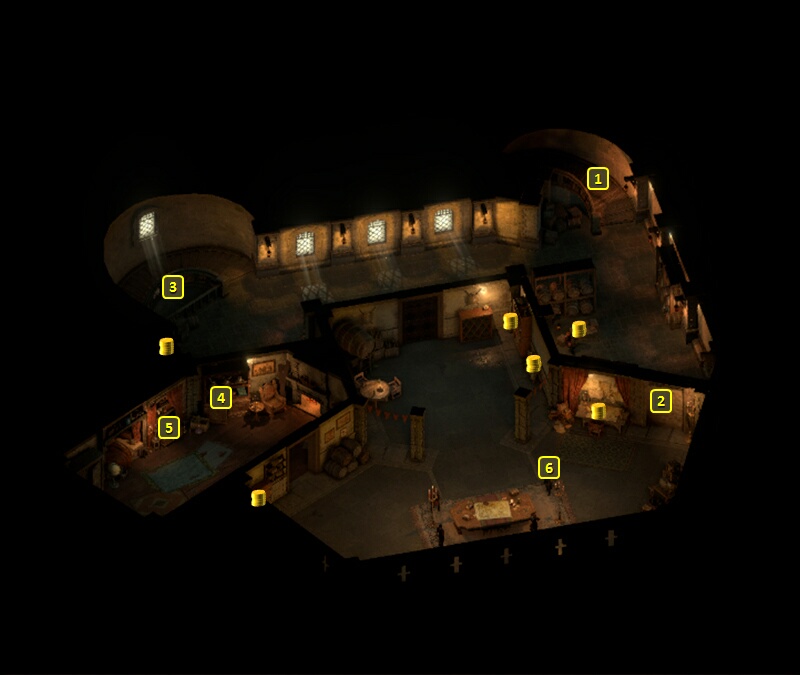
I could open the chest at #5 with either a Mechanics skill check of 13 or the Oiled Iron Key if you can pickpocket it from Furrante. The chest has A Letter from Director Castol, which proves Furrante's involvement with the slave trade. You can confront Furrante with the Letter, with the result that the rest of the Principi council will sentence him to death and hang him from atop the Balefire Tower. I do intend to side with Aeldys, but I don't want to do it this way for the reason that I won't be able to loot Furrante's Breastplate. Although this pathway does avoid losing any reputation with the Principi.
I go up the stairs at #3 to reach the Balefire Tower.
Captain Aeldys
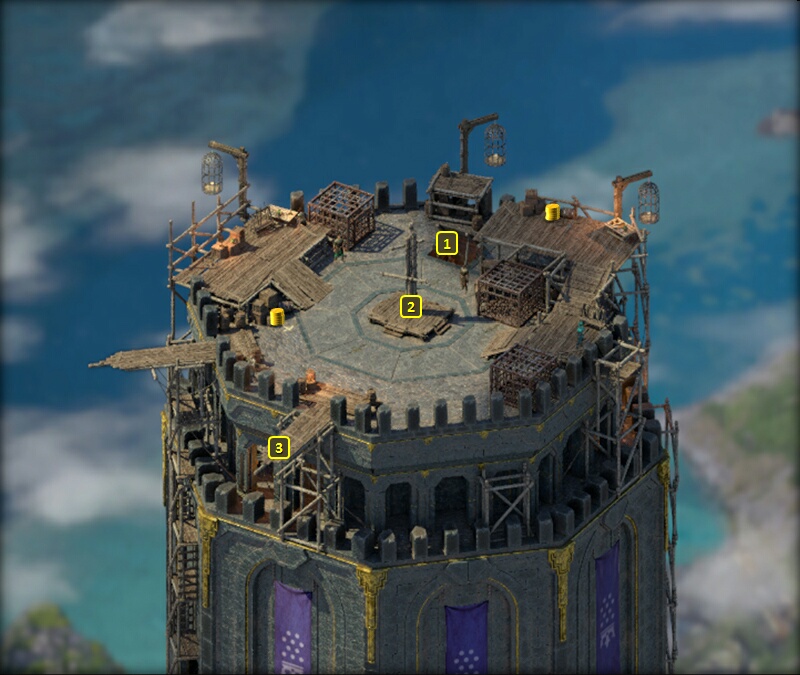
I am now at #1 on the map of the Balefire Tower. Had I chosen to expose Captain Furrante and have him hung, it would be from the gallows at #3.
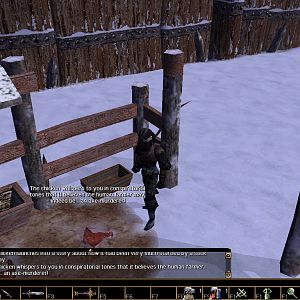
I speak to Captain Aeldys and free her. I am now forced to kill the Principi in the Tower. Note that I had Mirke turn off her Powdered Burns modal, to avoid damaging Captain Aeldys and turning her hostile.
I go back down the stairs at #1.
Honor Among Thieves
Captain Furrante and the rest of the Principi of Balefire Beacon will now attack me. I stay at the top of the stairs. And seeing as it's Evening, Alliria bombards them with Ninagauth's Shadowflame, and Mirke spams Stunning Surges as always.
Captain Aeldys comes down and sets herself up as the new head of the Principi. She provides a Sabre called Scordeo's Edge. Serafen equips it in his main-hand for the rest of the game. I enchant it with Blade Cascade, which replicates the Bloodthirst power with a 5% chance of allowing instant Recovery from attacks for at least 5 sec on scoring a Hit. Both his weapons, and his Bloodthirst power, give him opportunities to bypass the Recovery penalty that comes with wearing the Bronze Juggernaut version of the Patinated Plate. I also have him activate the Windmill Slash modal, which adds +2 Penetration at the expense of another Recovery penalty, for the same reasons.
Her rewards would have included the Blackblade Hood as well if she hadn't already given it as a reward for the Quest called A Shrewd Proposition.
Captain Aeldys also shares the words of the oath that will summon the Floating Hangman. That concludes the Honor Among Thieves Quest, and begins a new Quest called A Dance With Death. I leave and return to my ship.
Now I loot Furrante's body for Furrante's Breastplate. Alliria wears it for the rest of the game. It starts off with providing Concentration at the start of each combat. It also emits an aura whereby the wearer's allies suffer 10% less Damage, but the wearer's own Damage received increases by 15%. I enchant it with Love of Life instead of First to the Fight. The former increases the Healing received by allies by 10%. That will increase even more the Healing provided by Alliria's own White Flames, and the Healing provided by Pallegina's numerous healing auras and abilities. I also enchant it with Vigorous Protector, which reduces the +15% damage penalty for the wearer to 10%. It's an easy choice over Intervention, which is a once per Rest power.
I return to my ship, and bring Aloth back in for Serafen.
*Evil* Captain Aeldys
The evil party sails southeast to Fort Deadlight at #9 on the World Map.
I arrive at the gate at #1 on the map of Fort Deadlight. I speak to First Mate Mabori just a little ahead, and he brings me directly to Captain Aeldys.
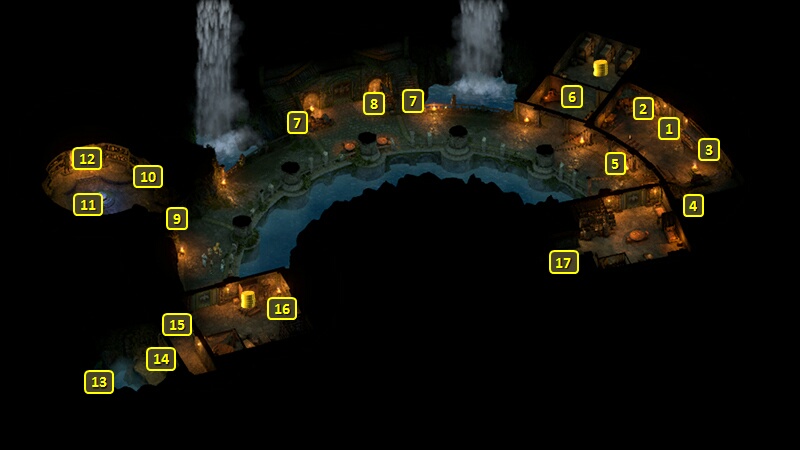
I am now at #6 on the map of the Deadlight Donjon. I cut to the chase and pick a fight with Captain Aeldys and the rest of the pirates in the room. I win with the usual methods of course.
Captain Aeldys herself leaves behind a sword called Hel's Beckoning. Serafen equips it in his off-hand for what's left of the game. The Half-Sword modal that provides +2 Penetration, but with a -15 penalty to Deflection, ties in with his build that actually encourages Critical Hits against him. It can ignore the Deflection bonus of any enemy buff like Arcane Veil, and it acquires a +2% Corrosive Damage bonus that stacks with each hit up to 10 times. I enchant it with the Noxious Hel power. Should he happen to land a killing blow on a spirit, it unleashes a Noxious Burst which can Sicken (-5 Constitution, -50% Healing Received) anyone caught in it. I also enchant it with Hel Sickness. Once he hits his maximum 10 stacks, any subsequent Critical Hits will Sicken the target. His Panther's Leap power can Daze (-5 Strength, cannot Engage, -4 Penetration) its victims. If puts both Dazed and Sickened on his targets, that means a -20 penalty to Fortitude. And if his target's Fortitude is lower than its Deflection, that's when his Brute Force passive can come into play.
Zarathos clicks on the soul of Captain Aeldys, which is still hovering over her body. He learns the Darcozzi oath needed to summon The Floating Hangman, which is crucial to the Honor Among Thieves Quest. I go out the door at #1.
I emerge at the door at #19 on the map of Fort Deadlight. I go west and down the stairs, and then east killing a few Pirates along the way. I go down the stairs at #16.
That brings me to the stairs at #5. I easily slaughter any Principi who gets in my way, and head for the gate at #1 to return to my ship.
*Evil* Honor Among Thieves
I sail back to Dunnage at #9 on the World Map. I switch Serafen back out for Mirke once I get there. And again I make the rounds buying rare food and crafting ingredients.
I speak again to Captain Furrante at #4. I inform him both of Captain Aeldys' demise, as well as the Darcozzi oath needed to summon The Floating Hangman. He assigns me to coaxing forth Lucia Rivan and her undead crew.
That concludes the Honor Among Thieves Quest, and begins a new Quest called A Dance With Death. I leave and return to my ship.
Now it is time to entice the ghostly ship called The Floating Hangman.