-

- Forums
- Chatrooms
- Gallery
- Gameplay Videos
- Upload
- Articles
- Mod Reviews
- Shop SP: Games, Movies, Books
|
|
| Pillars of Eternity 2 Video-Based Walkthrough by David Milward |
To Fort Deadlight
Basic Provisions
My immediate objective, for either the good party or the evil party, is to attack and sink any Deadfire Merchant Ship that I come across that hover or approach Maje Island. There's a number of reasons for it.
One is that defeating Deadfire Merchant Ships will build up my store of Ammunition, Medicine and Repair Supplies.
Another is that I am not at the point where I have a full complement of developed and equipped Companions or Sidekicks who can handle boarding battles. That means my Crew Members will have to fill out the boarding battle participants on my side. But they're at level one. Winning naval battles will build up their Sailor Experience, advance them levels, and enable them to participate in boarding battles without getting killed right away. I in fact have a particular boarding battle that I want to take on soon.
The other is that the Sailor Experience will also mean an increase in the Crew Member skills. In particular, I want Chitupec (or Ikuiq in the evil party) and Vanizzi to acquire ranks in Cannoneer.
So I begin by sinking the first Deadfire Merchant Ship. The strategy is a simple one. Full Sail to bring myself within 250m. Turn to Starboard, Hold Position, fire my Vailian Hullbreakers, Jibe, Hold Position, fire my Dyrwoodan Hog Noses, rinse and repeat. The very act of acquiring some Ammunition, Medicine and Repair Supplies is what completes the Basic Provisions Task.
I continue with sinking 7 more ships, and some of my Crew Members have advanced at least 3 levels. Docking at Port Maje will mean that Ship repairs, and the expenditure of Repair Supplies, will happen instantly when I need to quickly get myself back to full ship health for the next fight.
Dragon Pendant
I sink another Deadfire Merchant Ship, and a couple more of my Crew Members advance another level. I have repairs done by briefly docking at Port Maje.
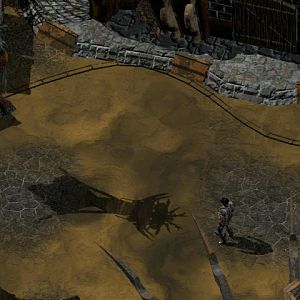
Now I sail due northwest until I land on an island with an Abandoned Village. I loot the Village, and keep reloading, until the Village yields what I want, the Dragon Pendant.
I briefly switch Serafen in for Mabel. He'll wear the Dragon Pendant for the rest of the game. The per Rest abilities don't mean anything to me. It's for the +1 bonuses to both Burning Armor and Slashing Armor, which fits the overall theme of this Barbarian build that emphasizes maximizing Armor Rating to the greatest extent possible.
*Evil* Zarathos holds onto the Dragon Pendant for Mirke when she joins.
The Whirlwind
I sail a little southwest, and get attacked by a Principi Dhow called The Whirlwind. I want to win this one through a boarding battle. The reason being that if I win a boarding battle, that guarantees that Principi Colors will be among the loot. And having the Principi Colors assures that I'll be able to enter Fort Deadlight through the front gate. There's a chance that I could get the Principi Colors if I were to sink the The Whirlwind, but odds would be far better that the Colors sink along with the ship.
It helps that my Crew Members have advanced a few levels. I turn Portside right away, Hold Position and then fire Grapeshot with my Dyrwoodan Hog Noses. The intention is not to sink the enemy ship, but to reduce its crew to my advantage during a boarding battle. I continue with Full Sail, Hold Position and Grapeshot. At some point it starts coming to me. I keep with the Grapeshot until I've reduced the enemy crew to about 8. It's at that point that I issue the order to charge and board the ship.
I let them come to me as I put up whatever buffs I can. I tend to go for their Rogues first as they're the proverbial glass cannons who can hit hard, but are themselves squishy and go down easily.
Mabel uses Phantom Foes on as many enemies as she can, and then turns one of their Fighters with Whispers of Treason.
Xoti has meanwhile been wreaking havoc on the rest of the enemies. It becomes a matter of ganging up on the remaining Fighters one by one, and then the last Warbler.
I get the Principi Colors, as well as another Iron Thunderer.
Gate of Fort Deadlight
I sail west to another Shipwreck. I reload until I get a third Iron Thunderer.
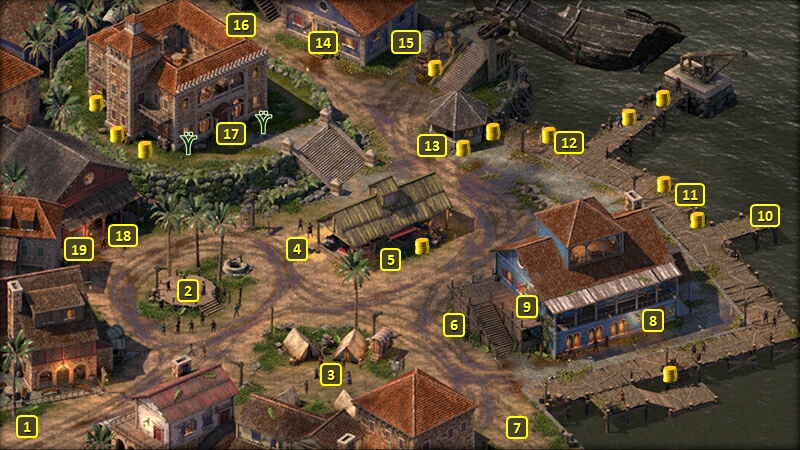
Now I switch Serafen in for Mabel. Fort Deadlight will have special meaning for him. I then sail a little ways ahead to Fort Deadlight at #4 on the World Map. It's now a question of how to get in.
One way is possible if you have a Spyglass. Wait until nightfall, although that results in any resting bonuses you might have expiring. You now end up at #14 in Fort Deadlight. Click on #15, and use a Rope and Grappling Hook along with an Athletics check of 3 to scale up the wall to the window. You will end up at the Dungeon of Fort Deadlight.
Another way is to make a frontal attack. That means sustaining some significant damage to your ship and its sails, even with a sturdy ship like a Galleon. It also means committing yourself to literally slaughtering everyone in the Fort to complete the Quest, including the prospective sidekick named Mirke.
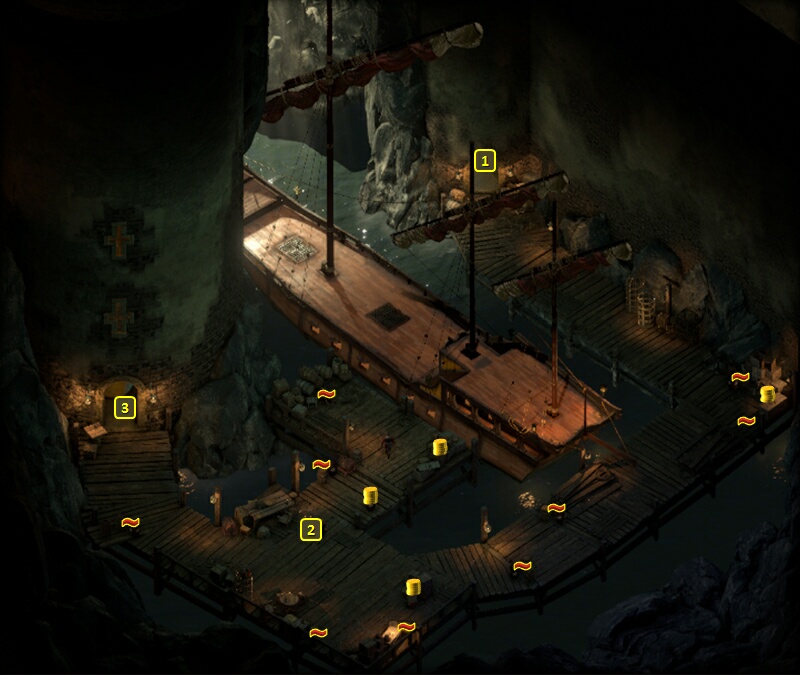
But I get in easy enough just by donning my ship with the Principi Colors I took from The Whirlwind. That brings me to #1 on the map of Fort Deadlight.
First things first though. I have no further use for Peredyne. So I strip her off all her equipment, and have the rest of the party force-attack her. They do it until they inflict four Injuries on her and kill her permanently. There's no other way to get rid of a hireling I no longer want.
I briefly leave Fort Deadlight, and bring Mabel back in. I still need her thieving skills for now. Xoti is the odd girl out for the time being.
It's time to explore the Courtyard of Fort Deadlight.