-

- Forums
- Chatrooms
- Gallery
- Gameplay Videos
- Upload
- Articles
- Mod Reviews
- Shop SP: Games, Movies, Books
|
|
| Pillars of Eternity 2 Video-Based Walkthrough by David Milward |
Fort Deadlight Dungeon
Ruddy Feyr
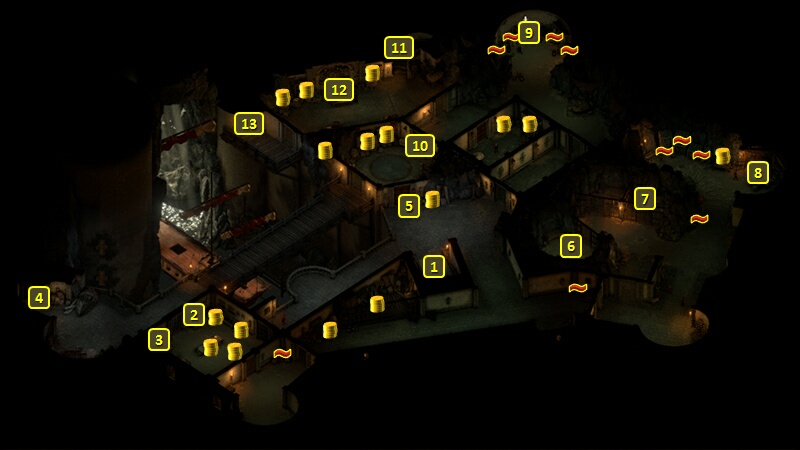
I am now at the door at #10. I go west to #12, and speak to Ruddy Feyr. He expresses a desire for celebratory drinking to celebrate the fortune he thinks he's going to get. He also lets on that Ungwith the Crag-Hearted, a nearby guard, doesn't appreciate festivities when they get too loud. I end the conversation, and avoid letting on that I don't know who Ungwith is.
Alliria uses a Thief's Putty, and then speaks to Ruddy Feyr again to start a drinking contest. She avoids having to drink anything by making successive Sleight of Hand checks of 4, 5 and 6 to pretend to be drinking while holding up an empty flagon.
Ruddy Feyr briefly knocks himself out. It's enough to get Ungwith the Crag-Hearted to come down and tear a strip off of him. That's my chance to go up the stairs and through the door at #15.
*Evil* Ruddy Feyr
*Evil* Zarathos easily makes Constitution checks of 11, 13 and 15 to drink Ruddy Feyr under the table.
Lamond
I arrive at the door at #12 on the map of the Deadlight Court. Lamond speaks to me, and catches that I'm not a Principi of Deadlight but the Captain of the Defiant that Benweth attacked. He himself would like to get back at Benweth, but asks that I free his crew from the Dungeons first. He also gives me 5 Lockpicks and the Deadlight Storage Key to help out.
I go through the door at #14, and get some loot from the balcony on the other side. I then come back and go down the stairs at #15 to enter the Dungeon.
Oromino
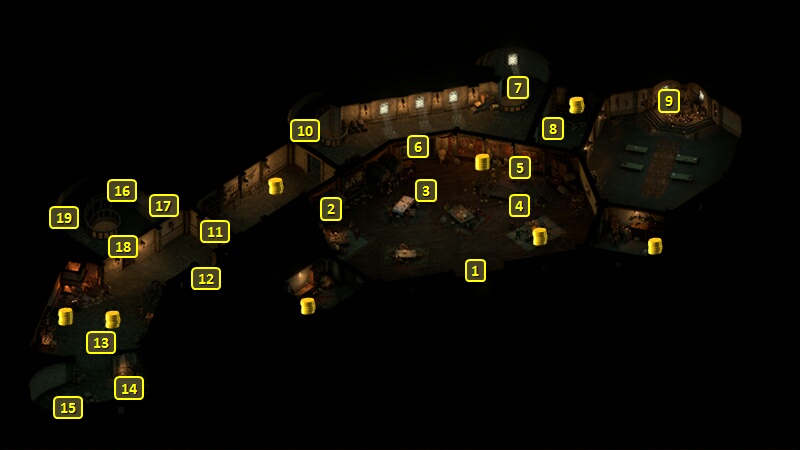
A few of the Guards leave the dungeon for the party that Mirke has started once I enter the Dungeon at #4. That will make things easier.
I go east and through the door at #5 that the Guards opened on their way out. I would have needed to either make a Mechanics check or use the Deadlight Storage Key had the Guards not opened it on their way out.
I continue on to the south edge of the dungeon. I have Mabel go into Stealth mode and send her in alone towards the southeast corner. She keeps her distance from the Guards while sneaking around, as they will sound an alarm if they notice her.
She loots Boots of Stealth from the skeleton at #7. I hold onto them for Mirke when she joins.
Mabel then unlocks the door to Oromino's cell at #6, who promptly leaves with the rest of his crew. Mabel regroups with the party. The party loots containers in the southwest corner of the Dungeon, and then returns to the central hub of the Dungeon.
*Evil* Maia will eventually get the Boots of Stealth in the evil party.
Special Stew
Normally, to make progress, I would have to go through the corridor that runs northeast from #5, sneak by the Guards near #9 without being seen, and then use a lever to open the door at #10 from the other side.
However, Mirke starting the party means that some of the Guards opened the door at #10 on their way out. So now I can just go through that door and straight to the Kitchen at #12. I speak to Cookie Maina, and get her to give me the Special Stew that Mirke wants.
I go down the stairs at #13.
Secret Dock
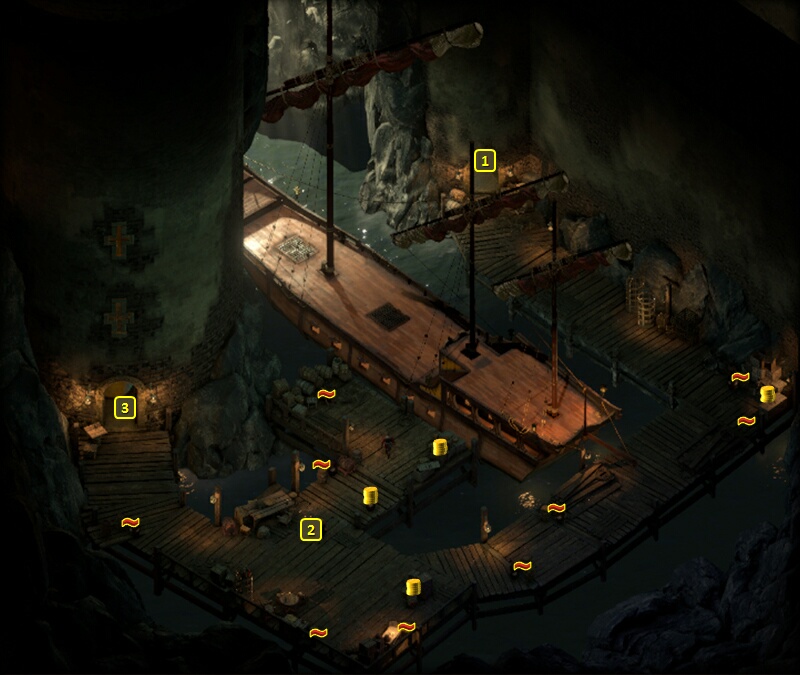
I start off at #1 on the map of the Secret Dock. I go southeast and then a little southwest.
The Guards here can be killed without sounding any alarm. I send Mabel ahead in stealth mode. She hits a Gunpowder Barrel with her Pistol, which takes out all but three of the Guards. I have little trouble mopping up the three that are left.
One of them left behind the Deadlight Western Ramparts Key. I use it to open the door at #3 and then go up the stairs.
Lamond's Plan
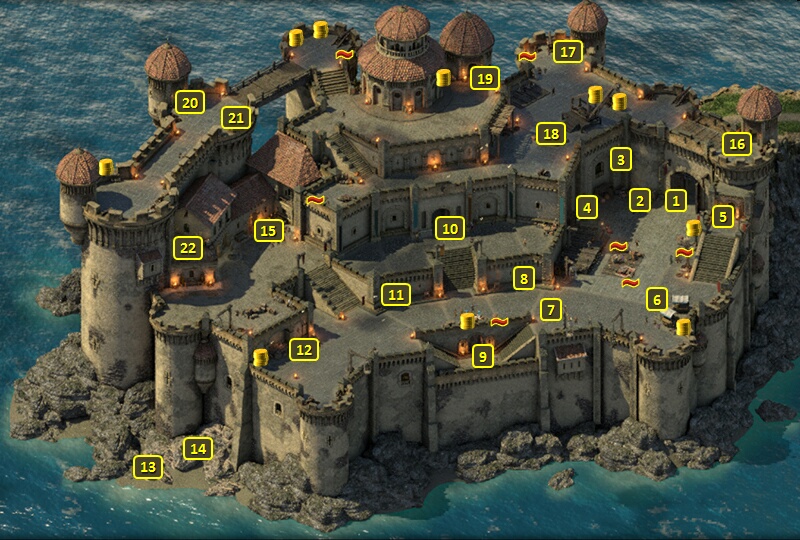
I emerge at the stairs at #16 on the map of the Court of Fort Deadlight. I use the lever at #17 to open the door at #18.
I speak to Lamond again at #13. He opens the door at #11. But he also has a proposition for me. He wants me to first clear out the Guards at the Secret Dock, and then use a bell on the ramparts to send a signal of three rings, so that he can steal Benweth's ship as an act of vengeance. I inform him that the Dock has already been cleared, so he and his men depart.
I go out the door at #12. I will return to the Court of Fort Deadlight, but in a different part.