-

- Forums
- Chatrooms
- Gallery
- Gameplay Videos
- Upload
- Articles
- Mod Reviews
- Shop SP: Games, Movies, Books
|
|
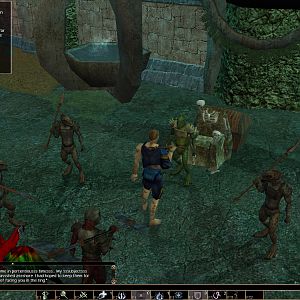
| Pillars of Eternity 2 Online Walkthrough by David Milward |
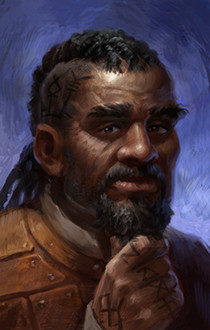
KONSTANTEN, M DWARF SKALD
Stats
Abilities
1st Level - The Thunder Rolled Like Waves on Black Seas: Default starting ability. An Offensive Invocation that both inflicts Crushing Damage and Stuns in a cone. It has an upgrade.
Come, Come Soft Winds of Death: Does a little bit of Raw Damage every 3 sec, and also heals the Chanter himself a little bit at the same time. I actually would have taken this on level-up if I had to, since it plays into the healing theme of this particular Skald build.
2nd Level - And Hel-Hyraf Crashed Upon the Shield: It's an Offensive Invocation that lowers enemies' Armor Rating by 2. It also has a significant upgrade that is worth targeting.
3rd Level - White Worms Writhed in the Bellies of the Dead: An Offensive Invocation that causes quite a bit of Crushing Damage as long as the dead body of an enemy is within its cone upon casting.
Two Weapon Style: - A key theme of this build is for him to attack often with two weapons, both of which will have significant Accuracy bonuses. And that means maximizing the chances of building up Phrases through Critical Hits as a Skald, and in turn allowing him to use his Offensive Invocations with greater frequency.
4th Level - At the Sound of His Voice, the Killers Froze Stiff: An Offensive Invocation that Paralyzes enemies within its cone.
5th Level - Ancient Memory: The idea is that any other ship Companions or Sidekicks who happen to be near him (which is often) will receive passive healing and keep them fighting longer.
Combat Focus: Offensive Invocations cast quickly, but I still like taking this for him as a "just in case" an Interrupt blow lands on him while attempting an Invocation.
6th Level - The Shield Cracks: It upgrades Hel-Hyraf Crashed so that successful Hits on the victim prolong the duration of the Armor Rating penalty. It can conceivably make that penalty last for the whole duration of the fight. Players often find it worth taking Hel-Hyraf Crashed just for this reason alone.
7th Level - And Their Fear Followed Them Into the Hills: It upgrades At the Sound of His Voice so that enemy targets become Frightened after the Paralysis wears off. The upgrade means that enemies can't do anything at all during the first phase, and can auto-attack during the second phase but can't use any activated abilities. The cumulative effect can be quite crippling for enemies.
Their Putrid Stench Wafts Across: It upgrades White Worms so that it causes the Sickened Affliction in addition to the Crushing Damage.
8th Level - Its Crash Could Not Be Denied: It provides an Accuracy bonus to The Thunder Rolled Like Waves.
9th Level - Seven Nights She Waited While the White Winds Wept: It's an Offensive Invocation that launches seven bolts of ice from the Chanter that inflict Freezing Damage only on enemies.
Rapid Casting: Some of his Offensive Invocations do have significant casting times, so taking this passive is certainly advisable.
10th Level - Tough: More Health is always good for front-line combatants.
11th Level - So Singts thy Biting Winds o' Eld Nary: It's an Offensive Invocation that inflicts both Freezing Damage and -50% Stride on its initial target, and then jumps to multiple targets.
Improved Critical: Improving Critical Hit Damage by 15% is always a good thing for a melee character, and especially for a character build where you have incentives to maximize the frequency with which he scores Critical Hits.
12th Level - Spell Resistance: A 10% chance to avoid being affected by any spell outright is a good passive to take, so long as you otherwise have room for it in the character build.
13th Level - Boil Their Flesh From Skin to Bone: It inflicts Raw Damage on enemies within a cone area-of-effect. It it kills a "Near Death" enemy, that enemy explodes causing Corrosive Damage to nearby enemies. The other point is that its upgrade will give those explosions the power to heal allies at the same time.
Mercy and Kindness Followed Where'er She Walked: Adds +50% to Healing Received for any allies. It's a natural Phrase to include for any Chanter who uses healing abilities like Ancient Memory.
14th Level - Her Tears Fell Like Rain: It upgrades Seven Nights She Waited so that each Freezing Damage bolt causes a small area-of-effect of additional Freezing Damage when it first strikes a target.
15th Level - Uncanny Luck: A passive that provides a 5% chance to avoid any attack, and a 5% chance to convert a Hit to a Critical Hit. The latter ties in with his incentive to land Melee Critical Hits as a Skald.
16th Level - Eld Nary's Curse Spread Through Their Midst: It upgrades So Singt Biting Winds so that the tornado bounces to more enemies.
His Laughter Rang Through the Halls: Another Offensive Invocation, a cone attack that both Dazes (-5 Strength, cannot Engage, -4 Penetration) and knocks enemies back.
17th Level - Bull's Will: He is at this point, and in my view, starting to run out of meaningful choices by way of Phases and Offensive Invocations. So I now take the opportunity to add passives that increase his Defenses other than Deflection. And those passives will stack with bonuses provided by his cloak.
18th Level - Bear's Fortitude: He continues to round out his defenses that will stack with his cloak.
19th Level - ... And Sip From the Marrow: It upgrades Boil Their Flesh From Skin to Bone, so that if any "near death" enemies explode from the Corrosive Damage, that explosion will also restore Health for nearby allies. And that healing will be increased by his Physicker's Belt, and the Bone Setter's Tarc when he gets it.
Prestige: Adds +1 Power Levels, which will increase the power of his Offensive Invocations.
20th Level - Snake's Reflexes: It completes the rounding out of his Defenses other than Deflection.
Inventory

Lover's Embrace: Stolen from a chest in Marihi's Metalworks, the entrance to which is #13 in Periki's Overlook. Daggers come with an inherent +5 bonus to Accuracy, which will help him get the Critical Hits he needs as a Skald. I enchant it with the Male version of Lover's Quarrel, as male targets are more common during ship battles. The Constitution bonus from the resulting Frenzy will improve his survivability. The Might bonus will improve both his Damage and his Healing.
Fair Favor: Given by Serafen in Sayuka as a reward for completing his Quest called A Sorcerer and a Gentleman. It provides a 10% chance to convert Hits to Critical Hits, and +10% Critical Hit Damage, when using Daggers, Rapiers, Sabres, Stilettos and Swords. It's perfect for Konstanten as it improves his chances of scoring Critical Hits with his Azure Blade and Lover's Embrace. And that in turns improves his ability to accumulate Phrases through Critical Hits as a Skald.
Bone Setter's Tarc: Obtained from a chest at #3 in the Pahowane Underground. The 5% chance to convert Hits to Critical Hits will improve his ability to obtain the Melee Critical Hits to build up Phrases that he wants as a Skald. The +10% to Healing will augment abilities like Ancient Memory and Sip From the Marrow.
The Giftbearer's Cloth: In a cave at #3 in the Cave of Threshing. It adds an extra weapon slot and quick-item slot. Its real benefit is that it adds +5 to all Defenses besides Deflection, and scales to add an additional +1 for every point in the History skill of the wearer. Konstanten is particularly suited to taking advantage of this cloak. He has +2 History to start with as a single-class Chanter, and devotes his passive skill points to History on every level-up. He also has room during his abilities selections to include passives that raise his Defenses, which will stack with the bonus to Defenses provided by this cloak. His Deflection may not be great, but he'll be very hard for enemies to put Afflictions or other debuffs on. And that leaves him free to use his Offensive Invocations and healing abilities.
Contender's Armor: Purchased from Engari at #10 in the Temple of Toamowhai. I choose the Heavy Mobility power, which reduces the Recovery Penalty of the armor by 1% for every point in the Athletics skill of the wearer. An armor with reduced Recovery Time is always welcome for a character that both fights on the front lines and casts spells, and some of the Offensive Invocations that Konstanten uses have significant Recovery Times.
Gauntlets of Accuracy: Obtained after defeating the Woedican Agents in Neketaka. A Skald as always wants to land Critical Hits as often as possible in order to accumulate the Phrases for Offensive Invocations as quickly as possible. That makes these Gauntlets an easy choice.
Ring of Overseeing: Obtained by defeating Chief Echoing-Strike in the Boa Hika Pass at #7 on Tikawara Island. The obvious reason being that it will expand the radius of his Chanter Phrases and the area-of-effect of his Offensive Invocations.
Ring of Minor Protection: Found at #7 in the Sea Cave. Its defensive bonuses stack with those that will be provided by his cloak.
Physicker's Belt: Purchased from Henric at #5 in Port Maje. The +15% to Healing Done will help in his role as the healer among the ship combatants.
Pathfinder's Boots: Looted from the Skaenite Cultists in the Wapau Jungle. The +5 to Reflexes and +1 to Dexterity are nice. The real point is that it increases his Athletics score by 1, and that in turn improves the Recovery Time of the armor I have in mind for him.
Possible Alternatives: If you're interested in playing the Watcher as a Chanter, at least two of the Chanter sub-classes are best played as single-class characters.
A Beckoner makes his summoning powers best felt when using the Summoning Invocations that summon multiple creatures to begin with. You can during the early parts of the game summon 6 Drakes instead of 3. And that means 6 projectile attackers for swiftly bringing down enemy spellcasters and archers. Summoning 8 animated weapons instead of four by using They Did a Song of Carnage Fair during the later parts of the game can overwhelm the enemy hordes. Regaining the Phrases for the higher-level summons can take time, especially with the penalty of +1 Phrases needed for Beckoners to use Summoning Invocations. Sasha's Singing Scimitar can help in that respect. The Encore enchantment would clearly be better for a resting run, while Refreshing Finale would clearly be better for a no rest run.
The Bellower's bonus Power Levels only apply to its own Invocations, so there's no point in multi-classing it. The key penalty is the reduced area of effect. One approach is to use Invocations that don't have an area of effect. Summons and self-buffs like Their Companion Braved The Horde Alone will at least have their duration considerably enhanced by the bonus Power Levels. The Eld Nary's Invocations are the Offensive Invocations that truly benefit from the bonus Power Levels, as their damage bounces from one single target to another up to at least four times. If you want to use the other Offensive Invocations as a Bellower, you're either going to have to do some very precise positioning (and even then still expect fewer targets) or rack up plenty of items that increase Intellect or area-of-effect. The party is also going to have to stay tightly packed together if you want them to benefit from whichever Phrases you choose. The Phrase recovery from Sasha's Singing Scimitar and the bonus Power Levels provided by The Weyc's Wand after making an Empowered Attack would make both weapons dual-wielded ideal for a Bellower.