-

- Forums
- Chatrooms
- Gallery
- Gameplay Videos
- Upload
- Articles
- Mod Reviews
- Shop SP: Games, Movies, Books
|
|
| Pillars of Eternity 2 Video-Based Walkthrough by David Milward |
Crookspur | Ori O Koiki | Fampyr Island |
Fampyr Island (Evil)
*Evil* Bounty on Rock-Stomper Rodul
I sail to Dunnage at #9 on the World Map. I board a Crookspur Captain on the way. I switch in Serafen, Maia, Rekke and Konstanten as the characters with the least amount of xp just before I enter Dunnage.
I speak to Udita at #5 on the map of Lifter's Refuge, and receive a moderate gain of reputation with the Principi, 5,000cp and 12,000+xp as reward for the Bounty on Rock-Stomper Rodul.
Rekke gains two abilities on his 19th level-up. One of them is Blood Storm. It upgrades Blood Frenzy so that killing blows by him will extend the duration of his Frenzy.
He also takes Unbending Trunk. It upgrades Unbending so that 33% of Damage taken with each blow is healed over time.
I thereafter buy rare food ingredients from Jacob Harker in King's Coffin and Birna in the Radiant Court, as well as gems from Dimessa in the Treasure Trove.
*Evil* A Shrewd Proposition
Now I travel to Balefire Beacon, and arrive at the entrance at #1. I speak to Captain Furrante at #4. I get 2,500cp, 20,000+ xp and a Crossbow called Fleetbreaker as rewards for completing the Quest called A Shrewd Proposition. I have no use for the Crossbow though.
I afterwards reassemble my core party. Mirke acquires The Dichotomous Soul on her 20th level-up. Now she can call on unlimited summons, especially in conjunction with the Enduring Dance ability.
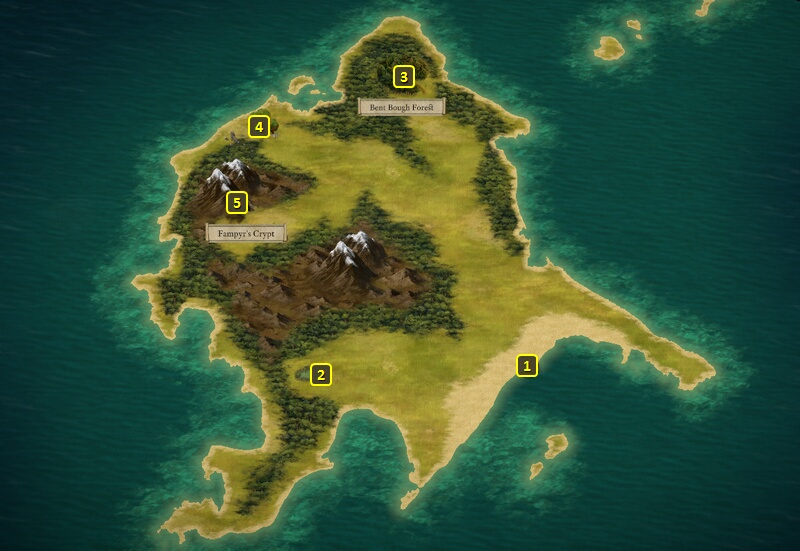
Now I sail northeast for Fampyr Island on #51 on the World Map. I board two Crookspur Captains and a Royal Deadfire Company Expert Captain on the way.
I switch out Tekehu for Konstanten before docking at the island.
*Evil* Bent Bough Forest
I collect some Water at #2 and then go to the Bent Bough Forest at #3. The scripted interaction begins with seeing an altar. Investigating the ground around the altar doesn't lead to anything for the evil party (see the good party for a different outcome). I leave for now.
My inventory happens to have a book titled, "The Cult of the Sanguine Harvest", which indicates a sacrifice that takes place on the 16th day of each month. So I wait a few days until it is the 16th. By the way, this is why I did the Tip of the Spear Quest first. It helped pass the time until I was reasonably close to the 16th by the time I go here.
Now I enter the forest again, and witness a ritual sacrifice as described in the book. I wait for the Cultists to sacrifice their victim. They will then head straight for me afterwards. Either hiding from them and letting them pass by, or sneaking away, requires every party member to make a Stealth check of at least 18. If you succeed, you end your encounter at the Forest without any further consequence. But I can't make that check, which is just as well since I intended to fight them all along. I kill them off pretty easily, and one of them leaves behind the Sanguine Great Sword. It's a pretty powerful sword that can replenish health for its wielder. The only reason I don't use it is I had different plans for my characters that didn't leave any room for this weapon.
*Evil* Cave of Threshing
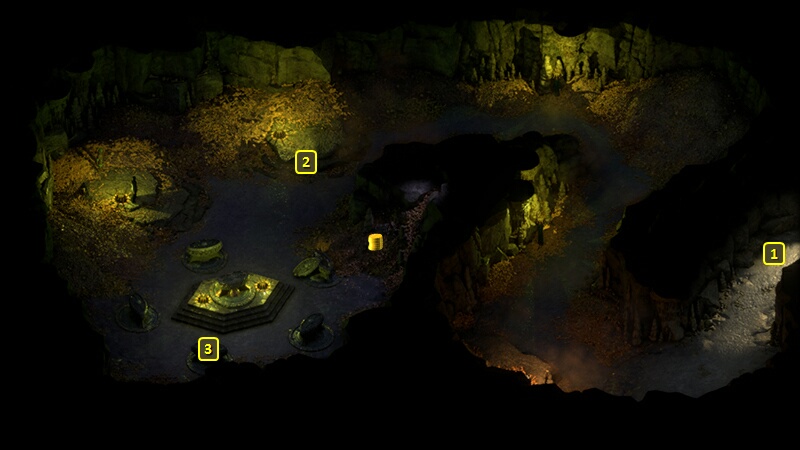
I collect some Fresh Fruit at #4, and enter the Cave of Threshing at #5.
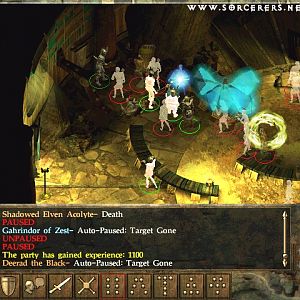
I start off at #1 on the map of the Cave of Threshing. I follow the tunnel, but go into Stealth mode once I approach the main area at #2. It allows me to start off combat significantly closer to the Ancient Fampyrs. A key danger is their gaze that can Dominate, but it wasn't a factor in this battle that I won rather handily.
Konstanten gains two abilities on his 19th level-up. One of them is ... And Sip From the Marrow. It upgrades Boil Their Flesh From Skin to Bone, so that if any "near death" enemies explode from the Corrosive Damage, that explosion will also restore Health for nearby allies. And that healing will be increased by his Physicker's Belt, and the Bone Setter's Tarc when he gets it.
He also gains Prestige. It adds +1 to his Power Levels, which will increase the power of his Offensive Invocations.
A sarcophagus at #3 has a Cloak called The Giftbearer's Cloth. Konstanten wears it for the rest of the game. It adds an extra each of weapon slots and quick-item slots for the wearer's inventory screen. Its real benefit is that it adds +5 to all Defenses besides Deflection, and scales to add an additional +1 for every point in the History skill of the wearer. Konstanten is particularly suited to taking advantage of this cloak. He has +2 History to start with as a single-class Chanter, and devotes his passive skill points to History on every level-up. He also has room during his abilities selections to include passives that raise his Defenses, which will stack with the bonus to Defenses provided by this cloak. His Deflection may not be great, but he'll be very hard for enemies to put Afflictions or other debuffs on. And that leaves him free to use his Offensive Invocations and healing abilities.
This is one of the islands I needed to explore for purposes of the Mapping the Archipelago: Razai Passage Quest. I leave the cave, rename the island to "Crimson Tides", and return to my ship. I switch Tekehu back in for Konstanten.
Now it's time to explore Outcast's Respite.