The entrance to Sanza's Emporium is at #20 on the map of Queen's
Berth. Getting this quest requires that you first complete the Mapping
the Archipelago: The Burning Shoals Quest. Now he wants you to
find a pair of islands in the Razai Passage.
There will be numerous Ancient Fampyrs (of varying classes) to fight at
#2. Be advised that they're capable of the Dominated Affliction (-5
Intellect, always attack allies) with their gaze. You may need abilities
or items that either provide Resistance to Intellect Afflictions, or that
provide bonuses to the Will defense. A couple of them leave behind Fampyr
Sage's Grimoires when killed.
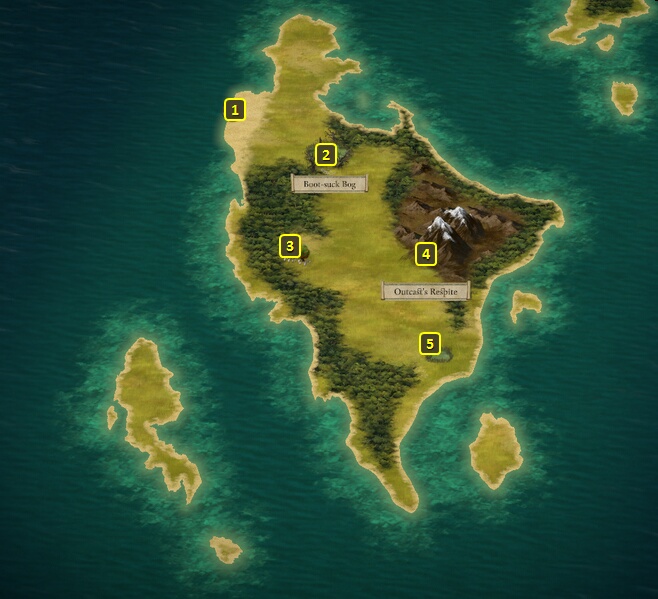
You'll start off at #1 on the map of the Northwest
Island, which is the initial landing point.
You'll have to get through the Boot-suck Bog at #2. The first stage of
the scripted interaction involves trying to get past the bog itself.
Getting through involves a Survival check of 19 by a party member you
select. You can proceed to the next part of the scripted interaction if
you make this check.
If you select a character other than the Watcher and that character
fails the Survival check, that character starts to sink. Another
character you select can make an Athletics check of 18 to safely extract
the sinking character. Failing that Athletics check means you still get
the character out safely, but he or she will now have the Fatigued (-5
Accuracy, -10 all Defenses, -15% Maximum Health) Injury. If you don't
designate a character to help the sinking character, the sinking
character has to make an Athletics check of 7 to get him or herself out.
If the character fails that check, the character drowns and dies
permanently.
If the Watcher fails the Survival check, the Watcher also automatically
attempts the Athletics check of 7 to get him or herself out. If that
Athletics check fails, the companion or sidekick with the highest
Athletics rank will attempt a rescue. If that Athletics check of 18
fails, you still get extracted to safety but the Watcher now suffers the
Fatigued Injury.
Choosing the "Press On" option leads to the next part of the
interaction, which involves an encounter with several Bog Wanderers and
Bog Lurkers. They'll demand that you leave the way you came, unless the
Watcher is a Nature Godlike. In that instance, their leader will
willingly give you a Ring of
Greater Regeneration.
A Diplomacy check of 17 is the other way to avoid a fight with the Bog
Wanderers, although that means you won't get the Ring
of Greater Regeneration.
The Clever dialogue option, or the attack option, or failing the
Diplomacy check, will all lead to a fight with the Bog Wanders, their
Board companions, and a few Bog Lurkers. Their equipment includes Superb
armors and weapons, as well as the Ring
of Greater Regeneration.
System Shock Injury (-2 Perception, -3 Shocking Armor Rating)
The bonuses last until when you next Rest. Receiving more than one
instance of the same bonus won't stack.
Getting multiple Injuries from the pool can lead to Major Injuries, and
permanent death if the Watcher ends up with enough Injuries.
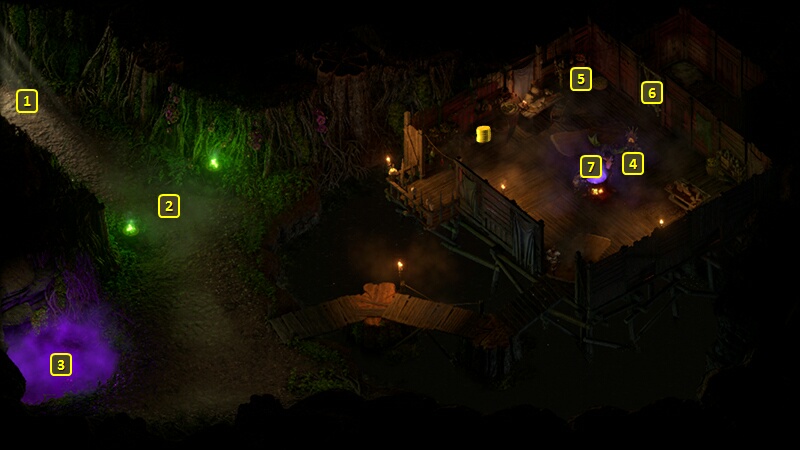
A Wizard named Bipara will be at #4, along with a few Bog Witches and
Bog Bats. Bipara herself leaves behind Bipara's
Grimoire, the Cauldron
Shard and the Witch's
Key when killed.
The chest at #5 contains the Encoded
Notes. You can translate them and obtain the Deciphered
Notes with an Alchemy check of 15, a History check of 17, or an
Intellect check of 20.
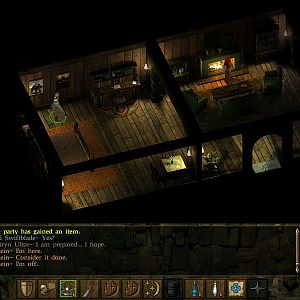
Alternatively, you can free Tama Watua from his captivity at #6, and he
can do the translation for you. You can free him either by using a
Mechanics skill check of 14 on the door, or using the Witch's
Key on the door.
He can translate Encoded Notes
(after being freed) into the Deciphered
Notes if you ask him for a favor. He'll remain here and be willing
to sell crafting ingredients. He also offers a retrain option.
You can use the cauldron at #7, if you have the Deciphered
Notes, to create a potion that will permanently raise one of the
Watcher's attributes by +1. This can only be done once, and the cauldron
will become empty after choosing one of the potions for yourself.
Ingesting the potion to raise an attribute by +1 occurs automatically
after creating it, so there's no need to go into your inventory screen
to find the potion.
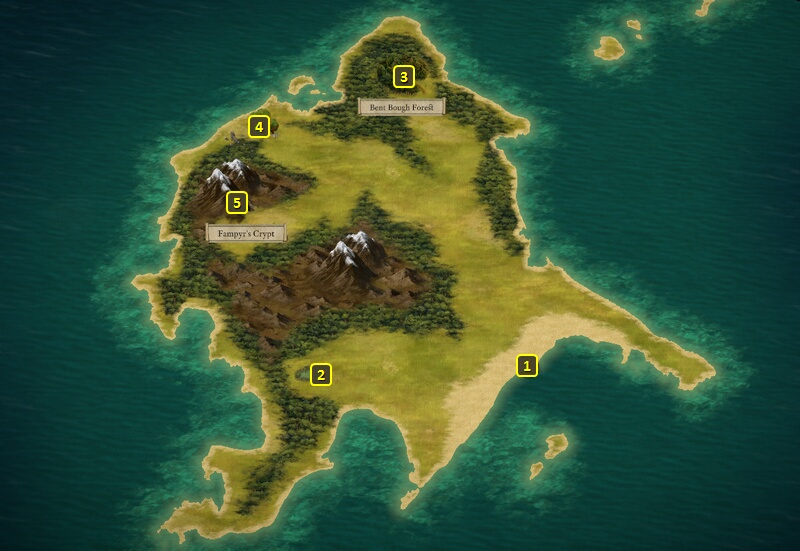
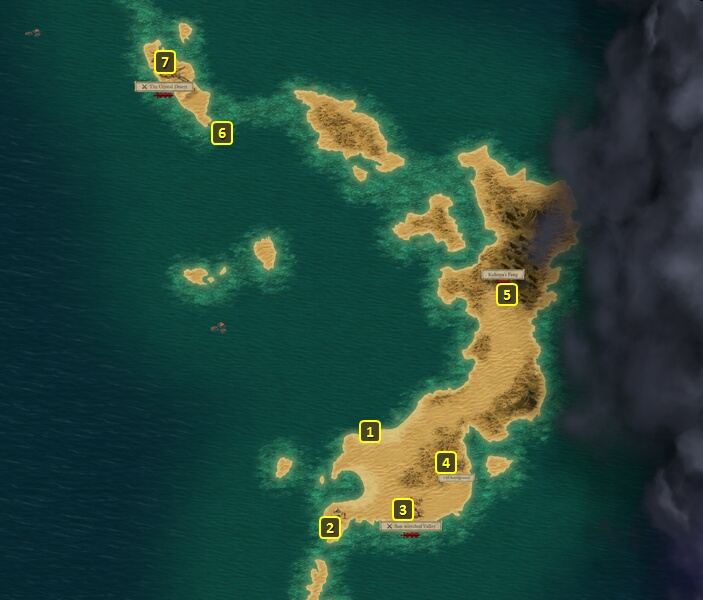
Land your ship at the point marked #1 on the map of the Razai Passage.
The entrance to Kohopa's Fang is at #5. You will initially need to make an Athletics check of 10 to avoid an
Injury from Fire Bats.
You will then have to fight those same Fire Bats, a couple of Flame
blights, as well as a Flame Naga Sorcerer before you can go through the
entrance itself. The Sorcerer will leave behind a Flail called Sungrazer
should you win.
The entrance will be at the top of the trail and towards the southeast
corner after you win.
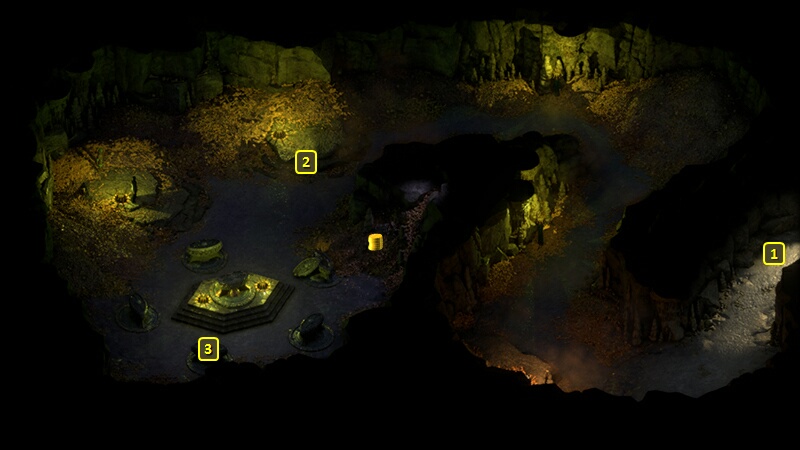
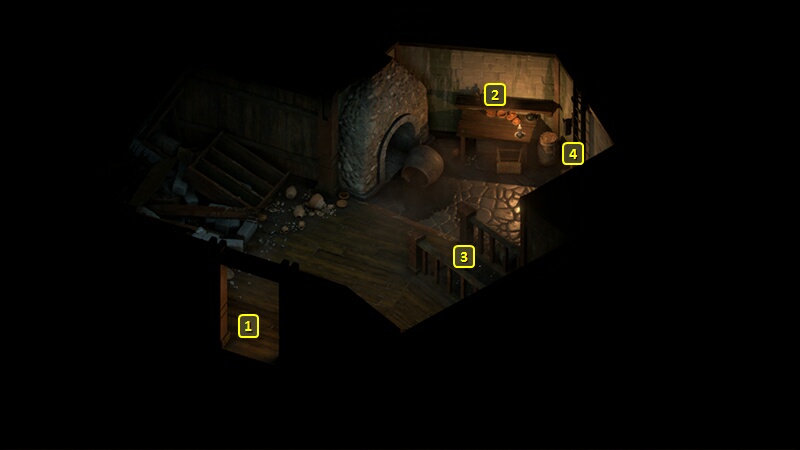
You will now be at #1 on the map of Kohopa's Fang. There will be Flame Naga scattered throughout the chamber ahead.
A Flame Naga Priestess named Uvaala will be at #2. Several other Flame Nagas will be here to help her. She'll leave behind a Battle Axe called Magran's Favor and Rekvu's Scorched Cloak when killed.
Sorcerer's
Place is a project run entirely by fans and for fans. Maintaining
Sorcerer's Place and a stable environment for all our hosted sites requires a substantial amount of our time and funds on a regular basis, so please consider supporting us to keep the site up & running smoothly. Thank you!
Supporting Sorcerer's Place
Has Sorcerer's Place been useful? If you'd like to show your appreciation
for our hard work on the site, and help us pay the bills the site generates
every month, please consider helping support SP.
Thank you!