Pillars of Eternity 2 logo


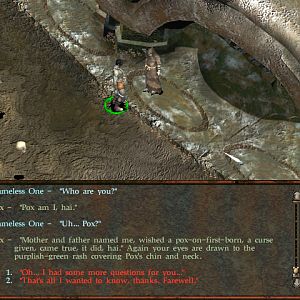
Pillars of Eternity 2 Online Walkthrough by David Milward

INTRO & ABOUT | CHARACTERS | COMBAT AND RULES | ITEMS | SHIPS
Quests | Areas | Mega Bosses
Disable all ads!

Mega Bosses: Sigilmaster Auranic | Belranga | Dorudugan | Hauani O Whe

Sigilmaster Auranic

World Map

  1. Sigil Master Auranic
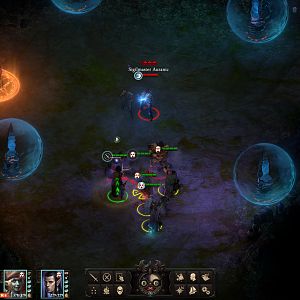
Sigilmaster Auranic is a Wizard in the Brimey Grotto, at #37 on the World Map. She will remain rooted in the same spot. She can't move or follow the party. But she herself is immune to Push or Pull effects. That means the entrance to the Grotto will keep the party safely out of her reach when they need to avoid at least her spells and possibly recuperate.

  2. She is also protected by two Savant Bodyguards, one of whom is a Barbarian and the other is a Fighter. They can be pulled towards the entrance away from her, and killed without much trouble.

  3. She is also in command of five Obelisks. The Obelisks are protected by Globes of Invulnerability that protect them from direct damage or any other attempt to harm them. Auranic has the option to temporarily turn off a Globe (for about 20 sec) protecting an Obelisk, which allows that Obelisk to unleash its specific power on the party every few seconds. The Obelisk stops using its power once its Globe of Invulnerability turns back on.

    That means that a Globe turning off becomes your window to do damage to the Obelisk, while at the same time getting hit over and over again by the Obelisk's power. The Obelisks are immune to Piercing and Slashing Damage, but are susceptible to Crushing and elemental forms of damage.

    The names and powers of each Obelisk are as follows:

    • Obelisk of Wrath - Casts Chain Lightning on all party members and your summons.
    • Obelisk of Cleansing - Casts Arcane Dampener on all party members and your summons.
    • Obelisk of Terror - Afflicts all party members and your summons with both Terrified and Sickened.
    • Obelisk of Mystery - Casts Tayn's Chaotic Orb on all party members and your summons.
    • Obelisk of Force - Casts Minoletta's Minor Missiles on all party members and your summons.

    The Obelisks, unlike Auranic, have no limits on the range. Their powers will reach you even if you stick by the entrance.

  4. A part of a good strategy can be to send summons ahead as often as you can to get Auranic to run out of spells. Sometimes it can also be a good idea to stay completely out of her sight by the entrance in between summonings. She won't activate any of the Obelisks if she can't see the party. That can give you a breather to recuperate (e.g., passive healing from sources like the Paladin's Exalted Endurance).

  5. It is also recommended you bring along any items or powers that provide resistance to Resolve Afflictions before starting this fight. The Chanter's They Shielded Their Eyes 'Gainst the Fampyr's Eyes is an example of a class power that can prevent the Terrified Affliction. The Cap of the Laughing Stock, which you can purchase from the Deck of Many Things, is an example of gaining complete immunity to Terrified. You can, if you must, use Potions of the Focused Mind, although I recommend avoiding Auranic and not using them until at least the Obelisk of Cleansing is destroyed, and probably saving them until the Obelisk of Terror is the last one. Preparing this kind of precaution before entering the Grotto for the battle can render the Obelisk of Terror a mere nuisance. Without it, your chances against Auranic can end up absolutely crippled.

  6. Spell Reflection abilities are also a good way to deal with the Obelisk of Wrath, and the Obelisk of Mystery. Once one of them is activated, Wizards can use spells like Arcane Reflection, while other characters can use Potions of Imperfect Arcane Reflection or Potions of Improved Arcane Reflection. The Chain Lightnings and Chaotic Orbs will bounce back and damage the Obelisks. In fact, if you can hang back out of Auranic's sight and take out the Obelisks of Wrath and Mystery in this way, it can make dealing with her and her remaining Obelisks much easier.

  7. Now you can go to work on Auranic herself. She'll likely be left with her scepter attacks by that time. However, she uses her Last Trick power once you bring her to near death. She regains full Health, all her spells are now back, and she gains the Brilliant Inspiration (+5 Intellect, +1 Power Levels, recuperate class resource every 6 sec) never-ending. Also, IF any Obelisks are still intact when she triggers Last Trick, they permanently lose their Globes of Invulnerability and stay in attack mode for the rest of the fight.

    That is why it is imperative to take out all of the Obelisks before taking on Auranic and coaxing out her Last Trick power. All of the Obelisks firing on the party will pretty much spell disaster for the party.

    She still can't move once she triggers Last Trick, so you can retreat, keep summons on top of her, and hit her with missile weapons from a distance.

  8. One of the Savant Bodyguards leaves behind a Cloak of Greater Deflection.

    Auranic herself leaves behind a Mythical Adra Stone, and Sigilmaster Auranic's Grimoire.

Amazon.com
Amazon.ca
Amazon.co.uk
Sorcerer's Place is a project run entirely by fans and for fans. Maintaining Sorcerer's Place and a stable environment for all our hosted sites requires a substantial amount of our time and funds on a regular basis, so please consider supporting us to keep the site up & running smoothly. Thank you!

Disable all ads!