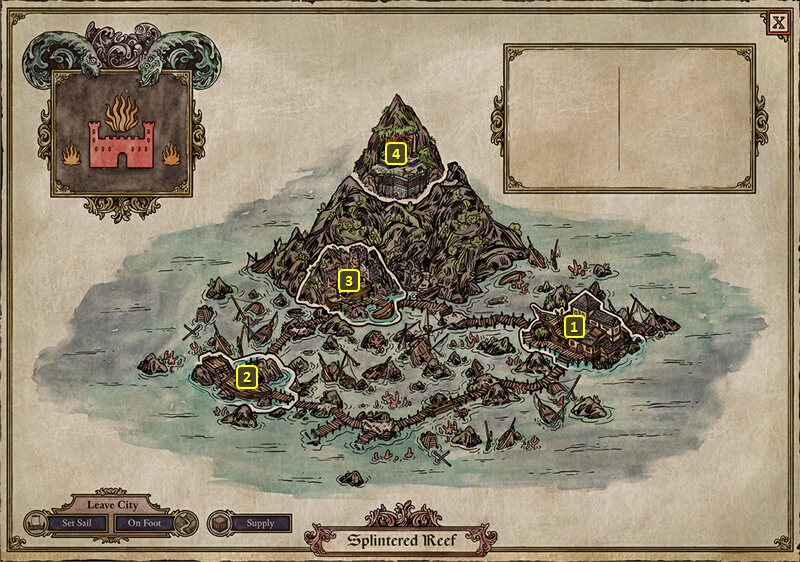
Travel to any of the districts on the map of Splintered Reef, and you'll get interrupted with a battle against several Darguls and a Grave Hound.
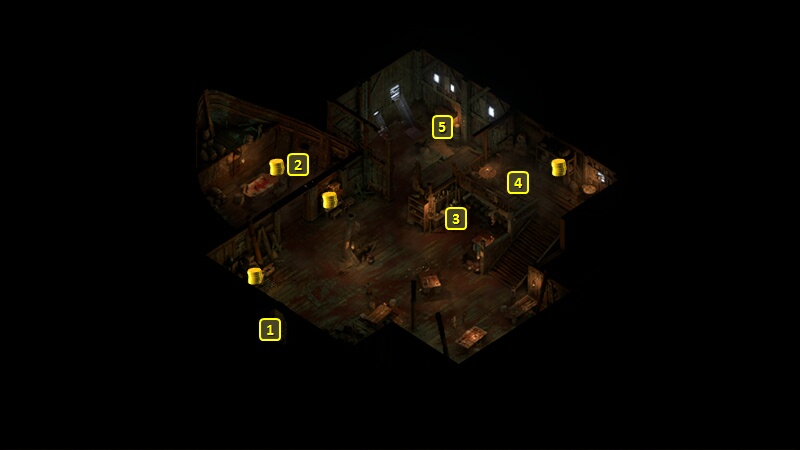
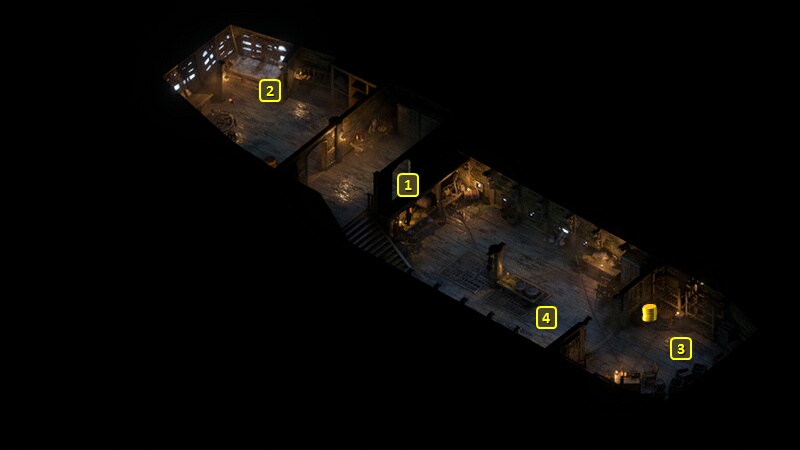
You'll start off at #1 on the map of The Pickled Eel. Speak to Copperhead at #4, which becomes the point where this Quest overlaps for a little bit with the Quest called The Final Voyage.
Speaking to him triggers the entrance of the Fampyr named Zulka through the door at #1. She and her bodyguards are hostile, unlike the rest of the patrons. She also has two surviving captives from Lofell's ship brought into the room at #5.
You can bring yourself within Zulka's view to start the fight. That means the rest of the undead patrons will go hostile and attack you as well. So on that note, be sure to buy anything you might want from the Tavern Keeper at #3 before speaking to Copperhead.
Alternatively, you can also have the whole party go into Stealth mode and leave while Zulka wanders away from the door at #1.
Copperhead will now be at #4 in the Boathouse. He shows an awareness that the local undead are locked in a fantasy of being normal kith, and he would like you to discover the cause. He offers to provide a distraction for when you make your way to the next area.
He is also wearing Copperhead's Helm. You could kill him for it if you're so inclined.
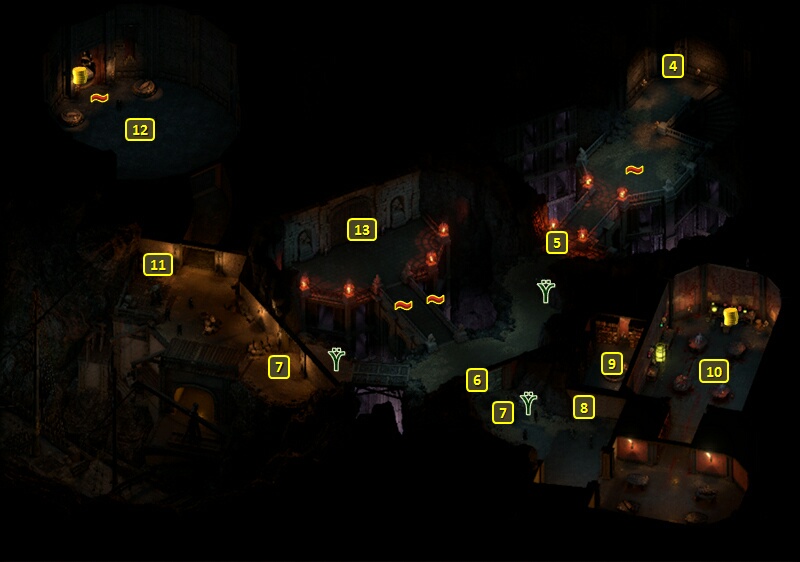
There will be a massive horde of undead of various sorts to fight around at around #2. Copperhead will lessen the numbers you have to fight if you previously took him up on his offer of a distraction.
The door at #3 leads to the door at #4 of the map of the Interior.
There will be a Revenant Ogre to fight at #5.
There will be also be more hordes of undead to fight at points marked #7.
The door at #6 requires a Mechanics skill check of at least 18 to open.
Runemaster Kastor will be at #10, along with several more undead and a Steelclad Construct. He leaves behind a Vial of Fampyr Blood when defeated.
The crate at #9 will have a Blackwood Log in it, which can help you put together a ship that can reach the end of the game.
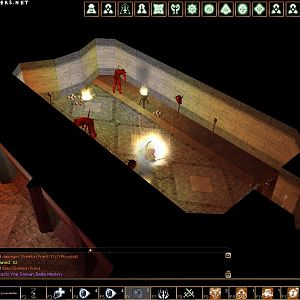
The door at #13 has a brazier on either side of it. Using a Vial of Fampyr Blood on each Brazier, one from Runemaster Kastor at #8 and one from Quartermaster Harka at #10, will open the door.
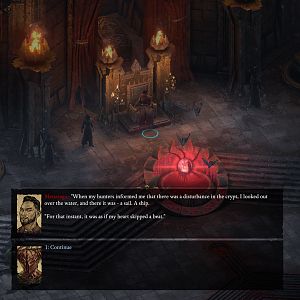
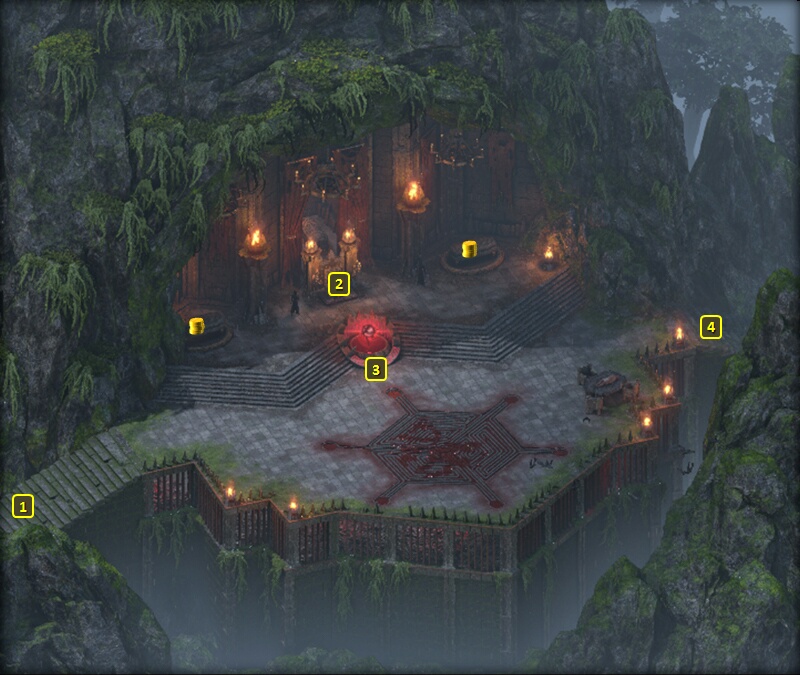
Menzzago, a Fampyr Illusionist, is at #2. If you're intent on ending the Quest violently, he'll be aided by numerous Alguls and several Fampyrs of various classes. He'll leave behind a Scepter called Amaliorra, the Silk Spider Robe, and Menzzago's Grimoire if you defeat him.
Copperhead wants you to destroy whatever is powering the illusions the undead live under, so you may as well follow through and shatter the orb at #2.
Now go back to Copperhead. If you destroyed the Sphere, he'll willingly reward you with 16,000+xp as well as Copperhead's Helm. You can also, when first speaking to him again upon your return, have the option to recruit him as a Crew Member for your ship.
The other main branch to completing this Quest involves striking an alliance with Menzzago. Opening up the possibilities requires either a Diplomacy check of 8 or a Survival check of 8. The possibilities then become:
You can have the Crookspur Slavers regularly deliver victims to Splintered Reef. It requires having completed the Tip of the Spear Quest, that Master Kua will be alive, and that the Slavers still be in control of Crookspur.
Another possibility is to have the Vailian Trading Company send him Luminous Adra Potions to avoid the need for feeding on Kith. The possibility requires at least 2 points of positive reputation with the Company, to have restored the Adra pillar in either Poko Kohara or Hasongo, and to have not yet completed the Quest called He Waits in Fire. If you have a Luminous Adra Potion on hand, you can give it to him to seal the deal then and there and complete the Quest. Or you can say you'll come back later, get the Potion, and then give it to him.
Another possibility requires that you have completed a Quest that seals an exclusive alliance for one of the factions, A Dance With Death for the Principi, Taking Out The Traders for the Huana, Sabotage at the Brass Citadel for the Vailian Trading Company, or The Final Maneuver for the Royal Deadfire Company. You can gain Menzzago's allegiance on the understanding that he and his undead minions will share Ukaizo with whatever faction you've allied yourself with.
Copperhead will be quite angry with you if went with the last option, but the Quest will already be completed by this point.
Sorcerer's
Place is a project run entirely by fans and for fans. Maintaining
Sorcerer's Place and a stable environment for all our hosted sites requires a substantial amount of our time and funds on a regular basis, so please consider supporting us to keep the site up & running smoothly. Thank you!
Supporting Sorcerer's Place
Has Sorcerer's Place been useful? If you'd like to show your appreciation
for our hard work on the site, and help us pay the bills the site generates
every month, please consider helping support SP.
Thank you!