-

- Forums
- Chatrooms
- Gallery
- Gameplay Videos
- Upload
- Articles
- Mod Reviews
- Shop SP: Games, Movies, Books

|
|
| Pillars of Eternity 2 Online Walkthrough by David Milward |
REKKE, M HUMAN BRUTE (BARBARIAN / FIGHTER)

Stats
Abilities
1st Level - Frenzy and Knockdown: Default starting abilities.
2nd Level - Blooded: Provides a +25% bonus to Damage while the Barbarian is himself at 25% Health or less. I certainly don't mind a passive like this for a character who's restricted to mostly ship combat.
3rd Level - Disciplined Barrage: Provides the Aware Inspiration for a lengthy duration. It's also a prerequisite to Disciplined Strikes.
4th Level - Accurate Carnage: This is obligatory as it increases the probability of Static Charge from Lord Darryn's Voulge sticking to multiple targets.
Fighter Stances: The Cleaving Stance modal would be a natural choice for any Fighter build that emphasizes inflicting damage instead of tanking. But it takes on special meaning for Rekke as it increases his ability to spread the electric-Carnage love (i.e. Static Charges) around through his Lord Darryn's Voulge.
5th Level - Two-Handed Style: It's a given as he uses a Pollaxe as his exclusive weapon.
6th Level - Confident Aim: Provides a 30% chance of converting Grazes to Hits, which is a natural choice for any character that wants to Hit as often as possible.
7th Level - One Stands Alone: Adds +20% Damage when near 2 or more enemies, and at least 3 enemies are needed to force the Flanked condition on him. It's pretty much an obligatory choice for Barbarians.
Disciplined Strikes: It upgrades the Disciplined Barrage ability so that it now provides the Intuitive Inspiration, which means +5 Perception, a 50% chance of converting Grazes to Hits, and a 25% chance of converting Hits to Critical Hits. The last benefit is particularly relevant, as increased chances of Critical Hits means increased chances of detonating any accumulated Static Charges that his nearby foes will have accumulated.
8th Level - Barbaric Blow: It's a Full Attack with +20% Damage, +50% Damage on Critical Hit, a 30% chance of converting a Hit to a Critical Hit, and a +50% area of effect for Carnage. The obvious reason for Rekke to take it is to expand the area-of-effect of Carnage and thus spread the Static Charges from Lord Darryn's Voulge even further. Any concerns about expending Rage points can be mitigated when it gets upgraded to Barbaric Smash.
9th Level - Bloodlust: +20% Action Speed for 10 seconds after landing a killing blow. Also a standard choice for many Barbarians.
10th Level - Blood Frenzy: It upgrades Frenzy so that his attacks cause a little extra Raw Damage over a few seconds. The ultimate reason is that it leads to the upgrade called Blood Storm.
Weapon Specialization: It increases his Damage with Lord Darryn's Voulge by 10%.
11th Level - Bloody Slaughter: A passive that provides a 20% chance of converting Hits to Critical Hits and +50% Critical Hit Damage, both against Near Death targets.
12th Level - Rapid Recovery: Constant Recovery will now regenerate 7 health per 3 sec.
13th Level - Barbaric Smash: It upgrades Barbaric Blow so that it recoups any Rage spent on it if it results in a killing blow.
Mob Stance: It upgrades Cleaving Stance so that he enjoys a 5% reduction of Recovery Time for every enemy that is within Melee range.
14th Level - Armored Grace: The 25% reduction of Recovery Time will stack with any reductions applied by Mob Stance.
15th Level - Unbending: This is an activated ability that takes 25% of Damage from each attack made against the character, and converts it to healing over time for the character. Might will not affect the amount of healing. But Intellect and Power Levels can prolong the duration of the healing, which means that the healing over time can actually result in greater net healing than the damage caused by the original attack. That can make the ability really powerful in certain circumstances. One circumstance is where the character hits hard from the side, takes the odd blow or two, but is not himself the main object of enemy attacks like the tank. That will give him time to catch his breath and let the healing occur over time. The other is where the character does get pounded hard and lots of times, but is able to weather the storm (e.g. like with the help of Barring Death's Door). If the character can survive the onslaught, that will mean multiple healing ticks doing their thing over time. And yes, it can get prolonged by Salvation of Time from Xoti during ship battles.
16th Level - Improved Critical: It's a natural choice for any two-handed warrior.
Tough: More Health is always good for any two-handed warrior who is himself going to take damage.
17th Level - Unflinching: It provides Resistance to Constitution, Dexterity and Might Afflictions while his Health is above 50%. That makes for a worthwhile benefit in its own right. The appeal for a Barbarian is that will at least prevent either the Staggered (-5 Might, cannot Engage) or Sickened (-5 Constitution, -25% Healing Received) Afflictions from negating his use of Frenzy.
18th Level - Spell Resistance: A 10% chance to avoid the effects of any spell outright is always good for any character.
19th Level - Blood Frenzy: It upgrades Blood Frenzy so that killing blows by him will extend the duration of his Frenzy.
Unbending Trunk: It upgrades Unbending so that 33% of Damage taken with each blow is healed over time.
20th Level - Unbreakable: He'll revive on being knocked unconscious with 100+ Health, +10 all Defenses for 30 sec, and +2 Armor Rating for 30 sec, once per Encounter. There's also the added benefit that getting knocked unconscious will trigger Shocking Damage to all nearby enemies through his Mantle of the Seven Bolts.
Inventory

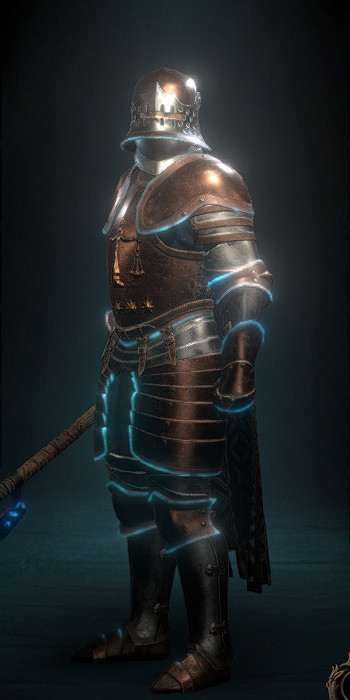
Deltro's Cage Helm: Looted from Ezzali Bardatto at #4 in the Bardatto Estate. The wearer can add extra Shocking Damage to his attacks when he himself receives Shocking Damage. It won't happen very often, but when it does it will be enhanced by the bonus Electrity Power Levels that come with wearing Deltro's Cage.
Orishia: Obtained by defeating Flamewalker Vessali at #35 on the World Map while pursuing a bounty against him. It grants one of six effects at random at the start of each combat: +5% Action Speed, 25 point Damage Shield, -20% Hostile Effect Duration, +1 Penetration, -10% Recovery Time, +15% Stride. Most of them will enhance the abilities of a character designed to hit hard in melee for damage and as often as possible.
Mantle of the Seven Bolts: Purchased from Iolfr's Raiments, the entrance to which is at #22 in Periki's Overlook. I don't get it for the once per Rest offensive power. A cloak like this makes sense for a character who will get the Fighter's Unbreakable passive. If he gets knocked Unconscious, the cloak will unleash Shocking Damage around him, and then Unbreakable will revive him with at least 100 Health. I don't mind this kind of setup for a ship combatant, as he won't be suffering any lingering Injuries should that happen. Moreover, I am emphasizing Electricity Power Levels for him to get the most out of his Lord Darryn's Voulge. And that in turn means more damage caused by the Mantle when he does get knocked Unconscious.
Deltro's Cage: Looted from Ezzali Bardatto at #4 in the Bardatto Estate. Its key benefit is +2 Electricity Power Levels. And that means greater Shocking Damage build up with Static Discharges from Lord Darryn's Voulge, and more Shocking Damage from the Mantle of the Seven Bolts should he get knocked unconscious during a ship battle.
Boltcatchers: Looted from The Steel Preacher after defeating him on the island at #5 on the World Map, while pursuing a Bounty against him. It can use Crackling Bolt once per Rest, and has a 20% chance of reflecting a Shocking Damage attack made against the wearer. The key benefit for Rekke is that it provides a 20% chance of him scoring extra Shocking Damage when he scores a Critical Hit. And that bonus Shocking Damage will be increased by the bonus +2 Electricity Power Levels provided by his Deltro's Cage armor.
Whispers from the Depths: Looted from a crate at #8 in The Enclosures. It has a 30% chance on scoring a killing blow to provide Acute (+5 Intellect, +1 Power Levels) for 8 seconds. And that +1 raise of Power Levels will enhance the powers of Lord Darryn's Voulge in combination with his Deltro's Cage armor.
Ring of Regeneration: Looted from an Ogre in the Collapsed Coal Mine, the entrance to which is at #6 on the Cleft Island. It's a sensible choice for a warrior who is himself going to get hit plenty.
Girdle of Eoten Constitution: Obtained by defeating Beina while pursuing a Bounty against her. More Health and more Fortitude is always a good thing for melee fighters, especially ones who fight with two-handed weapons and lower Deflection.
Boots of Stability: Looted from the Plagued Ship at #21 on the World Map. The +5 bonus to Fortitude is helpful for any character. But in this instance it's a combination of having other boots in mind for other characters, and that Rekke will be recruited very soon afterwards that informs this decision.
Ways to Improve: If you want to base your own Watcher on this build, Mage Slayer may be a good Barbarian subclass to go with. The Spell Disruption can be transmitted to enemy spellcasters through Carnage, in addition to Static Charges. If you know you're going to go with a certain weapon type exclusively, like Pollaxes, then the Devoted is the Fighter subclass to go with.
Alternatives: Corpse-Eater is not a popular choice for Barbarian subclass. It does offer a way to recoup Rage from the very start, by devouring the corpse of a fallen Beast or Kith or Wilder enemy. One drawback players don't like is that activated Barbarian abilities impose a +1 Rage expended penalty. The other is the significant time to both use the ability, and the Recovery Time afterwards. This multi-class might make it workable, as Armored Grace can reduce the Recovery Time. High Might (increased Attack Damage and increased Healing) and high Dexterity scores (faster use of Flesh Communion) are crucial to such a build.


