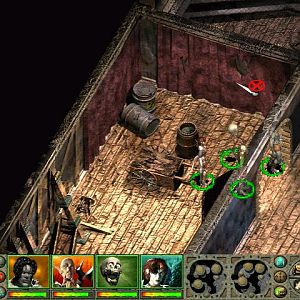
Here is the wreck of a ship that had been known as The Huaro. Getting
anything out of it means approaching it on a skiff. At least one of your
characters needs to make an Athletics check of 4 to be able to board it,
and chances are that characters with no ranks in Athletics may end up
sustaining an injury.
Making either a Perception check of 12 or a Streetwise check of 7 will
get you some money, and the Laughing
Imp Cameo.
Here is a Derelict Vailian Ship. You can either loot it for various
food items and ship supplies, or let your ship cannoneers sink it for
Morale and crew experience. Looting it amounts to Resting and will
result in any Resting bonuses you may have at the moment expiring.
Here are the Te Hika Fishing Pools. A Survival check of 4 by any
character can reveal the presence of a whale suffused with Adra called a
Resplendent Phantom. If any Huana crew members are present, they'll
consider it a fortunate omen.
You can ask your crew for thoughts on whether to hunt it. Their
responses naturally depend on their individual personality types.
If you decide to let it pass it peace, it will spend some time beside
the ship before departing. It will also mean a loss of 5 Morale for the
Crew, but a gain of experience for them as well. Letting it pass will
also earn positive reputation with Eder
if he's in the party.
If you decide to hunt it, it will result in a loss of reputation with Eder if he's in the party. Successfully
hunting it requires an Expert-level Deckhand. The results are a gain of
experience for the Crew, a gain of +10 Morale for the Crew, some
experience for the Crew, and 40 Mohora Meat.
But one of the Crew Members will get injured.
If you can't make the Deckhand check, the whale will escape. You'll
still get the experience gain, but no other benefits.
There is a permanent storm here, which can in some instances be of
use. One notable use is to sail into a storm for purposes of upgrading Lord Darryn's Voulge, which is
obtained nearby.
The island here has a few things, like an Oasis that provides Water,
and a grove that provides Fresh Fruit.
The key feature of the island is a shipwreck that, when searched, yields
a Soulbound Pollaxe named Lord
Darryn's Voulge, in addition to a few other random items.
Here is a Derelict Ship. Using a Spyglass
will determine that they've taken ill, while a Kind Wayfarer can
identify that the crew members are themselves Kind Wayfarers. Crew
Members and some of your Companions are likely to advise against
boarding it.
Sinking it with cannon fire will provide xp and Morale for your crew.
Boarding it will result in a decrease in Morale, and will end any
Resting bonuses. The Morale can be made up by sinking it afterwards.
If you do board, you'll notice that the crew are all dead, and that
there's a barricaded hatch. A combined Athletics and Mechanics check can
open it, as will any offensive spell that can cause damage. Opening it
will lead to obtaining a Physicker's Belt.
Here is a Plagued Ship. Using a Spyglass
ahead of time can determine that its stranded crew is suffering from a
plague.
You can choose to heal them if you're Crew Surgeon isn't Wilder (e.g., Big Mouth from Dunnage), and earn
Benevolent Disposition in the process. They'll offer you Boots
of Stability out of gratitude. It's up to you whether or not you
want to accept them.
You can also choose to sink the ship from afar to earn xp for your crew.
Another choice is to rob the crew for Cruel disposition, and get the Boots of Stability and several other Water items in the process as well.
Here is the Mara-Mara Trench, which presents another whale hunting
opportunity. A Survival check will identify it as a Bowhead, though some
Crew Members will think it's a Wallface.
You can let the creature pass, which will earn positive reputation with
Eder if he's in the party. Crew
Members gain 210xp, 2 Sailor Experience and +10 Morale.
Letting the creature pass will also earn an until Rest bonus called Ngati's Blessing (+2 Constitution) for anyone who is in the core party on the ship.
You can also choose to hunt it, which will lose reputation with Eder
if he's in the party.
It starts with a Crew Member injuring the whale from the skiff, but also
getting Injured.
You can make either an Insight check of 4 or a Survival check of 5 to
identify a real danger should the whale manage to dive into deeper
water. A successful check will also reveal the check you need to avert
the danger.
That check is that the Deckhands of your ship need to make a combined
Deckhand Rank check of 5. What happens is you eventually manage to wear
the Whale out, and can harvest Mohora Meat
from it. Crew Members will get 210xp, 2 Sailor Experience and +10
Morale.
If you attempt the Deckhands Rank check and fail, the whale will make
the dive and pull the crew on the hunting skiff underwater. One of them
will die permanently. The whale will also escape.
If you start the hunt and fail, either because you gave up partway
through or because it made the dive, Crew Members will gain 189xp and 2
Sailor Experience, but also lose -5 Morale.
The small island hereh as the Wapau Jungle, which involves a scripted
interaction. A group of Skaenite cultists approaches you, wanting to make
you an offer but away from the ears of your companions.
You can decline repeatedly while avoiding hostilities. Doing so ends the
scripted interaction, and the Jungle disappears from the World Map.
You can decline, but then choose an Aggressive option to fight them. The
Skaenite Priest leaves behind the Pathfinder's
Boots should you win.
To even listen to their offer earns Shady reputation. They want you to
follow them to their altar and sacrifice one of your companions. You can
at this point again decline to end the encounter peacefully, or choose
the Aggressive "counter proposal" to fight and kill them.
You can take them up on their offer and choose a Companion to bring with
you. Following them obliges you or your companion to make a Survival
check of 12. Making the check means you reach the altar without any
trouble. Failing it means both you and your Companion end up with the
Fatigued injury (-5 Accuracy, -10 all Defenses, -15% Maximum Health).
You can sacrifice your Companion, which leads to your Companion's
permanent death. Doing so earns Cruel disposition and an Effigy
Doll. Going back leads to a loss of reputation with Companions
(not Sidekicks) who are in your party.
You and your Companion can instead destroy the altar, which earns
Benevolent and Aggressive reputation.
You can again simply walk away from the altar, or choose an Aggressive
option to fight and kill the Skaenites.
Here is a pile of flotsam where you can find and recruit Rekke
as a Sidekick.
Here is the Hohonu Lagoon, which involves an encounter with a large
sea creature. A Survival check of 7 will reveal that it is a large and
horned carnivorous whale known as a Qilutaalik.
All further options lead to the whale attacking the ship, getting its
horns lodged in the ship, and your ship itself sustaining at least 15
points damage. One of your party members needs to be able to make an
Athletics checks of 6 to avoid getting injured. The choices at the start
of the encounter are:
Trying to let the creature pass in peace leads straight to the
whale attacking the ship.
Trying to hit it with cannon fire still leads straight to the
whale attacking the ship. But the difference is that you'll have an
additional option once the whale lodges its horns in your ship.
Trying to get away from the whale leads to your Helmsman getting
injured, and an additional 5 points of damage to your ship. And
that's before the whale makes its usual attack that causes 15 points
of damage to the ship.
You could try to hunt it. It requires a cumulative Deckhand check
of 8 from your Crew Members to
minimize any injuries and damage to the ship. At least one Crew
Member will still get injured. Moreoever, the damage to the
ship increases to around 30 when the whale attacks it.
You have a few options once the whale does lodge its horns in your ship:
Trying to hit it with damaging spells won't do much, pretty much
obliging you to resort to the other options.
An Explosives check of 9 can accurately place a Bomb
in its blow hole, killing it.
If you had used the cannons options earlier, you now have the
option of using a cumulative cannoneer check of 5 from your Crew
Members to blow it apart.
Attacking it with your weapons is a reliable way of killing it
off.
Here are the Hungry Shoals, which provide a shortcut to the nearby
Motare Island, where otherwise you'd have to approach it the long way
from the north. Successfully making your way past the Shoals requires a
Master Helmsan (4 skill ranks in Helmsman). That would typically mean
bringing on Llendreth, and having
him act as your Helmsan without taking on any other roles on your ship
so as to max out at 4 skill ranks in Helmsman.
Here is another Plagued Ship. Using a Spyglass
ahead of time can determine that its stranded crew is suffering from a
plague.
You can choose to heal them if you're Crew Surgeon isn't Wilder (e.g., Big Mouth from Dunnage), and earn
Benevolent Disposition in the process. They'll offer you a Stone
of Power out of gratitude. It's up to you whether you accept it or
not.
You can also choose to sink the ship from afar to earn xp for your crew.
Another choice is to rob the crew for Cruel disposition, as well as the
Stone of Power and several other Water items in the process as well.
A ship called the Goshawk and captained by Wilda will be here, but
only if you have accepted a Quest from the Royal Deadfire Company called
A Matter of Import.
Here is Sayuka Island. Your
initial point of entry will be the town of Sayuka
itself.
Here is the entrance to Cignath Mor,
which only gets revealed after you've made sufficient progress with the
Overgrowth Quest.
Here is where you can pursue a Bounty against Beina.
Here is a School of Fish. A gigantic shark will come into view. A
Survival check of 8 identifies it as a Barbed Ravager, notorious for
attacking and sinking ships. Serafen
can reduce the check to 6, while Tekehu
can reduce it to 4.
Now you have some choices during the first round of the encounter:
Use a defensive spell. It doesn't work.
Aim your cannons at it. A combined Cannoneer check of 8 will kill
it.
Flee, which requires a Deckhand check of 10 to get away.
Using a defensive spell, or failing a check, means the ship itself will
take damage, and a Crew Member will
get Injured.
If you failed a check, a second round ensues. Your choices are:
Aim your cannons at it. It will succeed if you aimed and missed
with the cannons last round. It will fail if you tried to flee and
failed that.
Make an Explosives check of 9 to throw a Grenade
at it and kill it.
If you made the Survival check, you can sacrifice a Crew
Member by tossing him or her overboard. It earns Cruel
disposition and -15 Morale, but it always works.
Use a power with the Wind-keyword to put wind to the sails and
escape. It always works.
Stay on course. You'll be able to outlast the creature and leave
it behind.
If you fail on your second round option, a Crew
Member will get thrown overboard. You can either save the Crew
Member, or let the Crew Member drown
and repeat the checks that became available on the second round. Those
checks will now always succeed.
You gain 10 Morale if you used the Grenade,
7 Morale if you killed it with cannon fire, 2 morale if you missed with
cannons the first round but fled the second, and no Morale if you fled
the encounter without any offensive action on your part.
Here is where you'll encounter a deserted ship with a Leaden Key
symbol on it, if you've made sufficient progress with Aloth's
personal Quest, The
Painted Masks.
There will be a Plagued Ship here. If you want, you can board the ship
and try to heal its crew. Doing so results in an immediate -15 loss of
Morale for your own crew. They themselves will contract the sickness,
which eventually forces an expenditure of Medical Supplies and a Rest
that cancals any Resting bonuses you may have in place.
The sick crew of the Plagued Ship will also offer you a pair of Gloves
called Aegor's Swift Touch out of
gratitude. It's up to you whether you accept them or not.
Alternatively, you can have your ship shoot down the Plagued Ship at a
safe distance. The immediate Morale loss will be reduced to -5 instead.
You can still get Aegor's Swift Touch
from the debris afterwards.
Here are a pair of islands just south of the Razai
Passage.
Here is the point through which you can enter Ondra's Mortar so as to complete the Main Quest called The City Lost to Time.
Here is Ukaizo, the final destination of the game.
*NOTE* The Deck of Many Things is a ship that will literally go anywhere
on the World Map, except the northeast corner. Should you be able to
get close to it, you can board the Deck
of Many Things at Captain Thaenic's pleasure and and gain access to
several merchants with a lot of unique items.
Sorcerer's
Place is a project run entirely by fans and for fans. Maintaining
Sorcerer's Place and a stable environment for all our hosted sites requires a substantial amount of our time and funds on a regular basis, so please consider supporting us to keep the site up & running smoothly. Thank you!
Supporting Sorcerer's Place
Has Sorcerer's Place been useful? If you'd like to show your appreciation
for our hard work on the site, and help us pay the bills the site generates
every month, please consider helping support SP.
Thank you!