If you completed The Coming Storm Quest without allying yourself with any of the four competing factions, you will be in Ukazio Harbor at #1 already when this Quest starts. You can bump ahead to the sections on Ukaizo if that is the case.
If you completed The Coming Storm Quest by allying yourself with one of the four factions, then sail to #61 on the World Map. Ships from a rival faction will be waiting for you. The rival faction waiting for you tends to be the one that stood the best chance of laying claim to Ukaizo had you finished The Coming Storm Quest in their favor instead of the faction you did ally yourself. The game estimates that through a combination of which faction other than your ally you had the highest reputation with, and how many Faction Quests you completed for that faction. For example, if you allied with the Vailian Trading Company, but your reputation with the Huana was higher than it was with the Royal Deadfire Company and the Principi, and you only had the last Faction Quest left to do for the Huana before allying with the Vailian Trading Company instead, then it will probably be Huana ships waiting to attack you.
You will be asked if you want to proceed, because there's no going back to the rest of the world once you sail into Ondra's Mortar.
There will be four encounters. You can either help out your faction allies and fight alongside them, or skip out on them and head straight for Ukaizo.
*NOTE* You may have extra allies to get you through the first two encounters without any damage or loss depending on your prior actions over the course of the game.
If you sealed an exclusive alliance with Queen Onekaza, then the Wahaki Tribe can be used as allies.
If you sealed an exclusive alliance with Captain Furrante and left the Slavers in charge of Crookspur, the Slavers can be used as an ally.
If you convinced the Rathun to leave Ashen Maw, you can have a Rathun longship as any ally.
If you allied yourself with Menzaggo in Splintered Reef, you can have the undead from there as any ally.
Note that you can only use an ally once, during either the first or second encounter. If you have only one of the allies mentioned above, you can only use it during the first or second encounter. If you have more than one ally, you can use one for each of the first two encounters to get yourself through those first two encounters without any risk or damage.
The first encounter will be against an enemy ship. You can take it on in either naval combat, or board it. If it's a Huana ship, the crew will be led by Captain Daruku. If it's a Principi ship, the crew will be led by Captain Bassetti. If it's a Royal Deadfire Company ship, it will be led by Captain Reiki. If it's a Vailian Trading Company ship, it will be led by Captain Cipriano. You can use one of your allies mentioned above, if you have any, to take out the ship for you.
The next ship, whichever faction it is with, will be led by an Ogre named Gundruk and will try to attack the ship commanding your faction allies. You can fight it, or leave straight for Ukaizo. Or you can use one of your allies mentioned above if you have any without having used them during the first ship encounter.
The next ship will be a boarding battle. Also, your crew or any companions or sidekicks who are on ship but not in your core party will not be able to help you. Your only help will be Sailors from your allied faction. You also can't use any allies to take out the ship for you. You have to last through the boarding battle. If it's a Huana ship, the leader of the enemy crew will be Prince Aruihi. If it's a Principi ship, the leader of the enemy crew will be Captain Katla. If it's a Royal Deadfire Company ship, it will be led by Captain Masquoro. If it's a Vailian Trading Company ship, it will be led by Captain Baravas.
A monster made of Adra and steel will appear beneath your ship. You can make a Canoneer check of 5 to shoot at it. I don't know if succeeding makes a difference or not.
If you completed The Shadow Under Neketaka Quest in a way that freed the Dragon named Scyorielaphas, then Scyorielaphas will arrive and kill the monster for you. That will make a fight upon landing in Ukaizo a good deal easier for you. *NOTE* This intervention will not happen if you sail to Ukaizo on your own without the help of an alliance.
Now it's a matter of reaching Ukaizo. And that depends on who you made an alliance with.
If you allied with the Huana, their Watershapers will calm the storm for you and allow you to sail to Ukaizo unhindered.
If you allied with the Vailian Trading Company, their Animancers will have a machine on board that creates a sort of "wormhole" for you. You simply sail through it and bypass the storms to reach Ukaizo.
If you allied with the Principi, the mists that surround the Floating Hangman will keep the storms of Ondra's Mortar at bay. You can sail to Ukaizo without a worry.
If you allied with the Royal Deadfire Company, the Submarine will submerge and travel underwater beneath the storms of Ondra's Mortar, allowing you to reach Ukaizo without a hitch.
You can still use a ship of your creation for the latter two alliances without using either the Floating Hangman or the Submarine. But in those instances your ship will then still need to be equipped with both the Blackwood Hull and the Dragonwing Sails to avoid sinking in the storms. Even with the proper ship upgrades, you still need to make a few checks to make it through alive as though you were sailing for Ukaizo on your own without any alliances:
Winds will batter your ship, resulting in 10 damage to your sails.
Your Helmsman needs to be at least Expert level to get you past the Adra Pillar. Your sails take another 10 damage.
All your Deckhands need to be at least Expert level to get you past the whirlpool. Your sails take another 10 damage.
If your Dragonwing Sails are reduced to 0 health, that also means your ship will sink. So be sure you come in with a fully repaired ship before you start. On that point, you may want to spend any alliances you may have (e.g., Wahaki, Rathun, Crookspur, Splintered Reef Undead) to minimize any risks of damage to your ship until you get to this point.
You can use a ship of your own creation for either the Huana or Valian Trading Company alliances, even if your ship isn't equipped with the Blackwood Hull and the Dragonwing Sails. That is because it's your allies who provide methods of minimizing the dangers of Ondra's Mortar, and that do not rely on having a particular ship.
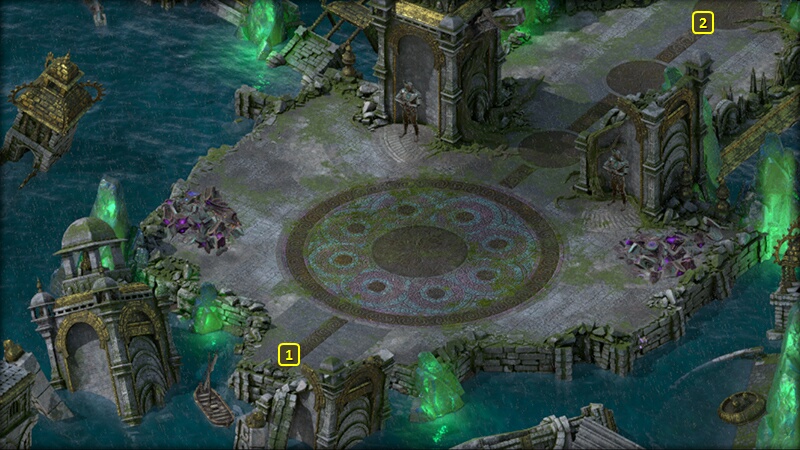
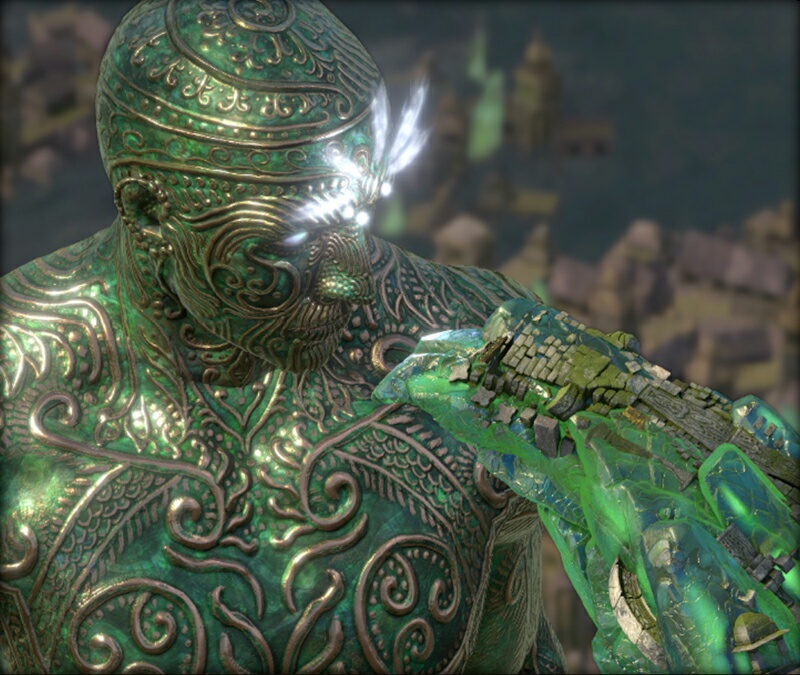
You'll arrive at #1 on the map of Ukaizo Harbor. Step forward a little and the Guardian of Ukaizo, a Dragon-like Construct, will show up.
You actually have the opportunity to Rest before taking that step, so you can grab the opportunity to Rest with Food of your choice. Captain's Banquet could be a choice, given a distinct danger in the fight itself.
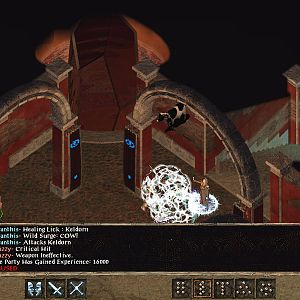
The Guardian is willing to entertain questions, but a fight is inevitable. It starts out the fight aided by a lot of Adra Animats.
It always has the Brilliant (+5 Intellect, +1 Power Levels, regain class resource every 6 sec.), Energized (+5 Might, +2 Penetration, Interrupt on Critical Hits), Intuitive (+5 Perception, 25% chance of converting Hits to Critical Hits) Inspirations active. Its breath weapon inflicts Raw Damage.
Bring it to 75% or less Health, and it summons two nearby Engwithan Titans to join the fight. These Titans can push back with their kick attack, knock down with their slam attacks, and score extra Raw Damage.
The other thing the Guardian does at 75% or less Health is sit in a kind of trance for several seconds. The result is that its one head gets replaced by two new heads. One head has a breath weapon that causes Burning Damage, and can both Push back and Prone victims. The other head has a breath weapon that causes Freezing Damage and Paralyzes victims.
At 50% the Guardian will summon a pair of Engwithan Saints. The Saints can cast spells, and can Dominate victims.
At 25% the original head that could breathe Raw Damage re-emerges as a third head.
It has a LOT of Health, making this a very long fight. And its attacks can occasionally cause Injuries. A lot of healing and / or buffing will be needed for this fight.
*Note* If you freed Scyorielaphas during The Shadow Under Neketaka Quest, then Scyorielaphas will have killed the Guardian of Ukaizo prior to your coming here. That means you only have to fight the two Engwithan Titans and nothing else. However, they will come forward and attack you the moment you arrive, giving you no opportunity to rest.
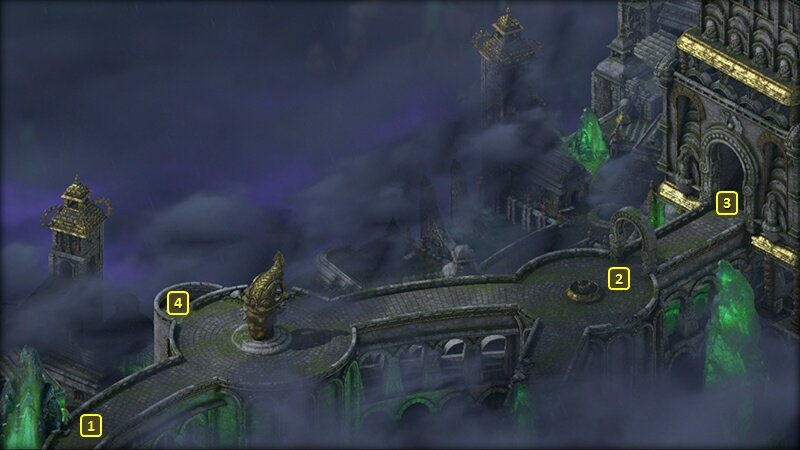
Click on the panel at #2 to turn off the machine that fuels the storms of Ondra's Mortar. That progresses the Quest in two ways.
First, you'll have another conference with the Gods where they try to counsel you on which course to take with Eothas.
Second, you'll see ships from your rival faction pull into harbor. That sets up your last fight, which will take place in the Grand Promenade.
Now return to the Grand Promenade. An enemy party from your rival faction during this Quest will confront you at #2. Any of these fights is likely to include Fighters who can use the Charge ability, so it may be a good idea to rest with Shark Soup as your choice of Food. It will provide complete immunity to any Body Afflictions, like Stunning from the Charge ability.
If the rival faction is the Huana, it will be led by Queen Onekaza.
If the rival faction is the Principi, it will be led either by Captain Furrante or Captain Aeldys depending on who was left in charge of the Principi at the conclusion of the Honor Among Thieves Quest.
If the rival faction is the Royal Deadfire Company, it will be led by Hazanui Karu.
If the rival faction is the Vailian Trading Company, it will be led by Nirro, Canta Nicese. Pallegina will likely be with them as well. Canta Nicese will leave behind a Cloak called Violet Redemption. But there's no point anymore, since there's literally no fights left in the game after this one.
If you win, there will now be an exit at #4 that allows access to the last area of the game, Moi Gweath.
You immediately begin your interaction with Eothas upon arrival. You fundamentally have 6 choices:
Attack him - He simply sucks your soul into his body, ending the game with you trapped within.
Persuade him to end all life - All life on Eora quickly dies off into extinction.
Stand witness to him breaking The Wheel.
Persuade him to give mortals a head start on founding a new cosmic order.
Persuade him to channel his essence into another God, making Berath the undisputed ruler among the Gods.
If you revived Wael's body during The Inner Mysteries Quest, you can call on Wael to attack Eothas. Wael drags Eothas down, but not before Eothas breaks the Wael. The ending will play out pretty much the same as the "standing witness" one.
You now get an epilogue based on the choices you made with Eothas, and the rival factions, and almost every other choice you made throughout the game.
Sorcerer's
Place is a project run entirely by fans and for fans. Maintaining
Sorcerer's Place and a stable environment for all our hosted sites requires a substantial amount of our time and funds on a regular basis, so please consider supporting us to keep the site up & running smoothly. Thank you!
Supporting Sorcerer's Place
Has Sorcerer's Place been useful? If you'd like to show your appreciation
for our hard work on the site, and help us pay the bills the site generates
every month, please consider helping support SP.
Thank you!

 You'll arrive at #1 on the map of Ukaizo Harbor. Step forward a little and the Guardian of Ukaizo, a Dragon-like Construct, will show up.