-

- Forums
- Chatrooms
- Gallery
- Gameplay Videos
- Upload
- Articles
- Mod Reviews
- Shop SP: Games, Movies, Books
|
|
| Pillars of Eternity 2 Video-Based Walkthrough by David Milward |
Outcrop on High
*Evil* Footsteps of the Beast
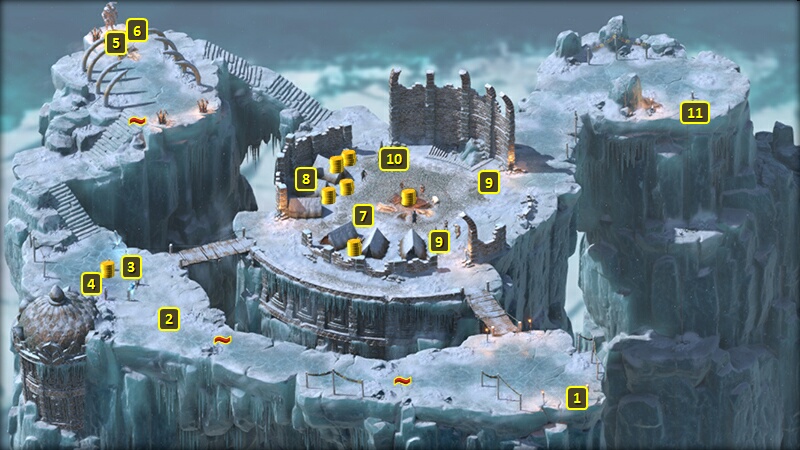
The evil party goes west and disarms a couple of tripwire traps along the way.
Several Frost Shades and Greater Ice Blights will be at #2. The Frost Shades can be especially dangerous. They can of course teleport to other squishy spellcasters like other Shades. But their real danger is that they can use Ninagauth's Freezing Pillar without limit. And that spell sends out periodic pulses of Freezing Damage during its duration. Multiple castings of the Pillar can overwhelm an unprepared party.
The good party can simply regenerate and outlast the enemies. The evil party has to be more careful. I send Zarathos, Mirke and Xoti ahead to get their attention, and invite them to surround the trio. Mirke activates Swift Flurry, Disciplined Strikes and Refreshing Defense. Zarathos activates Swift Flurry, Spirit Frenzy and Enlightened Agony.
Ydwin waits until the horde has locked onto the trio as targets, and then quickly gets in a single strike at a distance with her bow to get to at least 70 Focus. She thereafter puts Ancestor's Memory on Xoti and quickly retreats. She and Tekehu keep themselves well away from the rest of the fight.
Xoti, once Ydwin begins casting Ancestor's Memory on her, casts Barring Death's Door on Zarathos followed by a Salvation of Time. She waits until she regains Salvation of Time, puts Barring Death's Door on herself, and follows that up with Salvation of Time. She thereafter just keeps everything extended without limit, while Zarathos takes the enemies apart. Mirke's Armor Rating and Defenses are high enough that she's never in any real danger.
Ydwin takes Reaping Knives on her 17th level-up. It gives a character a pair of dual-wielded unique weapons that both inflict Raw Damage and add Focus for her whenever they connect for that Raw Damage. It can be a useful option to turn one of the party members into a Focus-generating battery for Ydwin during very long battles. And yes, it can be extended endlessly with Salvation of Time.
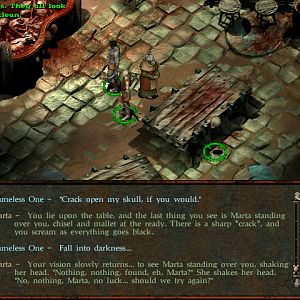
Zarathos uses his Watcher powers to learn the fate of the souls whose bodies are now tied to the stakes.
I continue to the northwest corner, and find a pair of boots called Footsteps of the Beast. Leaving behind a trail that only Hobbles (-5 Dexterity, reduced stride) any enemy that steps on the trail left behind isn't really a big deal, so nobody in either the good or evil parties has any use for them.
*Evil* Champion-Ascendant Grymgaer
I go southeast down the stairs, and battle a cult of Rymrgand fanatics led by Champion-Ascendant Grymgaer. I of course outlast them with the Salvation of Time-Ancestor's Memory loop.
Grymgaer himself leaves behind Boots of the White and a Helm called the Horns of the Aurochs. I'll soon give it to Serafen.
I collect whatever else I can get in the way of loot, and then destroy the nearby Sigils.
Champion-Ascendant Grymgaer
I "Wait" until day time, and set up a bottleneck just at the bottom of the stairs. Aloth uses Grease and Pull of Eora from Jernaugh's Careful Calamities.
Alliria spams Fireballs, while Mirke spams Stunning Surges. Victory is pretty much assured once the crowd thins out.
Rekke will get the Horns of the Aurochs.
*Evil* Glacierbane
The evil party makes its way to a rope and grappling hook at #11, and it leads down to the Rimebound Temple through a scripted interaction.
A Perception check of 14 on the way down reveals an object lodged in the ice. Zarathos makes a Might check of 16 to pull it out of the ice, and obtains a War Hammer called Glacierbane.
This can be a useful item for some character builds. It scores extra Raw Damage with each hit. A character that wants to be able to score damage on heavily-armored enemies will value the stacking Harder than Ice power, although that requires the wielder to take Freezing Damage to put it into play. In the alternative the Shattering power can be very useful against Wizards and bosses since it suspends beneficial effects on a Critical Hit. But I had other plans in mind for my characters. Making the Might check then and there means that the weapon is in my inventory then and there when I reach the bottom.
Glacierbane
Alliria can't make the Might check, so she takes the "try something else" option when it becomes available. She then uses a fire-based spell, a Fireball, to melt the ice around it. An Immolator would have worked too.
Glacierbane drops down to the bottom. That means I have to make my way to the Rimebound Temple and then pick it up.