-

- Forums
- Chatrooms
- Gallery
- Gameplay Videos
- Upload
- Articles
- Mod Reviews
- Shop SP: Games, Movies, Books
|
|
Northweald
Cwineth
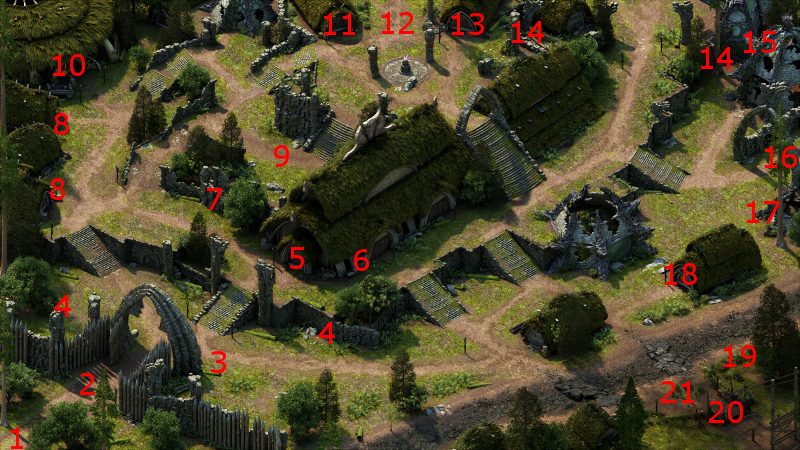
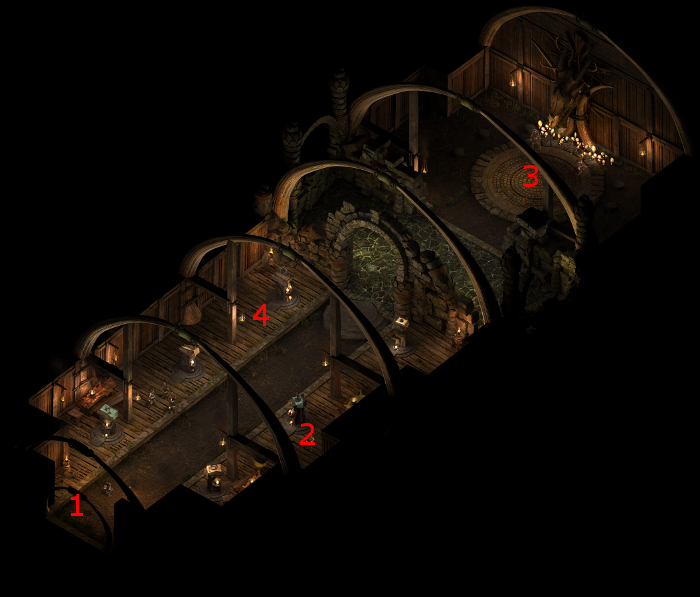
The party is at the gate at #1 on the map of Hearthsong. The entrance to the Celestial Sapling is at #20.
I speak to Cwineth, who's at #7 on the map of the Celestial Sapling. She wants me to give her expedition party warning (who happen to be in an area called the Northweald) of an impending attack by a Glanfathan tribe called the Fangs, or help defend them if it comes to that. The request starts the quest called At the Mercy of the Tribes. I leave the Sapling, and Hearthsong as well, in order to travel to the Oldsong district.
I start off at the point marked #1 on the map of Oldsong. I travel north until I reach the World Map Exit at #10, which opens up access to Northweald.
Rimecutter
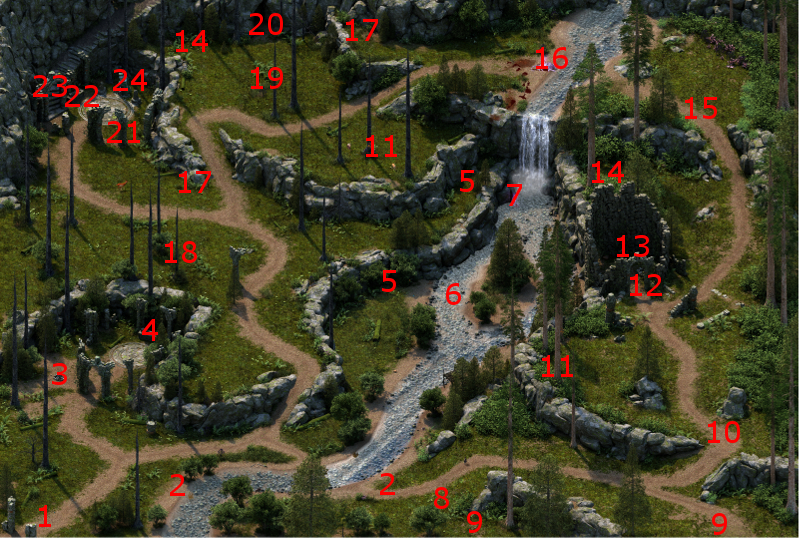
I arrive at #1 on the map of Northweald. It turns out that Azzuro will in a day or so arrive at Caed Nua, ready to sell a random item from his inventory. I return to Caed Nua and reload my quicksave until it is the Rimecutter Battle Axe. I purchase it from the Stronghold menu once that is the item he shows up with.
I enter the Great Hall and loot it from the rewards chest. It will be the Devil of Caroc's weapon for the rest of the game. It is the only weapon in the game that has both a Critical Hit Modifier and a bonus to Attack Speed that will stack with the Critical Hit Modifier and Attack Speed bonuses provided by the 'Durganized' enhancement. That definitely makes it one of the best single-hand weapons in the game, and ideal for a Rogue that wants to land as many Sneak Attacks and Critical Hits as she can. It already comes with the Freezing Lash Damage enchantment as well.
I happen to have a Ruby and a Vithrack Brain on hand, so I add the Exceptional enchantment as well. There's still enough room to add the Legendary enchantment as well.
I rest up with the Chapel resting bonus (+3 Resolve), the reason for which will soon become clear. I then return to Northweald.
Wolf Camp
I'm back at #1. At around #3 will be a pack Wolves that are killed off easily enough. A nearby corpse is riddled with arrows, which suggests that the man was killed by Glanfathan Hunters instead of the Wolves, a clue for purposes of the quest called At the Mercy of the Tribes.
Cwineth in Hiding
I head east. Cwineth appears again at #8, this time to inform me that the rest of her expedition has been surrounded by the Fangs. She naturally asks for my assistance in freeing them.
Fang Bright Blood
Alliria puts on the Ring of Changing Heart. The good party then proceeds to #10, where they encounter a large party of Glanfathan Hunters led by Bright Blood.
They are bound and determined to wipe out the expedition or otherwise teach them a lesson. The quest then boils down to siding with Cwineth to free the expedition, or giving them Glanfathan justice at the behest of Bright Blood.
Alliria chooses to side with Cwineth. The simplest way to do it would be to slaughter the Fangs then and there, but there's also a more involved way to do it as well.
Alliria makes a Resolve check of 17, aided by the Chapel resting bonus from Caed Nua and her Ring of Changing Heart, to convince Bright Blood to let the expedition go free and unharmed. Bright Blood insists on one condition, the expedition's leader must leave himself to Glanfathan justice and mercy. The alternative route to convincing Bright Blood to accept the offer was to have very high reputation with Twin Elms, but I didn't have that.
*Evil* Zakara falls in with Bright Blood's request to wipe out the expedition.
Mercenary Captain Esmar
I head north to #12, where I find the expedition survivors led by Captain Esmar. I could now fulfill Bright Blood's condition by persuading Esmar to let himself become a prisoner, either of the Fangs or in the Caed Nua dungeons.
However, Alliria decides she wants to free all of them. Esmar indicates that escape to the north is impossible until the Stelgaer pack in that direction is dealt with.
*Evil* Mercenary Captain Esmar
The evil party decides to slaughter the Mercenary expedition outright. Zakara tags Esmar with Sworn Enemy, and then goes after him with her Flames of Devotion. Eder and Maneha let the other Mercenaries come to them on the flanks. Durance does his usual buffing-up.
The Mercenary Wizard and the Mercenary Healer can be a problem if I don't take them out quickly enough and if they're allowed to cast enough spells. Here I show a good way to neutralize them. Zahua uses his figurine to place a couple of large beetles near the Wizard, while Aloth his figurine to place a few spiders near the Healer. That means enemy spellcasting will be targeted towards my summons, not my party. In fact, the Beetles killed the Wizard outright.
Aloth then casts Eldritch Aim, and then begins to pelt the enemy with Chain Lightning spells. He seals the deal with a Call to Slumber on the survivors.
Stelgaer Pack
The Stelgaer pack is at #15. The usual tactics suffice, although things take a little longer than usual. Note how Kana's The Killers Grew Stiff invocation and Grieving Mother's Amplified Wave can set up them for Deathblows from the Devil of Caroc.
I go back and inform Captain Esmar that the way is now clear. He and his men promptly depart. There will be some gems and coins in the urns at #13.
*Evil* The evil party sets up its shield wall at the top of the trail just east of the pack. Aloth then does the sequence of Eldritch Aim, Chill Fog and Malignant Cloud, which pretty much suffices.
Fangs Attack
The Fangs will go hostile now that I've helped the expedition escape. The Fangs party includes a Cipher, a Druid, and a Barbarian. I initially have a rough go of it, since Alliria and Grieving Mother got knocked off their feet right away. However, Kana and Devil of Caroc manage to hold tank positions, while Hiravias leads off with Nature's Mark and Woodskin. Things get better once Sagani and Ituumak team up to take out the Druid. Alliria and Grieving Mother also take out the Cipher together once they've regained their feet. Hiravias adds in a Relentless Storm just to be sure.
At the Mercy of the Tribes
Alliria returns to Cwineth with the news. Cwineth in turn offers three possible rewards: 9,000cp, an Arquebus named Long-Feller, or the Dungeon Delver Talent. I have no use for the gun, and money is never in short supply, while it is the talent that has the most enduring and meaningful value in the game. The Dungeon Delver talent is especially beneficial for Alliria, as her build is partially centred around maximizing the damage of Critical Hits and in turn maximizing the chances of triggering Strange Mercy. I return to Hearthsong.
*Evil* At the Mercy of the Tribes
Zakara now reports her success to Fang Bright Blood. She has her choice of 9,000cp, a Hunting Bow named Prey Maker, or the Wild Running talent (+10 Defense vs. Hobbled and Stuck, +10 Defense vs. Disengagement attacks).
I choose the talent, and for similar reasons. The Talent will always have the longest lasting value over the long-haul.
Ridai
The entrance to the Passage of Six is at #5 on the map of Hearthsong.
Ridai will be at #4 on the Passage of Six map. Somebody named Arthwn came back alive from a Stelgaer hunt claiming victory, while also claiming that his competitor and Ridai's brother, Fiorm, exiled himself in shame. Ridai doesn't believe it, and wouldn't mind if the Watcher looked into matters to determine what he feels is the truth. This conversation triggers the Hunter, Brother quest.
I stop off at the Celestial Sapling to sell off my excess loot and rest up. I then travel to Elm's Reach.
Arthwn
I start off at #1 on the map of Elm's Reach. I speak to Arthwn at #9, who of course gives a self-glorifying version of the story whereby he killed the Stelgaer single-handedly while Fiorm did not even get in a single blow. Fiorm thus exiled himself in shame. I now go back to Northweald.
Elder Bear
I travel northwards, and get attacked by a few Bears led by an Elder Bear at #18. I kill them off easily enough.
Persoq
The good party now travels to #19. They encounter several Fangs hunters surrounding a dying Stag, which happens to be the current (but for not much longer) incarnation of Persoq, the subject of Sagani's personal quest, The Long Hunt.
I have a few options once things sink in for Sagani in terms of what I counsel her to tell the now dying Persoq:
*Evil* Stelgaer Spirit
I show this part from the perspective of the evil party, which heads to #16. There will be another pack of Stelgaer to fight and kill.
There will also be the corpse of a very large and dead Stelgaer here as well. Zakara uses her Watcher abilities to communicate with the spirit of the dead Stelgaer. She learns the truth of what happened, Fiorm and the Stelgaer killed each other during the hunt, with absolutely no involvement from Arthwn.
A major companion adventure becomes available, but it doesn't matter to me which one. It happened to be St. Ifen's Knot.
12th Level
Every companion now has enough experience to advance to their 12th levels.
Sagani now selects the Weapon Focus: Soldier talent. It will provide a +6 Accuracy bonus both for her Tallgrass pike, and her Stormcaller bow (as a Soulbound weapon).
Grieving Mother selects the Apprentice's Sneak Attack talent. She can set up her targets for its use either by positioning herself behind them, or using Phantom Foes beforehand. And again, it's all about maximizing the Focus she acquires with each blow she strikes.
She also selects the Mind Plague power. It can hit multiple foes with both Daze and Confusion, severely impairing their ability to fight back.
Hiravias selects the Scion of Flame talent, which will increase his Burning Damage Reduction and the Burning Damage of some of his spells.
Devil of Caroc selects the Weapon Focus: Soldier talent. It will increase the Accuracy of her attacks with Rimecutter, and in turn increase the probability of a Critical Hit along with the enhanced-Critical Hit Damage modifier that comes with using a Battle Axe.
Kana selects the Bull's Will talent. He will have a very good Will Defense, especially after combining this talent with his Ring of Protection. It's important for more than one reason. As the party chanter, he'll need to keep his own mind free in order to keep the They Shielded Their Eyes 'Gainst the Fampyr's Gaze phrase active when faced against foes like Spores and Fampyrs. He will also be the natural target for self-Stunning and then having Grieving Mother activate her Defensive Mindweb power.
He also selects the Invocation named The Bride Caught Their Ruse And Set To Make Them Pay chant. It will provide hefty +5 bonuses to Dexterity, Intellect and Perception to party members. Can be a useful option during especially intense fights.
Alliria selects the Scion of Flame talent. The bonus to Burning Damage will enhance both her Flames of Devotion, and her Sacred Immolation power, which she will take on the next level-up.
Rain Blights and Lurkers
I head back down south and then upstream until I reach #6. I have to fight a few Forest Lurkers and Greater Rain Blights, but standard tactics suffice to wear them down.
Fiorm
The dead body of Fiorm will be at #7. Alliria uses her Watcher abilities to speak with his soul. She learns that Fiorm deliberately left Arthwn out of the hunt, and he and the Stelgaer killed each other in combat. The party returns to Elm's Reach.
Hunter, Brother
Now I speak to Arthwn again. He'll want me to cover up for him, to avoid even further shame for his lowly Twice-Split Arrows tribe. How you reply is ultimately of no consequence, since you'll still have a decision as to how to resolve the quest. Alliria chose the Passionate reply.
I return to the Passage of Six, and inform Ridai that I have uncovered the truth. Now I speak to Anemenfath Bethwl at #3. There are multiple possibilities for which story you tell.
If you want to side with Ridai, then you need to first select the Deceptive option that Fiorm went into exile, then the Honest option that it was Fiorm that killed the Stelgaer, and then the Deceptive option that Fiorm went into exile for having needlessly endangered Arthwyn. That will lead to Bethwyl deciding in Ridai's favour. Ridai will reward you with a spear called Delem Rawdha.
Alliria chooses to select Honest dialogue responses all the way through: that Fiorm is dead, that it was Fiorm who killed the Stelgaer, and that Fiorm chose to fight the Stelgaer by himself when it was supposed to be a group effort but Arthwn lied about getting the kill afterwards.
Bethwyl will decide that both Arthwn's and Ridai's tribes brought shame upon themselves. Bethwyl will also rewards Alliria with a sword called Sheathed in Autumn. I have no use for it though, so I'll sell it.
There is a third route described below.
*Evil* Hunter, Brother
Zakara selects the Cruel option with Arthwn in Elm's Reach, but it has no consequence.
She uses Deceptive options all the way through to perpetuate the lies that Fiorm exiled himself, that it was Arthwn who killed the Stelgaer, and that Fiorm shamed himself by exposing Arthwn to danger who survived nonetheless. Arthwn rewards her with a Hunting Bow named Lenas Er, but I have no use for it.
Both parties decide to collect some Bounties.