-

- Forums
- Chatrooms
- Gallery
- Gameplay Videos
- Upload
- Articles
- Mod Reviews
- Shop SP: Games, Movies, Books
|
|
Celestial Sapling
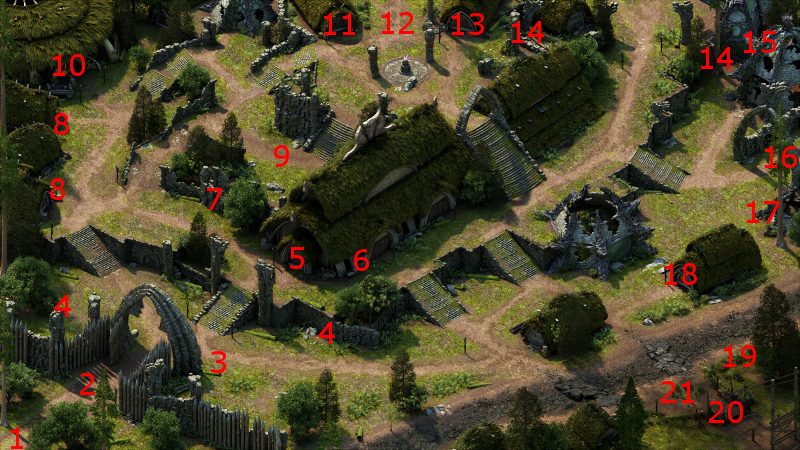
The entrance to the Celestial Sapling is at #20 on the map of Hearthsong.
*Evil* Retraining Durance
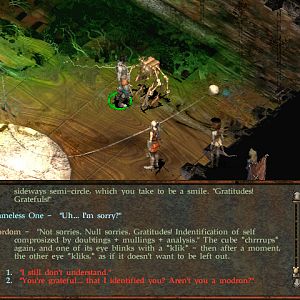
The initial entrance is at #1 on the map of the Celestial Sapling. The innkeeper is at #6.
Here is where I retrain Durance, with the point of replacing his Weapon Focus (Noble) talent with the Weapon Focus (Soldier) one instead. It will allow him to apply a +6 Accuracy bonus to both the Pliambo per Casitas Arquebus, as well as the Steadfast sword as a soulbound weapon.
He'll obtain the Arquebus fairly soon. He'll even be able to use the Godansthunyr War Hammer as an interim weapon.
The Sealed Missive
At #13 is the Head Monk, along with several other Monks from the same order as the Monk who died at Elmshore. Alliria gives the Sealed Missive to the Head Monk to conclude The Sealed Missive task. I get rewarded with some xp, a small shield called Aila Braccia, which I'll just sell, and a moderate boost to positive reputation with Twin Elms.
A Legendary Companion Adventure becomes available, but I don't care which one. It happened to be The Solitary Mark. I assign Pallegina to it.
*Evil* The Sealed Missive
Zakara shows the Open Sealed Missive to the High Monk. The High Monk's initial inclination is to attack. I could try to talk him out of it, but I fully intend to slaughter all of them.
Zakara tags the High Monk with Sworn Enemy and then lays into him with Flames of Devotion. Eder and Maneha hold the flanks. Zahua waits until the position solidifies before attacking from one of the flanks.
Durance casts Shields of the Faithful and Consecrated Ground before hitting from the flank as well.
Aloth starts with Eldritch Aim followed by Call to Slumber. That is pretty much enough to assure victory.
The High Monk leaves behind a Small Shield called Aila Braccia, but I have no use for it.
The evil party has taken another moderate loss of reputation with Twin Elms.
*Evil* 11th Level
I begin the video by heading over the west side of the Celestial Sapling. I ignore Cwineth at #7 for the time being. The point is to pick the lock on the chest at #10, which gives everyone just enough experience to advance to their 11th levels.
Zakara gets Righteous Soul, which increases her Defenses against Charming, Domination, Disease, Poisoning, Frightened and Terrified.
Eder acquires Critical Defense, which turns a percentage of Critical Hits into Hits and a percentage of Hits into Grazes. This is a key ability for any Fighter-tank build since it will reduce the amount of damage sustained over the course of the battle.
Maneha acquires Threatening Presence. It can passively afflict any nearby enemies with Sickened as long as she remains stationary, which she often does as a tank. This ability, in combination with Durance's Painful Interdiction, will allow her to take full advantage of her Brute Force ability.
Zahua acquires Iron Wheel, which increases his Damage Reduction by +1 for each Wound he has. This can be really useful, especially in fights where I have him turn off his Aggressive AI.
Durance selects Consecrated Ground as his next mastered spell. It's really a no-brainer, being able to in every fight invoke a power that will passively recoup Endurance for 20+ seconds.
Aloth learns two spells. One spell is Chain Lightning, which inflicts Electrical Damage only on enemies, with the most damage being inflicted on the initial target.
The other spell is Death's Ring, which inflicts Corrosive Damage only on enemies within a certain radius centred around the Wizard. It can be a great spell to use when multiple enemies swarm the party from all sides. It can even kill weaker enemies outright.
He also selects Merciless Gaze as his next mastered spell. The idea is that I can use it either before he uses a sequence of area-of-effect damaging spells, or he's using his Kalakoth's Minor Blights, with the intention of increasing his probably for increased damage through Critical Hits.
*Evil* Frightened Villager
I show the next few parts from the perspective of the evil party. At #3 is a Frightened Villager who informs me that Lord Raedric has returned from the dead, and seeks revenge. This dialogue triggers The Champion of Berath quest. The evil party goes to Caed Nua.
*Evil* Binding Rope
Waiting for me in the rewards chest in the Great Hall will be a belt called the Binding Rope, which is the reward for the Bound and Buried companion adventure.
Zahua wears it for the rest of the game. The Constitution bonus is one of the key points, and indeed a Monk's powers depend in no small degree on sustaining damage in order to acquire Wounds. The more the better. The other key point is that any enemy that strikes the wearer in combat is subject to getting Stuck for at least 3 seconds. Stuck inflicts a -20 penalty on Deflection, which means that Zahua can in turn retaliate with an attack of his own that has the increased probability of inflicting a Critical Hit.
*Evil* Vision of Durance's Staff
Zakara will, after resting enough times during Act 3, have another vision of Durance's staff whereby she distinctly observes a symbol of twelve circles on the staff.
She speaks to Durance about it, and he is willing to oblige but only for so long.
*Evil* Berolt
The evil party, after resting, now has a new visitor at Caed Nua. That visitor is an Aedyran dignitary named Berolt who wants safe passage through Eir Glanfath.
Zakara offers safe passage, and then chooses the Aggressive option. This option raises her stronghold Prestige +1, but it also earns her another moderate loss of reputation with Twin Elms.
*Evil* The Champion of Berath
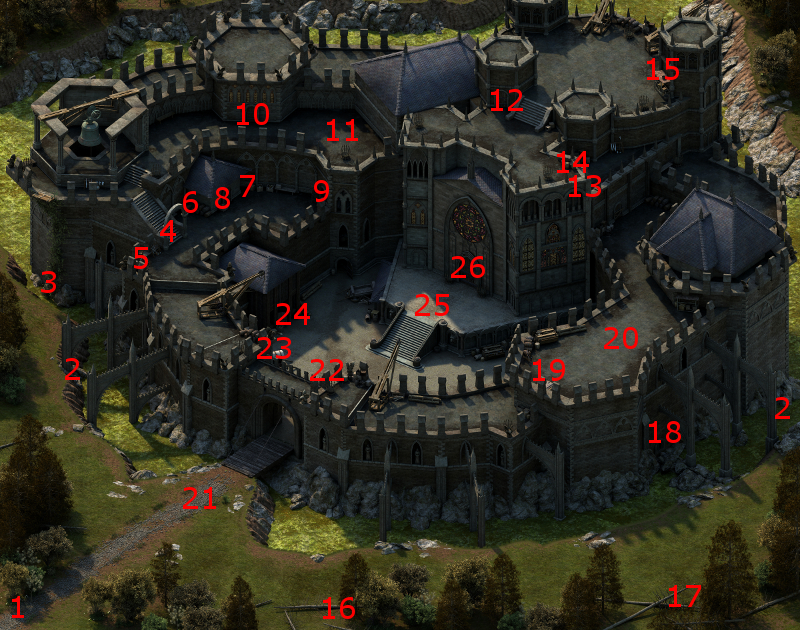
I start off at #1 on the map of the exterior of Raedric's Hold. At the gate around #21 will be a Fampyr. It is apparently possibly to get her to join you as a Hireling, but I've never succeeded at it and admit I am unsure how to do it. However, I take her up on her offer to take me straight to Lord Raedric.
That will bring the party to the door #12. Lord Raedric and his Fampyr minions will be waiting near #15. Note that no matter how you conduct the dialogue with him, he is always going to attack you.
I keep the evil party at the stairs just south of Lord Raedric. Aloth plants a Bounding Missiles Trap, while Durance plants a Searing Seal. Zakara goes forward, speaks to Lord Raedric briefly, and leads the Fampyr horde back to the rest of the party.
As that happens, Durance begins his sequence with Prayer Against Treachery, with the point of immunizing the party against the Fampyrs' Charm and Dominate powers. The next spells in his sequence are Devotions for the Faithful, Consecrated Ground, Circle of Protection and Salvation of Time.
Aloth begins with Bulwark Against the Elements, with the point of protecting himself against Raedric's Fireball power. The next spells in his sequence are Eldritch Aim, Pull of Eora, Malignant Cloud, Kalakoth's Minor Blights and Merciless Gaze.
Lord Raedric and a few of the Fampyrs manage to make it past crowd-control. Zakara tags Raedric with Sworn Enemy, and lays into him with both Flames of Devotion.
The Fampyrs that broke through form a cluster just in front of the party, so Aloth begins to make use of his Gaze of the Adragan spell. After that, he begins to bombard his enemies with his Blights. Durance also casts another Prayer Against Treachery just to be sure. The battle is won without much fuss.
It is Eder who will get He Carries Many Scars. The Endurance regeneration will enhance what he already enjoys through Constant Recovery. The Damage Reduction, especially the bonus Damage Reduction that will kick in should he happen to lose enough Endurance, will only augment his tank role.
Concluding this quest now makes an average companion adventure available. At this point the available choices aren't that meaningful, so I accept whichever one happens to turn up. It turns out to be The Page Unturned in this instance.
The Champion of Berath
The good party has to conduct this battle differently, partly because it doesn't have Durance's Prayer Against Treachery, and partly because they don't have the same crowd-control resources.
Kana readies a Scroll of Defense and a Scroll of Protection. The Devil of Caroc plants a Malignant Cloud trap at the top of the stairs. Alliria likewise speaks to Lord Raedric for a bit, and then leads the horde back to the rest of the party.
Kana uses his Scroll of Defense (+20 to all Defenses) as Alliria is coming back, and then uses his Scroll of Protection to reduce the duration of all hostile effects by 50%, in order to minimize the chances of the Fampyrs' Charm and Domination powers disrupting the party.
Hiravias protects the party with Moonwell and Form of the Delemgan just as Alliria regroups with the rest of the party.
The enemies soon swarm around the party, and that's when Hiravias unleashes a Relentless Storm. Grieving Mother also makes use of Ectoplasmic Echo.
Since Sagani finds herself right in the thick of it, she switches over to her Tall Grass pike. She also tags multiple Fampyrs in a tight cluster with her Ring of Searing Flames.
Hiravias also demonstrates another idea. If a group of enemies are tightly clustered near party members, a well-placed Embrace the Earth-Talon spell can leave them Petrified and vulnerable to massive damage right next to ready for the attack party members. Although in this instance, I accidentally caught Grieving Mother in its red-circle, but no harm resulted.
Soon only Lord Raedric himself is left. Alliria tags him with Sworn Enemy, and then nails him with Flames of Devotion.
11th Level
The good party now has enough experience to advance everyone to their 11th levels. Alliria gets Coordinated Attacks. It is a passive ability that provides a +10 Accuracy bonus to a party member when the party member is attacking the same target as her. This ability can be really powerful, especially when it is Devil of Caroc who is benefitting from it.
Kana acquires the Phrase called Aefyllath Ues Mith Fyr, which provides a +25% Burning Damage bonus for party members' weapons. It also stacks with the Burning Lash enchantment. I include it in the same Phrase sequence as The Dragon Thrashed, The Dragon Wailed.
Devil of Caroc acquires the Death Blows ability. It allows her to inflict double damage on her target when her target is subject to two more afflictions that make it vulnerable to sneak attacks. One of my mainstay strategies is to inflict two more such afflictions on multiple targets. For example, a Phantom Foes from Grieving Mother and a Relentless Storm from Hiravias will allow Devil of Caroc to hit her targets with double damage.
Hiravias makes Wood Skin his mastered 2nd-level spell, which allows him to provide his comrades with several Damage Reductions every fight.
Grieving Mother selects two Powers. One is Disintegrate, which inflicts hefty Raw Damage on a single target at a distance, and it is arguably the best ranged single-target damage ability.
The other Power is Amplified Wave, which will knock multiple enemies Prone over a very large area. In fact, if she can recoup her Focus fast enough with her melee attacks, she can virtually keep the enemy horde locked down and helpless. That it renders the enemies vulnerable to Sneak Attacks is an added bonus.
Sagani acquires the Stunning Shots ability, which allows her to Stun her target at a distance when Ituumak is also attacking it. It makes taking down enemy spellcasters that much easier.
*Evil* He Carries Many Scars
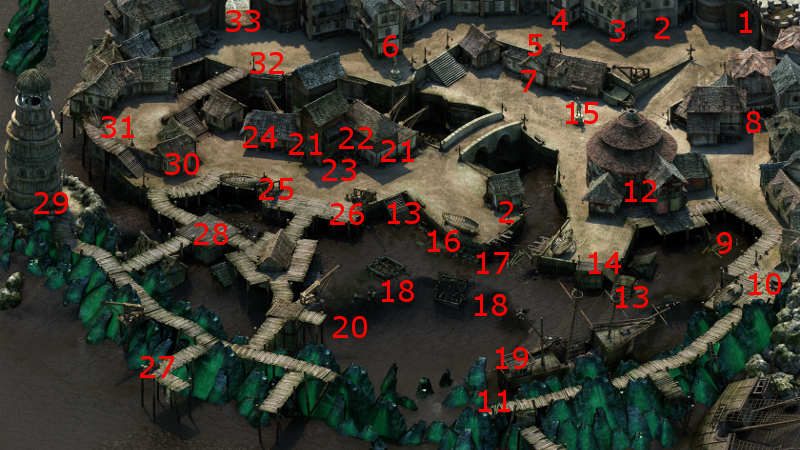
I now plan on enchanting He Carries Many Scars for Eder. I make my way out of the Keep, and head towards Ondra's Gift.
Arriving in Ondra's Gift results in Azzuro stopping by Caed Nua with an item for sale. I insist on reloading until it is the Rimecutter axe, as I figure it will make a good interim weapon for Zahua. Once it does become available, I purchase it from the Stronghold menu.
I stop off at the Salty Mast and rest up. I leave and now it is night time. That means Curnd will be available at #8 on the map of Ondra's Gift. I purchase three gems from him, a Diamond, a Sapphire and a Ruby. The first two are for the armor, while the latter is for the axe.
I now go about enchanting He Carries Many Scars. I add raise its quality enchantment to Exceptional, while I add +2 Perception to it. The latter enchantment will help Eder's Accuracy not just with his standard attacks, but also when he knocks enemies Prone through Overbearing Guard. The video concludes with the evil party returning to Caed Nua.
*Good* I have Kana wear the armor on an interim basis. I added the Exceptional, +2 Perception and Shock-Proofed enchantments to it.
*Evil* Rimecutter
I make my way back to the Great Hall, and pick up the Rimecutter axe from the rewards chest.
It is an interim weapon for Zahua, so I don't mind using up its enchantment slots then and there. I add the Exceptional Quality and Kith-Slaying enchantments to it.
Marked Amulet
The good party has also returned to Caed Nua. Waiting in the rewards chest in the Great Hall is the Marked Amulet as a reward for The Solitary Mark companion adventure. I have no use for it though, so I sell it off along with the rest of my excess loot.
I return to Hearthsong. I now go to the exit at #16 on the map of Hearthsong, which is now accessible in the wake of having received permission from Anemenfath Bethwyl. It now provides access to the other districts of Twin Elms. Elm's Reach is my next destination.