-

- Forums
- Chatrooms
- Gallery
- Gameplay Videos
- Upload
- Articles
- Mod Reviews
- Shop SP: Games, Movies, Books
|
|
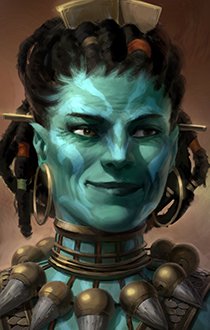
MANEHA, F AUMAUA BARBARIAN
Why She's Included and How to Use Her
A Barbarian with repressed memories of committing horrible atrocities in a past life, what's not to like for the evil party, right?
The key point for a Barbarian is always how to make best use of the Carnage ability. And Carnage is best done when it's used not just to inflict damage on several enemies with attack, but when it's done with a weapon that has on-hit effects as well. That is to say, when Carnage also afflicts multiple enemies with those on-hit effects too in addition to the damage.
Certainly a lot of great Barbarian builds are based on using two-handed weapons that inflict both massive damage and on-hit effects on several targets with each hit. Here I show how to use a Barbarian build that serves as an effective off-tank. It combines a particular weapon with a very hard to find pair of gauntlets that together inflict cumulative penalties to Accuracy upon enemies caught within Carnage's area-of-effect.
Location
She can be recruited at #10 in Stalwart Village after killing Warleader Darzir, and after leaving the village and returning.
Personal Quest
Stats
Skills
Athletics: This skill is important for any character on harder settings, even squishy spellcasters. It helps any character go longer between resting, which is especially crucial during the Hard or Path of the Damned settings. It also provides bonus Health and Endurance.
Survival: Maneha is a combat-oriented character, so developing this skill for the resting bonuses makes sense.
Abilities
1st Level - Barbaric Yell: Her default first-level ability, and I can't do anything about it.
3rd Level - Savage Defiance: A powerful self-heal ability for her, which can be commendable when she's being developed as a tank. Should she take enough damage over the long haul, she can pick herself back up by using this ability.
5th Level - Brute Force: Allows a Barbarian to target the Fortitude Defense instead of Deflection if the former is lower. By itself this passive ability will mean little, since a lot of enemies will have a significantly higher Fortitude than Deflection. However, combine it with the Barbarian's Threatening Presence and another power that imposes the Weakened effect (e.g., the Priest's Interdiction power) and that means at least a -30 penalty to Fortitude. That is when Brute Force really starts to have a significant impact for the Barbarian.
7th Level - Thick-Skinned: Increases Maneha's Damage Reduction by 2, which is always welcome for any tank.
9th Level - One Stands Strong: A passive ability that increases Maneha's damage by 20% whenever she's next to at least two enemies, and considering that I'm building her as a tank that will be almost every fight from this point onwards. She also can only get Flanked if two or more enemies surround her.
11th Level - Threatening Presence: This aura can passively afflict any nearby enemies with Sickened as long as she remains stationary, which she often does as a tank. In combination with Durance's Painful Interdiction, or Aloth's Wilting Wind, it will allow her to take full advantage of her Brute Force ability.
13th Level - Blood Thirst: This ability erases her need for Recovery time whenever she lands a killing blow on her target. This ability in particular allows a Barbarian to play at both a heavily-armored tank and a damage dealer at the same time.
15th Level - Blood Lust: This passive ability temporarily increases her Attack Speed by 20% should she personally kill two foes. This is another ability that allows a Barbarian to play at both a heavily-armored tank and a damage dealer at the same time.
Talents
2nd Level - Accurate Carnage: Increases the accuracy of any attacks against targets beyond the initial target who are affected by Carnage. A no-brainer for any Barbarian.
4th Level - Gallant Focus: The idea here is that I enjoy two Paladin-esque auras at once, Damage Reduction from Zakara's Zealous Endurance and an Accuracy bonus from this talent.
6th Level - Weapon and Shield Style: A must for any character built as a tank.
8th Level - Superior Deflection: Provides a +5 bonus to Deflection, which is sensible for any character that relies on a shield.
10th Level - Hold the Line: Like Eder, I want Maneha to be able to hold multiple enemies in place in order to protect Aloth. And enemies usually don't risk Disengagement attacks from her since her Hatchet packs a punch in its own right.
12th Level - Weapon Focus (Peasant): Improves her Accuracy with Hatchets.
14th Level - Veteran's Recovery: It is a weaker version of the Fighter's Constant Recovery, which will give her a slight amount of regeneration. Such is always welcome for a tank character.
16th Level - Stalwart Defiance: This talent enhances Savage Defiance so that it not only regenerates Endurance, but also raises all Defenses by +10. If Maneha plays it right during later levels, she rarely needs to use Savage Defiance, so this talent could wait.
Inventory
Captain Viccilo's Anger Looted from one of Brynlod's Deadfire minions after pursuing the bounty on him. The penalty to Accuracy from the Fatigue effect will stack with the penalty to Accuracy from the Daze effect of her Glittering Gauntlets. In fact, these two items together form the ideal setup for a Barbarian-tank build, since the on-hit effects of both items will affect multiple targets within Carnage's area of effect.
Dragon's Maw Shield: Looted from the Elder Skuldrak from the top of the West Tower. The +1 Engagement is certainly helpful for her tank role. The extra Savage Defiance use may be helpful during particularly long and intense battles. The Dragon's Breath power is not a big deal. The real benefit for having a Barbarian use this shield is that the Bash ability benefits from Carnage. And that in turn means multiple chances to trigger the Taste of the Hunt power when she uses Bash. Once a Taste of the Hunt triggers, she'll recoup Endurance when next she strikes her target with her Hatchet.
The Grey Sleeper Obtained after the completion of The Grey Sleeper quest. I keep this as her secondary weapon, and it does provide interesting options. This is one of the weapons that is particularly beneficial in conjunction with the Barbarian's Carnage ability, since the Paralysis, Invoke Vessels and Twin Stones powers will have multiple chances to trigger. The Slow Spirits power also provides an option whereby she can, at the start of a particularly intense fight, invoke the power to slow down a mass of enemies before switching back to her hatchet and shield setup.
Argwes Adra's Helm: Purchased from Hamond's Emporium at #10 in Stalwart Village during Part 2 of the White March expansion. The obvious point is to add +3 to Resolve (and therefore also Deflection) and thereby increase her durability as a tank.
Argwes Adra: Looted from the ancient Fampyr at #13 in the eighth level of Endless Paths. Plate Armor is always a natural choice for a tank build. Even if it's used rarely, the Second Chance power can be particularly helpful to Maneha. If she gets revived by the Second Chance, she can immediately invoke her Stalwart Defiance power to recoup her Endurance. I also added the Superb Quality, the +2 Dexterity, and the Crush-Proofed enchantments to the armor. She will get other attribute bonuses from other item slots, so the armor becomes the default choice for adding a Dexterity bonus.
Ruphec's Watchful Cloak MKII: Purchased from Yduran at #8 in Stalwart Village. The +2 Perception bonus is welcome for any character that attacks with great frequency. That it makes its wearer harder for enemies to Flank also makes it an ideal cloak for any tank character.
Glittering Gauntlets: A reward for the The Glass Tree companion adventure. The +9 bonus to Deflection is the obvious benefit. The Daze effect is especially powerful in the hands of a Barbarian, since it will affect all targets within Carnage's area of effect. That makes the Gauntlets the ideal gloves for a Barbarian-tank build.
Gwyn's Band of Union: The +4 bonus to Intellect is the key point, since it will enlarge Carnage's area of effect. It will also increase the duration of the Fatigue effect from her Hatchet and the Daze effect from her Gauntlets. The ability to use Blessing once per encounter is also a nice perk.
Ring of Overseering: Obtained from the chest at #7 in the Esternwood, as an item from the Esternwood - Upper Hidden section of the Random Drop List. The point is to increase the range of Carnage, as well as Threatening Presence.
Sentinel's Girdle: In a chest at #16 in the Cragholdt Bluffs. The obvious benefit is that it increases not only the damage against the enemy that she strikes directly, but also the Carnage damage against any nearby enemies as well. The defensive bonus vs. push attacks will help her hold her tank position. The Watchful Presence is possibly a worthwhile option for a non-spellcaster if Durance can't cast it in the right situation.
Boots of the Long March: Obtained from the corpse of a dead adventurer at #21 in Dyrford Crossing. The bonus to Endurance, both directly and indirectly through the bonus to Athletics, is welcome for any tank character.