-

- Forums
- Chatrooms
- Gallery
- Gameplay Videos
- Upload
- Articles
- Mod Reviews
- Shop SP: Games, Movies, Books
|
|
KANA, M AUMAUA CHANTER

Why He's Included and How to Use Him
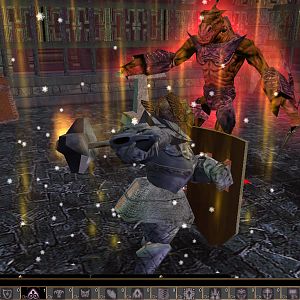
The nice scholarly member of the party, and also the main tank of the party. Chanters are ideal for tanking for a number of reasons.
They can always do something else besides chant to build up their phrases. That includes taking up front-line position to meet the onset of enemies, attacking those enemies, and using items from their quick-item slots (especially spell scrolls).
Furthermore, their chants are not affected by Dexterity or any Armor Recovery penalties. So a Chanter can go right ahead with heavy armor and a shield without any hangups.
The chants and phrases also make up for some of the gaps left behind by not having a Priest.
For some battles, I sometimes like to combine a few high-level chants together that can have a powerful cumulative effect on the battle.
For other battles I may want to emphasize the use of Invocations. In such instances, I switch a Phrase modal that uses lower-level chants that take less time and therefore more quickly build up the number of chants needed to use the Invocation I want.
Location
He can be recruited at #2 in Caed Nua before it has been restored.
Personal Quest
Stats
Skills
Lore: It is enough to bring this skill to 10 Ranks, combined with his starting bonus of +2 and the +2 provided by his armor. After that, he'll be able to use any scroll in the game.
Athletics: This skill is important for any character on harder settings, even squishy spellcasters. It helps any character go longer between resting, which is especially crucial during the Hard or Path of the Damned settings. It also provides bonus Health and Endurance.
Survival: Kana gets some ranks in this, although he tends to select the Damage-Reduction bonuses which aren't very hard to get, to reflect his tank role.
Talents
2nd Level - Weapon and Shield Style: A must for any character built as a tank.
4th Level - Cautious Attack: Kana's role is to take up a defensive wall position while chanting, and maybe doing something else at the same time like using a scroll. I don't care about how often he attacks since his efficacy does not depend on melee attacks. The +8 bonus to Deflection is easily worth the penalty to Attack speed in this instance.
6th Level - Superior Deflection: Provides a +5 bonus to Deflection, which is an easy choice for the main tank.
8th Level - Ancient Memory: It recoups a little bit of Endurance every few seconds. It's not a big deal, but every little bit can help.
10th Level - Beloved Spirits: Increases the regenerative power of his Ancient Memory talent.
12th Level - Bull's Will: He will have a very good Will Defense, especially after combining this talent with his Cloak of Comfort. It's important for more than one reason. As the party chanter, he'll need to keep his own mind free in order to keep the They Shielded Their Eyes 'Gainst the Fampyr's Gaze phrase active when faced against foes like Spores and Fampyrs. He will also be the natural target for self-Stunning and then having Grieving Mother activate her Defensive Mindweb power.
14th Level - Bear's Fortitude: For similar reasons as for Bull's Will. It will also generally help him resisting things like poisoning and disease and such when he's fighting on the front lines as a tank.
16th Level - Snake's Reflexes: And again with the theme of maxing out his Defenses.
Chants
1st Level - At the Sight of Their Comrades, Their Hearts Grew Bold; Blessed was Wendgridh, Quickest of his Tribe: Kana starts off with these chants at his 1st level and I can't alter them. However, the latter will be helpful during at least one scripted interaction.
3rd Level - Come, Come Soft Winds of Death: I make this a part of any phrases where I want to accumulate chants quickly enough to use Invocations. Besides the damage over time effect, it will also expose enemies to extra damage inflicted by Sagani's pet fox through the Predator's Sense ability.
5th Level - Rime and Frost Followed the Footfalls of Karth: It leaves behind Frost traps that inflict Freezing Damage and the Hobbled effect on any enemies that step over them. Note that it does not inflict damage on enemies surrounding a Chanter. It will only affect a spot where the Chanter once had been but no longer is. It is therefore useful for tactics based on sending the Chanter ahead to lead enemies on to the rest of the party.
7th Level - One Dozen Stood Against the Power of the Saint: This is a key Chant to use when faced with enemies that can inflict Frightened or Terrified, like Dragons.
9th Level - The Dragon Thrashed, The Dragon Wailed: Inflicts a significant amount of Burning and Slashing Damage over time within its large radius. It forms a key part of my standard crowd-clearing chant.
11th Level - Aefyllath Ues Mith Fyr: Provides a +25% Burning Damage bonus for party members' weapons, and it also stacks with the Burning Lash enchantment. It can also add a little extra Burning Damage when comrades' armors and shields trigger Retaliation.
13th Level - They Shielded Their Eyes 'Gainst the Fampyr's Gaze: It provides +25 resistances against Charmed, Confused and Domination, with an extra bonus to the Will Defense on top. He sets up a separate Phrase modal that alternates between this Phrase and At the Sight of Their Comrades, Their Hearts Grew Bold. The former will always be active, since the latter has such a short duration. It becomes my Phrase modal of choice when facing off against enemies such as Fampyrs.
15th Level - Mercy and Kindness Followed Whe'er She Walked: It doubles the amount of Endurance received from any healing effect, and I include it in the same Phrase modal as Aefylleth Ues Mith Fyr and The Dragon Thrashed, The Dragon Wailed as part of my large crowd clearing modal. The idea is that powers like Strange Mercy, Healing Chain, The Sword and the Shepherd, and Moonwell become especially potent if they activate while this Phrase is running.
Invocations
1st Level - If their Bones Sleep Still Under the Hill, None Can Say: Kana has this at his 1st level, and I can't change it.
2nd Level - But Reny Daret's Ghost, He would not Rest: Very useful during the early parts of the game, since the Phantom that is summoned frequently stuns its targets.
4th Level - White Worms Writhed in the Bellies of the Dead: Can be powerful in some situations. Let's say you've slain a bunch of enemies and their corpses are now piled up in proximity to each other. Send someone besides Kana to go ahead and get the attention of another group of monsters, while Kana builds up Chants. Once the enemies get close to both the party and the previously slain enemies, Kana can unleash this to cause hefty damage on the enemies but not on any party members. Another use, the corpses may be piling up in a prolonged battle against many enemies. A carefully aimed one of these can obliterate those that are still standing.
6th Level - Shatter Their Shackles, Cast Off Their Chains!: Remember that I don't have a Priest in the party, so I rely on Kana to fill in some of those gaps. He's ready to use it if he has enough accumulated enough Chants and if it's necessary to free his comrades from Paralysis, Petrification and / or Stuck.
8th Level - At the Sound of His Voice, the Killers Froze Stiff: It provides an offensive option that won't affect party members, but will expose enemy targets to Sneak Attack damage, whether it's from Alliria or Devil of Caroc or Ituumak.
10th Level - The Brideman Slew Thirty 'Fore They Crossed Half the Hall: It will provide hefty +5 bonuses to Might, Constitution and Resolve to party members. Can be useful during especially intense fights.
12th Level - The Bride Caught Their Ruse And Set To Make Them Pay: It will provide hefty +5 bonuses to Dexterity, Intellect and Perception to party members. Can be a useful option during especially intense fights.
14th Level - Their Champion Braved the Horde Alone: It at once provides bonuses to both Attack Speed and Damage Reduction, so it can really amp up both his physical attacks and his durability as a tank during particularly intense battles.
16th Level - Called to his Bidding, the Ancient Instruments of Death: The best of the summons, it summons four magical weapons. Can be useful for long and intense fights.
Inventory
Captain Viccilo's Anger Looted from one of Brynlod's Deadfire minions after pursuing the bounty on him. This weapon isn't quite as powerful in his hands as it is in Maneha's. The underlying point is that the stackable bonus to Deflection helps him in his tank role, and there's no need to raise its quality enchant as it is already a Superb weapon. I added the Corrosive Lash and Kith Slaying enchantments to it.
Little Savior: Looted from the Adra Dragon treasure hoard at #6 in the 15th of Endless Paths. I added the Legendary quality enchantment to it as soon as I found it, which by itself makes itself worthy for Kana as the main tank.
It also transmits an aura that provides +5 to all Defenses for all party members within its radius. It stacks with the Deflection bonuses and penalties to Accuracy suffered by enemies from auras stemming from other items that Hiravias wears, which is another considerable benefit.
It is also key to a strategy that requires cooperation between himself,Hiravias and Grieving Mother. This shield and Kana's boots (see below) each provide +50 bonuses to all Defenses, when the character is either knocked Prone or Stunned. The bonuses will stack together since one of the items is a shield. Now you need to inflict a self-stun on that character. The Priest's Withdrawal spell is one example. The example I use in my party is for Hiravias to use a Beetle Shell spell on Kana, who has the needed items equipped. Once that's in place, Grieving Mother casts Defensive Mindweb while everyone is tightly packed around Kana to put everyone's Defenses through the roof for at least 30 seconds. Can be really useful in fights against Dragons and other tough bosses.
White Crest Helm: Found in a chest at #10 in the Main Hall of Durgan's Battery while travelling to the West Tower during Part 2 of the White March expansion. The obvious point is to expand both the duration and the range of his Chants and Invocations. Indeed, his Chants will linger just a little longer, leading to more potent Phrase combinations than before.
Argwes Adra: Looted from the ancient Fampyr at #13 in the eighth level of Endless Paths. Plate Armor is always a natural choice for a tank build. Even if it's used rarely, the Second Chance power can improve his resiliency. The other key point is that it adds a +2 bonus to Lore, which allows him to use the most powerful of scrolls. I add the Superb Quality, +2 Perception and Shock-Proofed enchantments to it.
Cloak of Comfort: A reward for The Weaver's Song companion adventure. This is arguably one of the best cloaks in the game. It provides a +30 bonus to Endurance. It provides a +5 bonus to all Defenses that stacks with all other Defense bonuses, even ones provided by other items. So in this instance the Defense bonuses of the Cloak will stack with the bonuses provided by the Ring of Deflection and the Ring of Protection. It also provides +3 bonuses to Crushing, Piercing and Slashing Damage Reduction that stack with all other Damage Reduction bonuses, which also helps him in his tank role.
Siege Breaker Gauntlets: Looted from Cevestin while pursuing him from Whitestone Hollow to the mill in Dyrford Village. The Clear Out ability may sometimes come in handy, especially when he is faced with multiple enemies while in tank position. The real point is to maximize his Deflection as a tank through the +4 bonus to Resolve.
Ring of Deflection: Purchased from Yduran in Stalwart Village. The +9 bonus to Deflection definitely helps him in his tank role.
Ring of Protection: Obtained from the hidden niche at #13 in the 5th Level of Endless Paths, as an item from the "Endless Paths - 5th Drake" section of the random drop list. I often rely on Kana to maintain protections against status-conditions or to remove them after the fact, so maximizing his Fortitude, Reflex and Will defenses is perfectly sensible. Also, much later in the game, the bonuses from the Ring will get included in the huge boost to all defenses when Grieving Mother uses the Defensive Mindweb under the right conditions.
Girdle of Eoten Constitution: Found in the Grisly Cave at Dyrford Crossing. The bonus to Constitution will add to his resiliency as the main tank of the party.
Malina's Boots The bonus to Movement Speed can help him take up tanking position faster. The crucial point is that it will provide +50 bonuses when he is either Prone or Stunned. The bonuses will stack with the same bonuses provided by his shield. This setup is the linchpin in the strategy based on having Hiravias cast Beetle Shell on him, and then have Grieving Mother activate Defensive Mindweb to add +100 bonuses to everyone's defenses.