-

- Forums
- Chatrooms
- Gallery
- Gameplay Videos
- Upload
- Articles
- Mod Reviews
- Shop SP: Games, Movies, Books
|
|
Endless Paths - Level 5
Ornate Sword Hilt
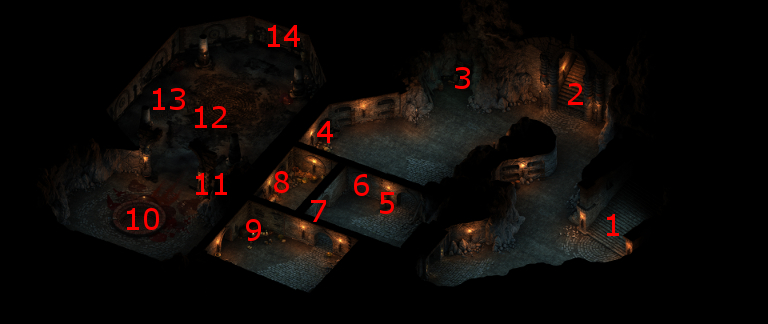
I arrive at #1 on the map of the fifth level. There will be two groups of Xaurips to fight through, and I'm pretty beat up, so I have to be careful. I rush the group west of #1 and take them out as quickly as I can to avoid attracting the attention of the other group.
There will be another group in between #1 and the stairs at #2. In comparison to the evil party, the good party doesn't rely quite as much on bottleneck-crowd control tactics, and tends to involve almost everyone in the fight. Note how I position everyone into a kind of 'reverse phalanx' arrangement, with the idea that almost everyone can hit the enemies from all sides once battle is joined. A theme that I employ for this battle is that Grieving Mother is at the south end of the reverse phalanx, and she tags Kana at the north end with an Ectopsychic Echo once she gets a chance. Once she does, she starts running back and forth inflicting damage multiple times on the mass of enemies. They don't last long.
Now I go up the stairs at #2.
Now I'm back up in Caed Nua at #4. I had previously ordered completion of the Woodland Trails upgrade to have the +3 Constitution and +2 Athletics resting bonus available. *Note* You'll have plenty of time to fully build up the Stronghold, so keep in mind that your preferences about what to do is subjective, subjective to the caveat that some upgrades are prerequisites for others. Now I rest up, whereupon the construction of the Woodland Trails has been completed. I then begin construction of the Western Barbican, which is a prerequisite of several other Stronghold upgrades. I go back down the stairs to the 5th level.
There will be another large group of Xaurips west of #2. I win it more or less the same way, except this time I have a summoned Phantom as the connector for my Ectopsychic Echo before Grieving Mother starts running around back and forth.
I remain in the large room to the north, and send Kana ahead to flush out the group of Xaurip from the small room to the south. Another theme I show here is sending Ituumak directly after any enemy spellcaster, in this case a Xaurip High Priest, when I have the room and pathway to do it. Once I set that up, Sagani and Ituumak have little trouble quickly killing off the enemy spellcaster.
I loot the crate at #5. I next press the button at #6, which opens the door at #7. The room at #8 will have several piles of treasure, one of which has an Ornate Sword Hilt. That item is relevant to The Blade of Endless Paths task.
The table at #9 has an Expedition Log Page, which provides a clue relevant to the Seals of the Endless Paths task.
The video concludes with the party resting up, grabbing Camping Supplies from a chest #4, and then making its way to the room at #10.
Drake in Endless Paths - Level 5
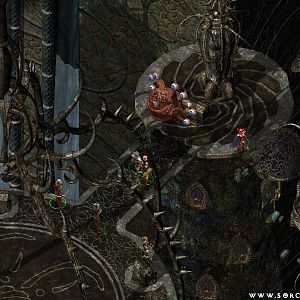
At #12 will be a large Drake surrounded by a lot of Xaurips. Keep in mind this can be a tough fight, where things won't go as you might hope, so some reloads may be necessary. Kana readies a Scroll of Insect Swarm that he had found earlier, and also switches over to his anti-fear chant. Grieving Mother switches over to her Arbalest.
I go ahead and begin the battle. Kana puts himself in front of everybody else.
Alliria tags the Drake with Sworn Enemy. She begins attacking anyone within hand's reach, although her target will change depending on circumstances. She'll prefer a nearby target that's near death in order to improve the chances of triggering her Strange Mercy power. She saves her Flames of Devotion / The Sword and the Shepherd whenever party members have taken some damage.
Hiravias begins a sequence of Returning Storm, Woodskin and Nature's Balm.
Kana, once he spots the two Xaurip Priests huddled close together, grabs the opportunity to use his Scroll of Insect Swarm on them.
Sagani uses her Ring of Searing on a tighly-packed cluster of foes who are surrounding party members. After that, she and Ituumak concentrate their efforts on an enemy that is accessible to Ituumak, especially if it is a Xaurip Champion.
Grieving Mother gets an early shot on the Drake with her Arbalest. She will use Ectopsychic Echo whenever she gets her Focus to +30, and run its line around to catch as many enemies as possible.
Eventually, only the Drake is left, and at that point it is rather easily ganged up.
Ilfan Byrgnar's Solace
At #13 will be a hidden niche that has an item from the "Endless Paths - 5th Drake" section of the random drop list. However, that list as it appears in the spreadsheet is inaccurate. I go up to the courtyard of Caed Nua, and rest until the 5th day of the month.
Construction of the Western Barbican is completed at that point, so I begin construction of the Bailey, which is also a prerequisite for several other upgrades.
I return to the 5th level. The niche, on the 5th day, will now have a Ring of Protection. It becomes one of Kana's rings for the rest of the game. I often rely on Kana to maintain protections against status-conditions or to remove them after the fact, so maximizing his Fortitude, Reflex and Will defenses is perfectly sensible. Also, much later in the game, the defense bonuses from the ring will get included in the huge boost to all defenses when Grieving Mother uses the Defensive Mindweb under the right conditions (see just below).
A skeleton directly below where the Drake had initially been (#12) will have a Medium Shield called Ilfyn Byrngar's Solace. It becomes Kana's for a long time. It provides a hefty Deflection bonus in its own right. However, there is a tactical exploit that I have in mind much later in the game. Let's suppose that Kana is wearing this, plus another item that provides +50 bonuses to all Defenses upon Kana either getting Stunned or knocked Prone. Now imagine that Kana does in fact get Stunned or Knocked Prone. Grieving Mother can (later in the game) use her Defensive Mindweb power on Kana, which results in all nearby party members getting a hefty boost of at least +100 to all Defenses for at least 30 seconds. Any other Defense bonuses that Kana is enjoying, like from his items, get added as well.
The trick is how to inflict a self-stun on Kana. The Priest's Withdraw spell will do that. So will Hiravias' Beetle Shell spell. The tactic becomes clear. Wait until Grieving Mother has at least 80 focus, have Hiravias cast Beetle Shell on Kana, have Grieving Mother activatea Defensive Mindweb, and everybody's Defenses go through the roof for at least 30 seconds.
The video concludes with the party leaving Caed Nua and for Dyrford Village.
*Evil* Ilfan Byrgnar's Solace
*Evil* It happened to be day 15 on the month, so I take the Liripe of Thinking, which will make for a good interim helmet for Durance.
I was lucky enough to get a Diamond earlier, so now I enchant Aloth's Leather Armor to add a +2 bonus to Intellect. I also add the Corrode-Proofed enchantment as well. Aloth in turn transfers the Hermit's Hat over to Eder, as an interim hat.
Durance will be using Ilfyn Byrngar's Solace for a long time.
Bleakhollow Bandits Attack
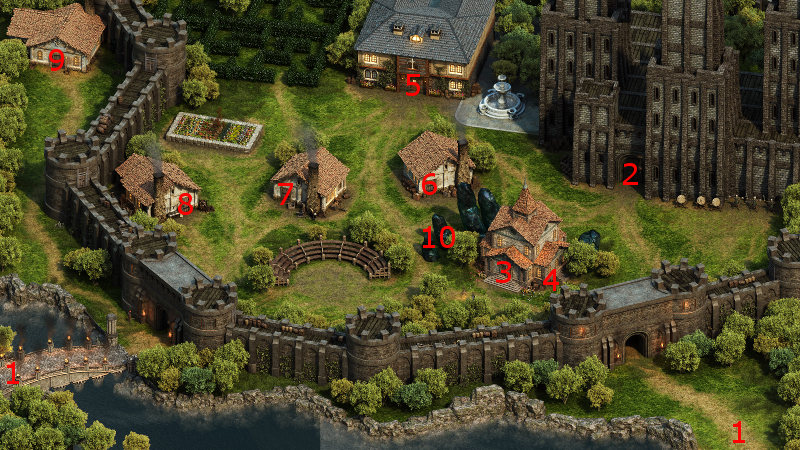
The good party arrives in Dyrford Village, only to receive an announcement that Bleakhollow Bandits are on their way to attack Caed Nua, so I promptly return. I choose to manually conduct the fight, as always.
This fight is fairly easy. Hiravias waits until the good party's front-line warriors and the Bandit warriors are engaged with each other. He then positions himself so as to subject as many enemies as possible to his Returning Storms spell. Note also how Sagani and Ituumak team up to first take out their Wizard, and then their Archers.
Construction of the Bailey has been completed, so now I select the Merchant Stalls for completion.
Now the party makes its way to Dyrford Village for real.