-

- Forums
- Chatrooms
- Gallery
- Gameplay Videos
- Upload
- Articles
- Mod Reviews
- Shop SP: Games, Movies, Books
|
|
Encampment Camp
Alliria's Character Creation
The opening credits, and the creation of my Watcher protagonist, Alliria.
*Evil* Zakara's Character Creation
And here is the character creation for Zakara.
Caravan Master Odema
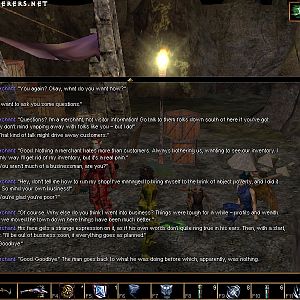
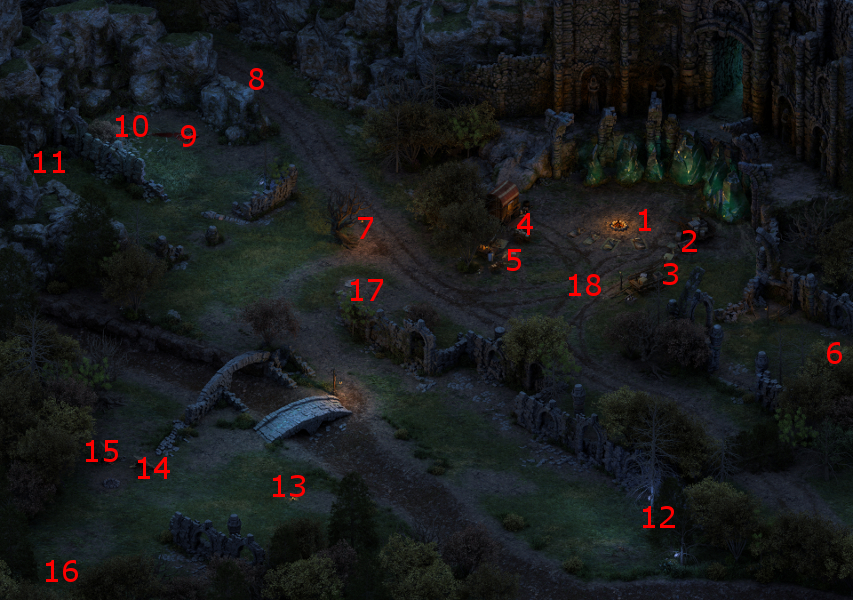
Alliria now speaks with Caravan Master Odema at #1 on the map of the Encampment. The dialogue provides both some early background exposition on the world of Eora, as well as a launchpoint for the first of the main quests, A Moment's Respite.
A Female Human Fighter named Calisca joins her as an erstwhile companion.
Heodan's Wares
Now I begin by altering the formation so that Alliria stands just behind Calisca.
I can't pick the lock on the box at #2. Nonetheless, I pick up the Orlan's Cradle at #6, and grab a random item or two from the crate at #3. I also grab a Potion of Minor Regeneration from the crate at #4.
Alliria now speaks to Heodan at #5, choosing the Passionate and Diplomatic dialogue responses when they become available. I don't buy anything from him however, as I'm just starting out and I want to spend as little as possible during the early going. I'll get the items I need by looting them from dead enemies for now.
The video concludes with Alliria giving her shield to Calisca, and taking the Torch from Calisca so that she becomes the dual-wielding character instead and Calisca becomes the tank.
*Evil* Zakara of course chooses the Cruel option, which Heodan doesn't seem to be bothered by.
Springberry
The video begins by speaking very briefly with Sparfel at #7. I then collect the Admeth's Wyrt at #8.
A pair of Young Wolves will attack me at #8. I have Calisca put herself forward first to set up a tanking position. I also order Calisca to attack the Wolf that's more to the south. Alliria positions herself behind that Wolf, and nails it with a Flames of Devotion. She then puts herself behind the other Wolf and gets it with another Flames of Devotion. The result is a fight where I take minimal damage to my Health, which is my overriding objective during each fight for this part of the game.
The Springberry in question is at #10. That prompts Calisca to begin a conversation with Alliria that reflects the latter's Slave background, to which Alliria expresses a desire to start a new and free life. They both return to near where they had spoken to Sparfel.
*Evil* Of course, Zakara's dream is to get filthy rich.
Sparfel's Death
The video begins with grabbing a Burned Lady at #11, and then a Leather Armor at #12.
I next cross the bridge and grab the Full Waterskin. That triggers a scripted interaction that reveals that Sparfel has been shot dead with an arrow.
What follows next is an ambush by a Glanfathan Warrior and a Glanfathan Archer. I use the same tactic of having Calisca tank herself against the Warrior, having Alliria come up behind a with a Flames of Devotion, and then repeating the process on the Archer.
The Disappointer
Now I explore the southwest corner. A Dyrcap will be at #16, while a Beer will be at #14.
Going into Scouting Mode reveals a hidden pistol at #15 called The Disappointer. Certainly I could down the road replace the penalties to Accuracy and Damage with an enchantment that will provide bonuses to Accuracy and Damage. But I still have no use for it, and ultimately plan to sell it.
Glanfathan Ambush
I get ambushed by three more Glanfathan at #17. I use the same tactics to take them out one at a time with minimal damage.
The loot provides an opportunity to plan ahead of time. Calisca gets one of the Hatchets to enhance her role as a temporary tank. Alliria puts one of the other Hatchets in her main-hand, and her Sword in her off-hand. I am doing this in anticipation of Alliria having to sacrifice one of her weapons in order to save Heodan from injury fairly soon. She also takes the Battle Axe away from Calisca, and puts it in her stash. I will be using it once I leave the Encampment.
Glanfathan Leader
The Glanfathan Leader and several other Glanfathan Hunters will be waiting for me at #18, and they will be holding Heodan captive. The dialogue itself presents an opportunity to avoid injury to Heodan by making any one of an attribute check, a low Athletics check, or a low Lore check. Alliria goes with the Athletics 1 check to avoid injury to Heodan.
Once battle begins, I send Calisca forward to tank and hold up the Leader and three other Glanfathans. Alliria uses Flames of Devotion on the one attacking Heodan.
Once she and Heodan are freed up, they flank and backstab the Glanfathans surrounding Calisca so as to take them out one by one. They do the same to the Leader, with Alliria using her last Flames of Devotion on him. He soon falls.
Biawac
A spirit energy storm called a Biawac overtakes the Encampment, forcing Alliria, Calisca and Heodan to free for the nearby ruins.
Unfortunately, a wounded Glanfathan Hunter grabs onto Heodan. If am unwilling to sacrifice the main-hand weapon that my protagonist is carrying and unable to make a Dexterity check of 15, then Heodan will die then and there. Alliria decides to use the Hatchet she was carrying to knock the Glanfathan away and rescue Heodan.
The trio will now find themselves in the Ruins of Cilant Lis. This event marks the conclusion of the quest called A Moment's Respite.