-

- Forums
- Chatrooms
- Gallery
- Gameplay Videos
- Upload
- Articles
- Mod Reviews
- Shop SP: Games, Movies, Books
|
|
Blood Sands
Prayer to Berath
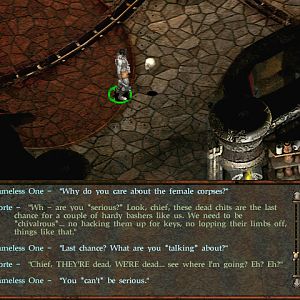
I click on the altar at #10, and pray with the words "There is life in death, and death in life." I then receive a vision of a Dwarf and an Elven woman, along with a whisper of the words, "Return them to the Wheel." Berath has clearly given me the mandate to bring about both their deaths.
The prayer and vision trigger the quest called A Servant of Death. I leave through the exit at #1.
Tamrwn
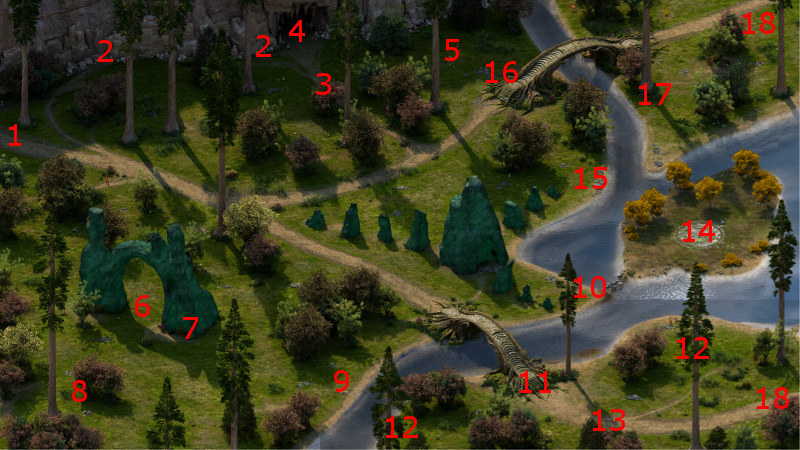
I am now at #19 on the map of Elm's Reach. Tamrwn is at #14. Alliria and Hiravias speak to him, and he reveals that the latter may learn more about his Autumn Stelgaer form as part of the True to Form quest.
I now make my way to Elmshore.
High Ovate Erona
I start off at the southeast corner of Elmshore. Alliria puts on the Ring of Changing Heart with the intention of making a Resolve check.
High Ovate Erona and her followers will be at #14 on the map of Elmshore. Alliria makes a Resolve check of 15 to convince Erona to willingly end her life for purposes of furthering the quest called A Servant of Death.
The good party returns to Caed Nua.
*Evil* High Ovate Erona
Zakara decides to just straight up slaughter her. She will be helped out by a pair of other Druids, as well as a couple of Barbarians. The Druids' spells throw my position into disarray, but it still isn't difficult to outlast all of them. A Ring of Protection will be one of the more distinctive items that Erona leaves behind.
*Evil* Maneha on Thaos
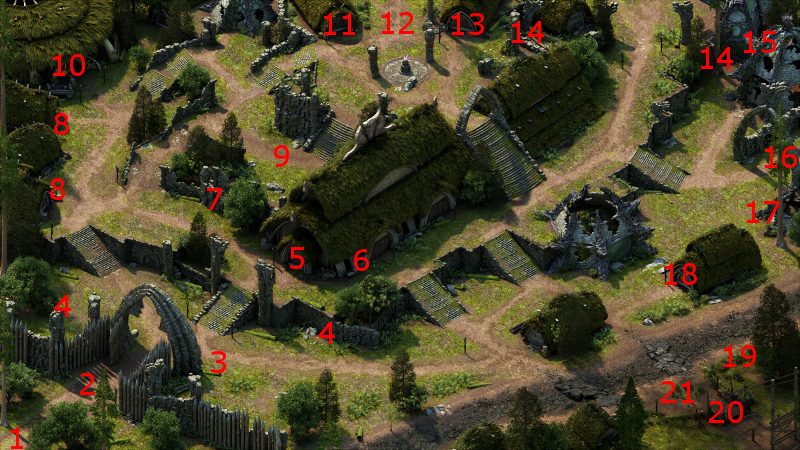
I stop off at the Celestial Sapling, the entrance to which is at #20 on the Hearthsong map. I sell off my excess loot and rest up.
Maneha will want to speak to Zakara after having crossed the bridge leading to Teir Evron for the first time since having completed The Burden of Memory quest. It is now that I choose to have this conversation. She'll have her own questions for Maneha. It won't particular matter what dialogue choices I make.
Geyda
The good party rested up at Caed Nua until another visitor arrives, the Animancer named Geyda. I give her 2,000cp and the suggestion of using Vessels from Heritage Hill in order to gain a permanent +1 Prestige for the Stronghold.
I sell off my excess loot and return to Elm's Reach afterwards.
Keeper Garost
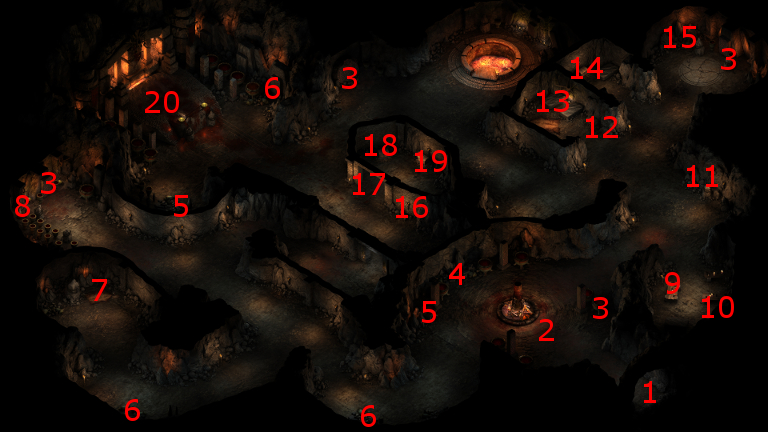
I make my way to the Blood Sands, the entrance to which is at #21 on the map of Elm's Reach.
I start off at #1 on the map of Blood Sands. I speak with Keeper Garost at #2, who's willing to provide background information on the Blood Sands and the Ethik Nol.
Stone Tablets
Naca at #10 could also speak to Hiravias about finding out more within the Blood Sands, but I've already done that with Tamrwn.
There will be several Stone Tabelts at points marked #3. I go to each one and click on them. Each time Hiravias draws another unsatisfying insight into his Autumn Stelgaer spiritform. Having Hiravias draw insight from all four Stone Tablets advances his True to Form quest, and he realizes that he needs to journey to the Burial Isle to complete his quest.
Archdruid Rehstin
Archdruid Rehstin will be at #20. Heading towards him leads to him killing a willing sacrifice atop an altar.
If you want to fulfill Berath's quest, A Servant of Death, then fighting him is inevitable. I position Alliria, Grieving Mother and Ituumak next to Rehstin. Sagani goes to the north wall. Kana assumes a tank position near the top of the left stairs. Devil of Caroc and Hiravias take up tank positions near the top of the right stairs, but leaving enough room for multiple enemies to come up the stairs.
Alliria begins dialogue to gain background information and start the inevitable. She tags both Devil of Caroc and Hiravias with Reinforcing Exhortation. She, Grieving Mother, Sagani and Ituumak take out Archdruid Rehstin as quickly as they can.
Devil of Caroc meets the enemies coming up the right stairs head on. Hiravias starts a sequence of Relentless Storm, Moonwell and Form of the Delemgan.
Once the Archdruid falls, Sagani and Ituumak spend the rest of the battle looking for any Druids at a distance from the rest of the action to lock down and kill together.
Alliria looks for opportunities to hit other enemies from the side. Grieving Mother does likewise, with the added point of unleashing an optimally placed Amplified Wave once she's accumulated at least 60 Focus.
Devil of Caroc continues to attack the nearest enemies. Hiravias will once in a while cast more spells when the circumstances are optimal for it, like another Relentless Storm when much of the party gets surrounded by multiple enemies, or an Embrace the Earth-Maw when it catches a cluster of Druids but without harming party members.
Kana takes some time to wear down the odd enemy or two that comes his way. Once he rejoins the battle in earnest, he unleashes a Killers Grew Stiff wave on multiple enemies to paralyze them. The battle is eventually won with minimal damage.
Purgatory
Alliria loots Archdruid Rehstin's body for a Sabre called Purgatory. It will become her base main-hand weapon for the rest of the game. The Endurance-draining power will increase her resiliency during the intense physical combats that she's often involved in. To start with, Sabres have the highest base-damage for any single-hand melee weapon type in the game. My set up for her, and the tactics she uses, emphasize increasing the Accuracy of her melee attacks, with the point of increasing the chances of a Critical Hit. The increased Critical Hit Modifier will in turn increase the damage of those Critical Hits. All of this in turn leads to an overarching theme of her build, to maximize her damage on any given melee strike and in turn maximize the chances of triggering her Strange Mercy power.
I added the Burning Lash enchantment, leaving just enough enchantment slots to add the Legendary enchantment later on.
Blood Testament
First, I kill a few enemies just a little east of where I fought the Archdruid, and they're dealt with easily enough.
There's a hidden button at #16, which opens the door at #17. In a chest at #19 will be a pair of Monk-specific gloves called Blood Testament, along with another random item or two. I don't have a Monk in the good party, and Zahua in the evil party will be using different gloves, so I'll just sell them in either instance.
In the chest at #18 will be an item from the "Elm's Reach - Blood Sands Hidden Room" section of the random drop list. It happens to be day 15, and therefore a perfect opportunity to score a pair of Gauntlets of Swift Action, which increases the wearer's Attack Speed by 15%.
Problem is, the Mechanics Skill check to safely disarm the trap on the chest is VERY high, so high that no one in the party can do it. I therefore shoo the party out of the room, and then have Sagani open the chest and take the damage. My rationale is that of all the party members, she'll be the least involved in intense fighting since she usually keeps her distance from the action, therefore a loss of Health on her part is likely to have minimal consequences until I have a chance to rest up.
Grieving Mother wears the gloves for the rest of the game. The faster she attacks the more quickly she can build up focus, and the more quickly she can use her Powers when she does have enough focus.
Keeper Wrdha
The good party slaughters more groups of the Ethik Nol along the west side of the Blood Sands. At #7 is Keeper Wrdha, who sells potions as well as Flasks of War Paint, which provides bonuses to Accuracy, Damage and Endurance. However, I'm content to buy Potions of Major Endurance and Potions of Ironskin from her, and trade my excess loot to her in return.
Tallan's Amulet
I kill more members of the Ethik Nol as I make my back to the south exit. One of my victims is Tallan, who was at #4. He leaves behind Tallan's Amulet. But I have no use for it so I'll just sell it.
Naca
Now I kill a few more Ethik Nol Keepers, including Naca at around #10.
Skull of Gems
Here is where I finish off the remaining members of the Ethik Nol on the east side. The room at #15 will have a large number of Keepers (Druids). Kana leads off with a Fireball scroll to catch almost all of them at the start, and then uses a Ray of Fire scroll in a manner very similar to how Grieving Mother would use Ectoplasmic Echo.
There is a hidden skull at #13 which will often have high-tier gems in it. The video concludes with the party leaving Blood Sands.
A Servant of Death
Alliria returns to Teir Evron, and informs Berath of the deaths of both Archdruid Rehstin and High Ovate Erona. Doing so completes the quest called A Servant of Death.
He also offers his aid in safely reaching the bottom of the pit in the Burial Isle. Accepting the offer also means the Watcher character obtaining the Berath's Boon talent (+1 Resolve, +5 Defense vs. Poison and Paralyzation). However, Alliria (and later on Zakara) prefers to keep her options open for now.
Iovarra and Soldier
I leave Teir Evron, and now have another vision in Teir Evron, this time of Iovarra and a bodyguard. The scene suggests that in the distant past I lured Iovarra into Thaos' trap. I return to Caed Nua after the vision concludes.
Constellated Cloak
I obtain the Constellated Cloak from the rewards chest in the Great Hall, as a reward for the companion adventure called They Who Woke The Stars. I have no use for it though, so I sell it to the Merchant along with the rest of my excess loot.
I return to Hearthsong, although my path will soon lead me to Northweald.