-

- Forums
- Chatrooms
- Gallery
- Gameplay Videos
- Upload
- Articles
- Mod Reviews
- Shop SP: Games, Movies, Books
|
|
Ionni Brathr Fragment
Hair of Ondra
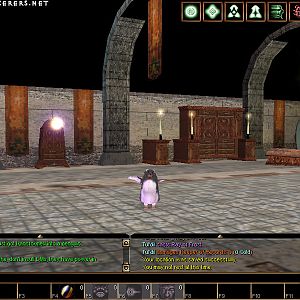
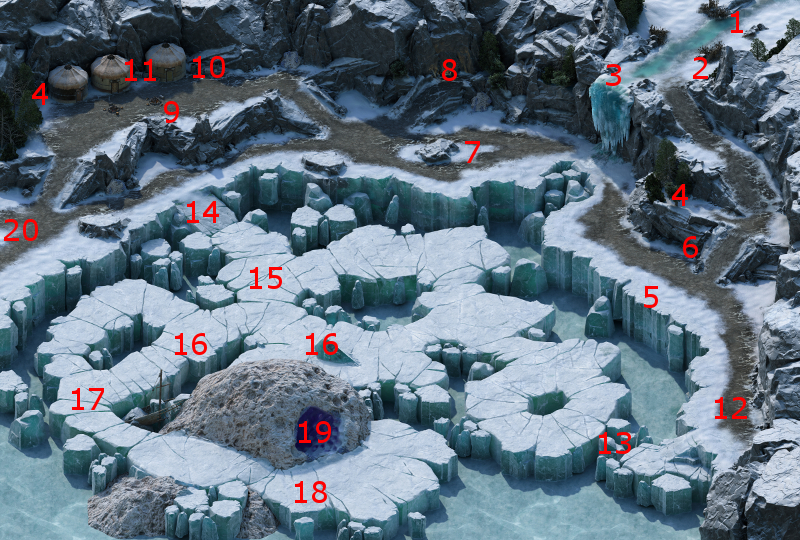
I start off at #1 on the map of the Ionni Brathr Fragment. I speak with Ondra again at a pool at #2, where she makes it clear that she expects Alliria to sacrifice herself in order to stop the Eyeless. I afterwards kill a single Eyeless just south of the pool.
Frythr's Plated Greaves
I continue may way southwards, and have to defeat a few Eyeless along the way.
At #3 is a pool. You can only select one character for the scripted interaction that's involved.
At the bottom of the pool will be some coins and Frythr's Plated Greaves, which ultimately I'll just sell. However, some Lagufaeth will have caught on to the looting of their treasure chest and will want to give pursuit.
If the character you chose for the scripted interaction has at least 10 ranks in Stealth, then he or she may simply hide from the Lagufaeth and then swim back up the top. That means the character will emerge with the Greaves without any injuries, and there will not be any fight with the Lagufaeth afterwards. Sagani makes the Stealth check for the good party.
If the character you chose for the scripted interaction has at least 13 ranks in Athletics, then he or she can outswim the Lagufaeth to the surface. The character will emerge without any injuries, but the Lagufaeth will also swim to the surface and you'll have to fight them. *Evil* Eder makes the Athletics check in the evil party.
If the character you chose for the scripted interaction can neither make the Athletics check of 13 nor the Stealth check of 10, then the character will sustain an injury making his or her way back to the surface. And the Lagufaeth will have followed that character to the surface, forcing you to fight them.
I continue northwest and defeat another Eyeless. I restup, with Alliria, Grieving Mother and Sagani taking the Accuracy vs. Primordial optin. Devil of Caroc takes the Accuracy vs. Vessels option, while Kana goes with Damage Reduction and Hiravias goes with the healing bonus.
Kraken
I click on the slide at #4 to get to the bottom. Keep in mind that once down, you can't come back up. The only way out is to see through the next battle.
The next battle is against the Kraken at #5. He himself is capable of projectile attacks that inflict Corrosive Damage, while his numerous Tentacles can stun party members. Three Eyeless will also approach from the south.
I have Kana, Devil of Caroc and Hiravias form a shield wall against the oncoming Eyeless. Hiravias also helps matters with Moonwell and Form of the Delemgan spells.
Alliria tags the Kraken with Sworn Enemy. She, Grieving Mother, Sagani and Ituumak go all out for the Kraken and swiftly bring it down. I get two Kraken's Eyes in my inventory upon its death.
Kana by then is now able to use Ancient Instruments of Death to summon the four weapons. The party is then able to take down each Eyeless one by one.
*Evil* Kraken
Zakara tags the Kraken with Sworn Enemy, and then hits it hard with both her Flames of Devotion in addition to standard attacks. Zahua likewise helps her bring it down as fast as possible.
Eder and Maneha form a shield wall against the coming onslaught of the Eyeless.
Durance puts up Devotions for the Faithful and Consecrated Ground. He also casts a Symbol of Magran once the Eyeless close in on my tanks.
Zakara and Zahua join in on taking out the Eyeless one by one once they've taken care of the Kraken. Aloth helps matters along by frequently using Concelhaut's Crushing Doom on Eyeless that are under attack. It's a long battle and takes some doing, but I eventually prevail.
Escape from the Fragment
At #6 is the large crystal. Clicking on it begins a lengthy and extended scripted interaction during which you try to make good your escape from the Fragment. A misstep will result in your deaths and the game ending with you having sacrificed yourself to end the threat of the Eyeless.
The first step is to select a character, either yourself or another party member, to strike Abydon's Hammer against the crystal. It doesn't have to be the character who has equipped the Hammer or has soulbonded with it. Keep in mind that some party members will refuse if you ask them specifically, while others will grudgingly accede to your request. Another approach is to draw lots so that a random party member is chosen. Doing things this way can result in the random party member performing the task, even if he or she otherwise wouldn't.
The next phase is when several Eyeless block your way. There is a real risk that the Eyeless will hold you up long enough if you select 'dodge' right away, and your game will end then and there. Options for safely clearing the Eyeless out of your way are:
*Evil* Escape from the Fragment
I select Eder to swing Abydon's Hammer, both because he's willing to when Zakara asks him to, and because he can make the Constitution check of 19 to survive afterwards.
Durance casts the Repulsing Seal spell to get past the oncoming Eyeless coming down the tunnel.
Aloth uses a Prybar in combination with a Mechanics check of 7 to clear the rubble away.
He also casts the spell called Kalakoth's Freezing Rake to get the party across the ice sheets.
Eder makes his Constitution check to make it to the surface of the lake.
Lair of the Eyeless
Ondra's plan didn't turn out the way she hoped. The Eyeless emerge from the submerged Fragment, and a lengthy conversation ensues. There are three choices.
What could be considered the optimal choice, which leads to the minimum of conflict and societal loss in the epilogue, will involve returning the essences of the Eyeless to Abydon, but also convincing them to do so without restoring Abydon's memories prior to the destruction of his original body. Pulling this off requires convincing them that some things in the past are best left forgotten during a prolonged argument and debate with them. Keep in mind that choices you may have made earlier in the game may preclude a successful effort on this point.
I show an example of such an argument in the video, whereby Alliria is able to convince them on some points, like with the Devil of Caroc. However, other choices like helping the Knights of the Crucible build the Forge Knights, convincing the Duc to allow Animancy to continue in Dyrwood, or binding the spirits of the Pargrunen to the White Forge, together end up fatal to my being able to obtain this outcome.
Alliria then decides to completely disperse the essences of the Eyeless to the Wheel, in keeping with Ondra's wishes.
Whichever choice you ultimately make concerning the fate of the Eyeless, it concludes the Lair of the Eyeless quest.
*Evil* Lair of the Eyeless
Zakara takes the third choice and decides to return the essences of the Eyeless back to Abydon, with his memories fully restored, in order to spite Ondra.
This event also marks the one and only upgrade for Aloth's weapon, Abydon's Hammer. The video concludes with the evil party making its way to Caed Nua.
Kraken Eyes
First, the good party travels to the crate at #11 on the map of Cayron's Scar and grabs both sets of Camping Supplies from it.
It's now time to put my two Kraken Eyes to use. First, I use one to add the Legendary (+15 Accuracy, +55% Damage) to Devil of Caroc's Rimecutter Battle Axe. It makes sense, since Devil of Caroc is my other heavy-hitter, and the Legendary enchantment will enhance the damage inflicted by its Critical Hits that much more. And given the Attack Speed bonus of the axe, which also stacks with the Attacked Speed bonus of the 'durganized enhancement, that will mean plenty of DPS for Devil of Caroc.
I use the other one to add the Legendary enchantment to Alliria's Purgatory sabre. It's perfectly sensible, since she's both my main good protagonist and one of my heavy hitters. As with Devil of Caroc's Rimecutter, the Critical Hits will get a hefty boost. Furthermore, the Endurance draining power will also become that much more potent following the enhancement.
I next use The Helwax Mold to make a duplicate of Purgatory. It was already a deadly weapon on its own, but now Alliria is that much more deadly for wielding two of them.
The good party returns to Caed Nua.
*Evil* Kraken Eyes
The evil party now also grabs the opportunity to make use of the two Kraken Eyes. First, I use one to add the Legendary (+15 Accuracy, +55% Damage) to Zahua's Edge of Reason Battle Axe. A weapon with the Endurance draining power is a priority for the highest-level enchantment, since the more damage it inflicts, the more Endurance it will recoup for its wielder.
I use the other one to add the Legendary enchantment to Zakara's Bittercut sabre. It's perfectly sensible, since she's both my main evil protagonist and one of my heavy hitters. That is especially the case with a weapon whose damage is boosted by the inherent Damage bonus of Sabres, as well as the Spirit of Decay talent.
I next use The Helwax Mold to make a duplicate of Bittercut. It was already a deadly weapon on its own, but now Zakara is that much more deadly for wielding two of them.
The Battle of Yenwood Field
I rest up with the Intellect bonus, sell off my excess loot to the merchant in the Great Hall, and then speak to Marshall Forwyn to finally get the Battle of Yenwood started.
A scripted interaction now begins to play out. Lord Gathbin's forces have at least three special units that could create problems for your army. They are a group of Wizards, a group of Ruautai Berserkers, and a squad of Bleak Walkers. The good party in turn has some allies owing to previous choices I made during earlier parts of the game. They are the Flames-That-Whisper Ogres, a group of Readceran Archers, and some assassins from House Doemenel. *Note* They would have been members of the Dozens or the Knights Crucible had I made different choices while in Defiance Bay.
If you deploy your allies correctly, they can neutralize the special units of Lord Gathbin's forces. The correct choices are:
*Evil* The Battle of Yenwood Field
The evil party has already slaughtered Emery, so that's not an issue. I also have only the Knights of the Crucible as recruited allies, so I'm content to simply have them neutralize the Bleak Walkers before cutting straight to the battle itself.
Eder and Maneha hold up tank positions. Zahua waits until the position settles before choosing a flank to hit from. Zakara unleashes Sacred Immolation to begin inflicting Burning Damage on the horde of enemies that will inevitably close in.
Durance puts up Devotions for the Faithful, Consecrated Ground, Circle of Protection, and Salvation of Time. He then opens fire on any distant targets he can find.
Aloth first protects himself with Llengrath's Safeguard. He then unleashes spells like Wilting Wind and Death Ring. The battle becomes an easy slaughter.
Zakara takes an extraordinary loss of reputation with Defiance Bay by refusing to share her taxes, as a roleplaying choice.
The good party now explores what's left of Caed Nua, beginning with the 6th level of the Endless Paths. The evil party has already done that, so they head back to Twin Elms for the climax.