-

- Forums
- Chatrooms
- Gallery
- Gameplay Videos
- Upload
- Articles
- Mod Reviews
- Shop SP: Games, Movies, Books
|
|
Longwatch Falls
I am using the Part 1 version of the Stalwart Village map, since at least one person who has an interest in the Longwatch Falls is referenced in the Part 1 version of the map.
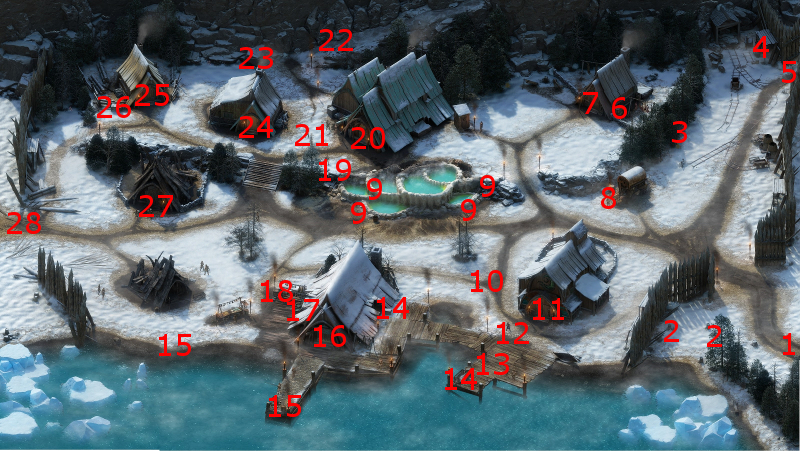
Tealdor
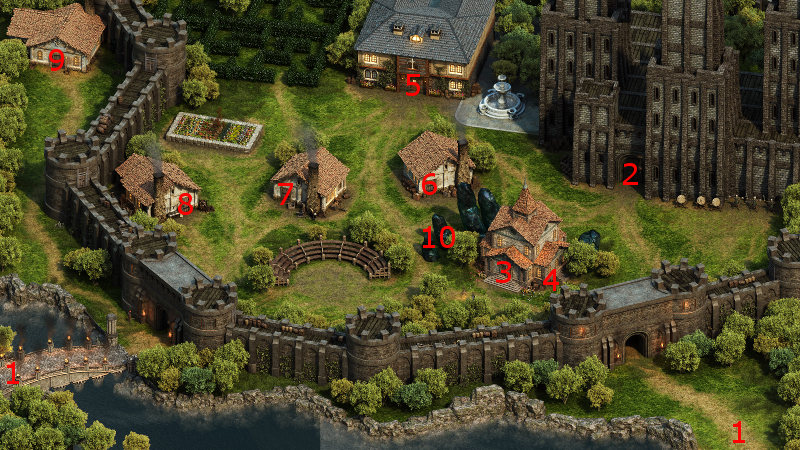
I speak to Tealdor at #21 on the Part 1 version of the map of Stalwart Village. He wants me to fetch a Thermal Pearl for him from the nearby Longwatch Falls. The request triggers The Thermal Pearl task.
*Evil* First Dragon's Maw Shield Upgrade
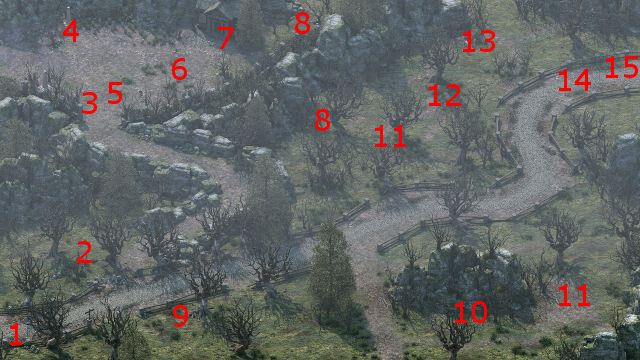
I show this part from the perspective of the evil party. I have arrived at the west entrance to the Longwatch Falls. Due north will be groups of Lagufaeth. I let Maneha handle these battles by herself, although Durance may sometimes cast Prayer Against Imprisonment on her to immunize her against the paralytic bolts of the Lagufaeth.
She manages to inflict at least 300 points of damage with her Dragon's Maw Shield and thereby obtain its first upgrade. The shield can now give her Taste of the Hunt on a Hit or Critical hit. And considering that Carnage also applies to shield Bash attacks, that means multiple chances to trigger Taste of the Hunt.
*Good* The good party also slaughters the Lagufaeth in these parts, but uses their usual team-based tactic which I have described previously throughout this guide.
*Evil* Second Dragon's Maw Shield Upgrade
I also show this part from the perspective of the evil party. I continue north and resume the same process against more Lagufaeth. Maneha, over the course of the battles, lands 750 points of damage and thereby obtains the second upgrade for her Dragon's Maw Shield. She now has an extra Savage Defiance that can be used each encounter from her shield.
The video concludes with me camping out with the Accuracy vs. Wilder resting bonus.
*Evil* Pearlescent Orb
There will be several more Lagufeath gathered around #7. And it's more of the same. 10 killing blows with the Dragon's Maw Shield is what is needed for the last upgrade. I have Maneha go it alone for the most part. Except this time the Lagufeath are numerous enough so that I have her use her Savage Defiance ability during each battle when her Endurance is getting low enough. I sometimes also have Durance help her out with a Prayer Against Imprisonment or Consecrated Ground when it's needed.
Maneha now has 9 out of the 10 kills that she needs for the last upgrade.
I search the nearby pools until I find the Pearlescent Orb, which is needed for The Thermal Pearl task.
*Evil* The Thermal Pearl
I make to leave Longwatch Falls. Just as I approach one of the World Map Exits, the Pearlescent Orb turns into a Baby Lagufaeth pet.
I return to Stalwart Village. I stop off at Gref's Rest to sell off my loot, buy another set of Camping Supplies, and rest with the Golden Whale resting option.
Now I inform Tealdor of what happened to his Thermal Pearl. Zakara agrees to sell him the Baby Lagufaeth for 500cp. That marks the conclusion of The Thermal Pearl task.
Ygadr's Journal
After returning, I speak to the soul of Ygadr at #5, who lets on that he was seeking out his soul twin shortly before his death. This encounter triggers the quest called His Better Half.
Ygadr's Journal can be found at #9, which provides a little bit of additional information.
*Evil* Third Dragon's Maw Shield Upgrade
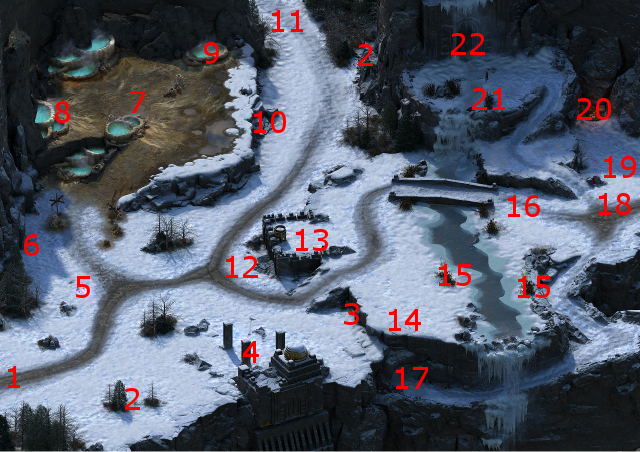
I also show this part from the perspective of the evil party. There will be an Ice Troll, a few Ice Blights, and a few Lagufaeth gathered around #13. The battle is not difficult, and I win it routinely.
Maneha has now killed at least 10 enemies with her Dragon's Maw Shield and thereby obtains the third and last upgrade for it. That upgrade is the ability to use a dragon's breath power once per Rest, and the Superb Quality enchantment (+12 Deflection).
There is also a Durgan Iron Ingot in the hidden niche at #12.
Ice Trolls and Frost Oozes
Here I easily kill off several Ice Trolls and Frost Oozes near #14.
Lagufaeth
The good party crafts a couple of Scrolls Against Imprisonment beforehand. I then go east across the bridge towards #16, where I have to fight several Lagufaeth and Ice Blights led by a pair of Broodmothers. Kana uses one of the scrolls to protect against paralysis. Devil of Caroc and Grieving Mother step ahead a little bit, so that Ituumak can reach the Broodmothers and help Sagani kill them at a distance.
I make my way to the cave entrance at #17.
His Better Half
Waiting inside the cave itself will be an Alpine Dragon, who happens to be the soul twin of Ygadr. And that fact is apparently a source of discomfort for the Dragon.
Alliria indulges in extended conversation with it. Perception checks of 13 and 16, Intellect checks of 15 and 19, and a Lore check of 12, are possible during the conversation and can provide additional insights on the Dragon's condition. It becomes tired of the conversation at some point, when Aggressive and Rational replies become possible.
Alliria, after that point, tries to convince the Dragon to let her use her Watcher abilities to sever its connection to its soul twin. First, you need to make either a Might check of 20, a Perception check of 16, or a Resolve check of 17. Alliria used the last option. After that, a Perception check of 12 will only provoke the Dragon into attacking. The correct follow-up is a Resolve check of 17. When she severs the connection, the Dragon rewards her with Ryona's Vambraces and that will be the extent of any reward. I'll just sell it.
It also marks the completion of the quest called His Better Half.
*Evil* His Better Half
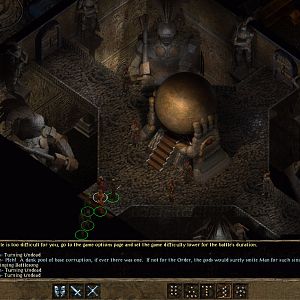
Zakara decides to pick a fight with the Alpine Dragon. She begins by tagging it with Sworn Enemy, and then activating Sacred Immolation.
Eder and Maneha maintain a front-line against the Dragon's advance. Zahua goes backward in order to protect Durance and Aloth.
Durance initiates a sequence of Devotions for the Faithful, Shields of the Faithful, Crowns of the Faithful, Consecrated Ground, Salvation of Time, and then Interdiction. Once that is finished, he switches over to his Pliambo per Casitas Arquebus and then fires away at the Dragon. One distinct benefit of the Arquebus is that it will mark its target, so that other party members attacking it will enjoy a +10 bonus to Accuracy.
Aloth first protects himself with Llengrath's Superior Elemental Bulwark and Llengrath's Safeguard. After that, he next casts Eldritch Aim and then multiple instances of Death Ring with the intention of wiping out the Ice Blights, Spectres and Wraiths as quickly as possible.
Zakara uses Concelhaut's Skull once the lesser creatures are gone. Concelhaut's Shade then uses Concelhaut's Crushing Doom on the Dragon, which keeps it Prone for the rest of the battle. Victory follows as a matter of course. I have no use for the items in the hoard, so I'll just sell them.
The video concludes with me leaving the cave, and hitting the World Map Exit on the east side of the Falls, in order to open up access to Whitestone Hollow.
*Evil* Spirits and Blights
The evil party continues up the trail to #21. There will be a pair of Cean Gwlas, a pair of Wraiths, a pair of Spectres, and a few Ice Blights there. This battle is by now easy enough to win.
*Evil* The Grey Sleeper
At #22 will be an Estoc stuck in a large stone, which you can retrieve during a scripted interaction. Keep in mind that whichever character you select to extract the Estoc, the Estoc will become soulbound to that character only, and cannot subsequently be soulbound to any other character. The character you select can also make a Perception check of 13 during the scripted interaction to read a poem on the blade of the Estoc. Successful extraction of the Estoc itself requires that the character you choose have one of the following:
*Evil* The Grey Sleeper at Cilant Lis
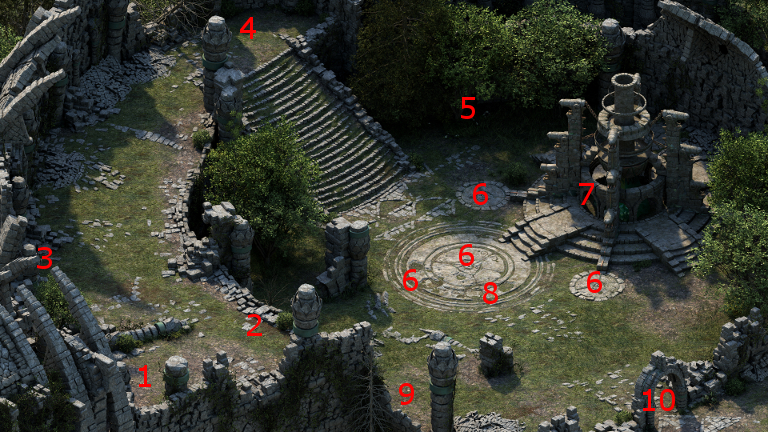
I return to Cilant Lis, and click on the Engwithan Soul Machine at #7. I thereby obtain the next upgrade for The Grey Sleeper, which allows the use of Slow Spirits three times per rest. Slow Spirits reduces Attack Speed by 60% and Movement Speed by 2.5 for enemies only in the area of effect. This can be quite a useful option to call on at the start of combat.
*Evil* The Grey Sleeper at the Esternwood
I next Rest in the Esternwood at #4. I thereby obtain the third upgrade for The Grey Sleeper, which is a 5% chance to summon undead like Guls or Skeletons to your aid on each Hit or Critical Hit.
*Evil* The Grey Sleeper at Caed Nua
I next go to the Adra hand at #10 on the map of Caed Nua. I kneel before it and thereby obtain the last upgrade for The Grey Sleeper, which is a 5% chance to hit its target with Twin Stones on a Hit or Critical Hit. The last upgrade also breaks the weapon's curse, so now Maneha can switch between this or her usual hatchet and shield setup.
I keep this as her secondary weapon, and it does provide interesting options. This is one of the weapons that is particularly beneficial in conjunction with the Barbarian's Carnage ability, since the Paralysis, Invoke Vessels and Twin Stones powers will have multiple chances to trigger. The Slow Spirits power also provides an option whereby she can, at the start of a particularly intense fight, invoke the power to slow down a mass of enemies before switching back to her hatchet and shield.
Both the good and evil parties alike now return to Stalwart Village, but ultimately will soon explore the Whitestone Hollow.