Pillars of Eternity logo


Pillars of Eternity Online Walkthrough by David Milward


INTRODUCTION & ABOUT  |  WORLD MAP  |  WHITE MARCH MAP
General:  
Quests  |  Tasks  |  Bounties  |  Items  |  Characters
Areas:  
Act 1 Areas  |  Act 2 Areas  |  Act 3 Areas  |  Act 4 Areas  |  Caed Nua  |  White March - Part 1  |  White March - Part 2  | 
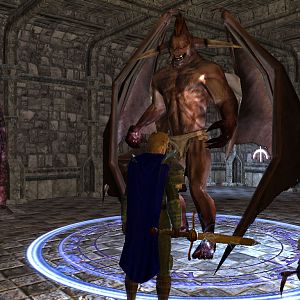
Disable all ads!

Quests:   Main Quests  |  Act 1 Side Quests  |  Act 2 Side Quests  |  Caed Nua Side Quests  |  Act 3 Side Quests  |  White March Part 1 Quests  |  White March Part 2 Quests  |  Companion Quests  | 

White March Part 2 Main Quests:   The Forgotten Army  |  The Iron Flail  |  The Rising Tide  |  Lair of the Eyeless  | 
White March Part 2 Optional Quests:   Iron and Flame  |  Whispers in the Dark  |  Ready the Cannons  |  The Phylactery's Promise  | 

Lair of the Eyeless

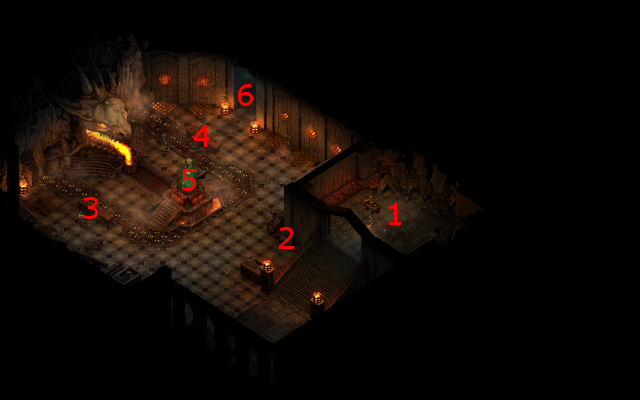
The quest triggers once you have completed The Rising Tide quest.

Durgan's Forge

  1. Go to the statue at #5 on the Durgan Forge map, with the Fragment of Abydon's Hammer in your inventory. You will end up with Abydon's Hammer.

    Cayron's Scar will now also be accessible on the White March map.

  2. At the very least, Deyran will arrive immediately thereafter and give you a Durgan Iron Ingot. Aggressive, Deceptive, Passionate and Rational replies are possible when he wants to know what's going on.

    If you previously completed the Ready the Cannons quest, then Wengra will also show up and give you the Heavy Cannon Blast talent. The talent provides an area-of-effect attack that inflicts both Crushing and Piercing damage, and also knocks its targets prone. It can only be used once per Rest, and can only be used in Cayron's Scar.

    If you previously completed The Iron Flail quest in a way that persuaded Adaryc to depart willingly, he will show up and give you the Burning Pitch Trebuchet talent. It's again another area-of-effect attack that can only be used once per Rest and can only be used in Cayron's Scar.

    *Note* None of them will actually travel with you to Cayron's Scar. Their help is limited to what is described above.

  3. Cayron's Scar

  4. You start off at #1 on the Cayron's Scar map. Now it's a question of getting to the frozen lake in the southwestern corner of the area. There's more than one way.

    There are a series of ice floes at #13. There are a few options to get across safely to the other side without any injuries based on enlarging the floes themselves temporarily:

    • The Druid's Winter Wind spell.
    • The Chanter's Rime and Rost Follows the Footsteps of Karth.
    • The Wizard's Blast of Frost spell.

    If you don't have any of these options, you can try to jump across without any magical aid. However, any characters with Dexterity less than 14 are likely to end up with injuries. It may be safer to go north the long way around and get across at #14.

  5. Eyeless Hammers and Eyeless Stonepiercers will patrol throughout the frozen lake in the southwestern corner of the area. In particular, there will be quite a few gathered about spots marked as #16, a few Eyeless and several Tentacles at #17, and a force of Eyeless gathered about #18.

    They can inflict hefty damage with their attacks, often on multiple party members at once. They have quite a lot of Endurance, and will also be immune to both Burning and Shocking damage. Besides buffing up your defences whenever you can, Abydon's Hammer as well as St. Ydwen's Redeemer may both prove invaluable here for their ability to kill an Eyeless instantly on contact. Also, if you have the Heavy Cannon Blast and Burning Pitch Trebuchet talents, use them if you can catch enough Eyeless in a group with them. They leave behind Binding Coppers and Vessel Flesh when killed.

  6. The entrance to the Ionni Brathr Fragment is at #19.

  7. Ionni Brathr Fragment

  8. You will start off at #1 on the Ionni Brathr Fragment map.

  9. At #2 is a pool at which you will encounter the Hair of Ondra. Ondra will speak to you again. Aggressive, Benevolent, Clever, Diplomatic, Rational and Stoic replies are possible during the conversation, and often at multiple points. An Intellect check of 13 will also clue you in to what Ondra has in mind.

    Ondra wants you to use Abydon's Hammer at a large crystal that is holding the Ionni Brathr Fragment together. The plan is that the remaining Eyeless will respond to the call of the Hammer, tear apart the crystal, and bury themselves underground along with you. That means Ondra fully expects you to sacrifice yourself in the process.

  10. At #4 is where you can slide down to the pool so as to fight the Kraken at #5. Keep in mind that you cannot climb back up. Once you go down, the way only out is by defeating the Kraken and then the scripted interaction with the Crystal at #6.

  11. Kraken
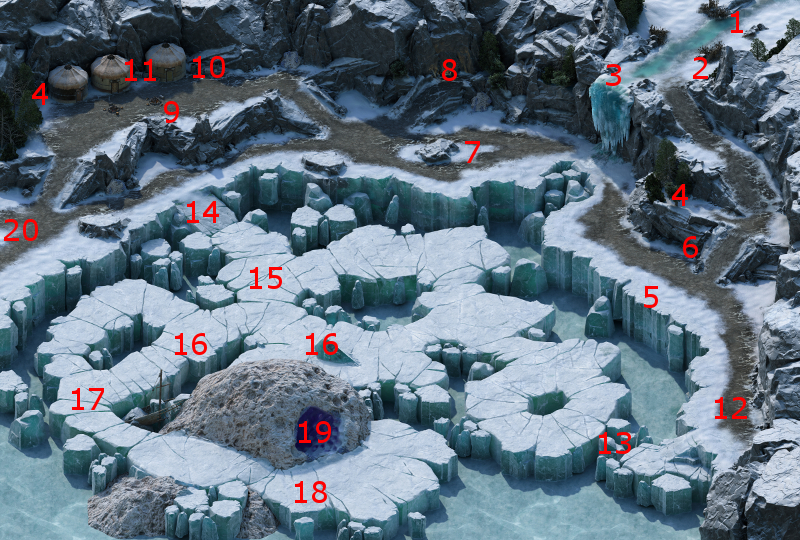
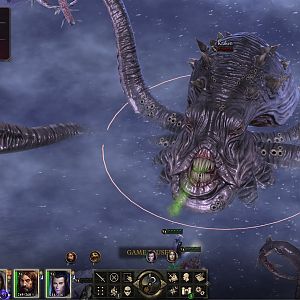
At #5 is where you fight the Kraken, who is the end boss of Part 2 of the White March Expansion. It will be helped along by a lot of its tentacles that can briefly stun party members, and it can also use projectile attacks that inflict Corrosive damage. A few Eyeless will also approach from the south. However, its own personal defenses are not great. So it's best to go all out for the Kraken itself first and foremost. It will fall relatively quickly, and the Tentacles will go with it, making the battle much easier.

    Killing it will also automatically result in you getting two Kraken's Eyes in your inventory, which can be used to add the Legendary enchantment (+15 Accuracy, x1.55 damage) to weapons.

  12. At #6 is the large crystal. Clicking on it begins a lengthy and extended scripted interaction during which you try to make good your escape from the Fragment. A misstep will result in your deaths and the game ending with you having sacrificed yourself to end the threat of the Eyeless.

    The first step is to select a character, either yourself or another party member, to strike Abydon's Hammer against the crystal. It doesn't have to be the character who has equipped the Hammer or has soulbonded with it. Keep in mind that some party members will refuse if you ask them specifically, while others will grudgingly accede to your request. Another approach is to draw lots so that a random party member is chosen. Doing things this way can result in the random party member performing the task, even if he or she otherwise wouldn't.

    The next phase is when several Eyeless block your way. There is a real risk that the Eyeless will hold you up long enough if you select 'dodge' right away, and your game will end then and there. Options for safely clearing the Eyeless out of your way are:

    • The Wizard's Mirrored Image spell
    • The Priest's Repulsing Seal spell
    • The Cipher's Ringleader power
    • The Rogue's Smoke Cloud ability

    The next phase is when a pile of rubble blocks your way. Effective options for clearing out the rubble are:

    • The Druid's Twin Stones spell
    • The Barbarian's Frenzy ability
    • Using a Prybar in combination with any character being able to make a Mechanics check of 7

    The next stage is getting to the shore across from the lake. Options for safely reaching the shore include:

    • Any character being able to make a Survival check of at least 7
    • The Wizard's Kalakoth's Freezing Rake spell
    • The Paladin's Zealous Charge aura
    • The Chanter's Blessed was Wengridh, Quickest of his Tribe chant

    The last phase of your escape involves a determination of whether the character you chose to swing the hammer survives. That character will survive if:

    • You chose the Devil of Caroc as the character, since she is anatomically incapable of drowning.
    • The character can make a Constitution check of 19.
    • The character was equipped with Iverra's Diving Helmet.

    Recall that Iverra's Diving Helmet can be acquired either through the companion adventure called To the Waterline or by completing the Wild Mylla task in a way that did not involve killing Mylla's Wicht friends.

    If you want to complete this quest without permanently losing any party members, it is obviously ideal to select a character that will willingly agree to swing the Hammer and meets one of the three requirements above.

  13. Now that the party has made it out safely, well ... Ondra's plan didn't go quite as she planned (aside from the fact that she wouldn't have minded if you died). The Eyeless emerge, and question why you tried to sink them to oblivion. Benevolent, Cruel, Passionate and Rational options are available during the conversation. A Perception check will reveal more clearly the tie between the Eyeless and Abydon.

    You will have choices as the conversation winds down:

    • Return their essences to Abydon, but without fully restoring him and his memories.
    • Return their essences to Abydon to fully restore him.
    • Disperse their essences completely to Ondra's satisfaction.

    This decision won't have any in-game consequence for what's left of your campaign. It will, however, affect the epilogue presented after you finish the game.

    Your decision regarding the Eyeless marks the end of this quest, as well as Part 2 of the White March expansion.


Amazon.com
Amazon.ca
Amazon.co.uk
Sorcerer's Place is a project run entirely by fans and for fans. Maintaining Sorcerer's Place and a stable environment for all our hosted sites requires a substantial amount of our time and funds on a regular basis, so please consider supporting us to keep the site up & running smoothly. Thank you!

Disable all ads!