Pillars of Eternity logo


Pillars of Eternity Online Walkthrough by David Milward


INTRODUCTION & ABOUT  |  WORLD MAP  |  WHITE MARCH MAP
General:  
Quests  |  Tasks  |  Bounties  |  Items  |  Characters
Areas:  
Act 1 Areas  |  Act 2 Areas  |  Act 3 Areas  |  Act 4 Areas  |  Caed Nua  |  White March - Part 1  |  White March - Part 2  | 
Disable all ads!

Quests:   Main Quests  |  Act 1 Side Quests  |  Act 2 Side Quests  |  Caed Nua Side Quests  |  Act 3 Side Quests  |  White March Part 1 Quests  |  White March Part 2 Quests  |  Companion Quests  | 

White March Part 2 Main Quests:   The Forgotten Army  |  The Iron Flail  |  The Rising Tide  |  Lair of the Eyeless  | 
White March Part 2 Optional Quests:   Iron and Flame  |  Whispers in the Dark  |  Ready the Cannons  |  The Phylactery's Promise  | 

The Rising Tide

The quest triggers once you have completed The Iron Flail quest.

Abbey of the Fallen Moon

  1. You start off at #1 on the Abbey of the Fallen Moon map.

    Ondra's faithful will be throughout the area. They will be of differing professions. Tidalfists are Monks that will frequently target spellcasters with their Flagellant's Path ability. They leave behind Monk's Outfits when killed. Crescentsworn are Fighters who can be looted for Plate Armor, Exceptional Swords and Exceptional Large Shields. Swordsworns are Paladins who can be looted for Plate Armor, Exceptional Swords and Exceptional Medium Shields. Faithbinders are Priests who can be looted for Fine Breastplates and Fine Morningstars. Mindgazers are Ciphers and leave behind Scale Armors and Fine War Bows when killed. Galesingers are Chanters and can be looted for Scale Armors and Exceptional Crossbows.

    You have two fundamentally different ways of approaching the quest. One way is to slaughter everything in your path to reach your goals. The other way is to infiltrate the Temple. If you prefer the latter, you will need at least once to make one of a Lore check of 6, a Perception check of 13, or a Resolve check of 14 when you run into Ondrites as you make your way around. If you make the check once, the Ondrites will welcome you as a prophesied Tidebringer.

  2. At #19 is a mural. One crucial bit of information you need to glean from viewing the mural is the association of the word "Saman" with floods. You will need that clue, whether you are peacefully infiltrating the Ondrite temple or storming it by force.

    Another piece of information is the order in which certain pictures appear on the mural. That order will become important later on during the quest.

  3. Your next goal, however you do it, should be to reach the Halls of Presence. There will be doors leading into the Halls at #8, #10 and #20.

  4. Halls of Presence

  5. You may start off at any one of #1, #18 or #22 on the map of the Halls of Presence map, depending on which doorway you used to come in.

  6. High Abbott Kaoto
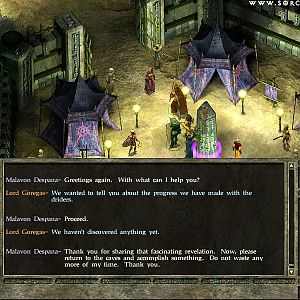
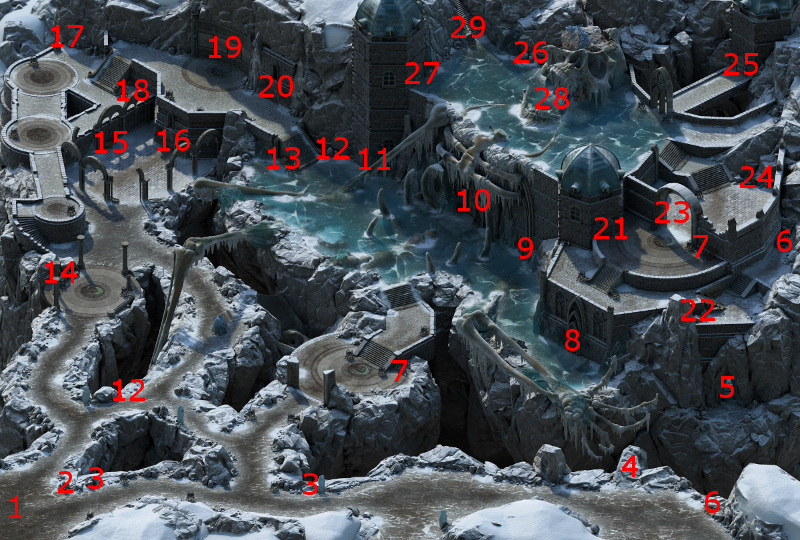
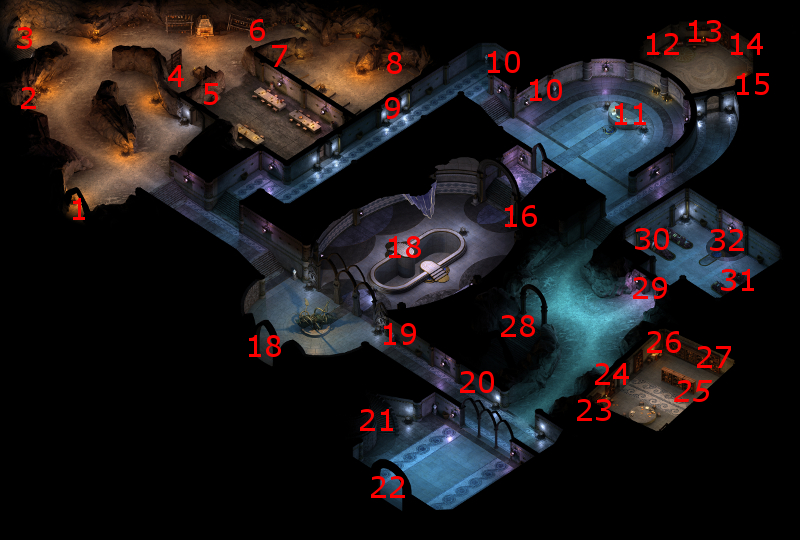
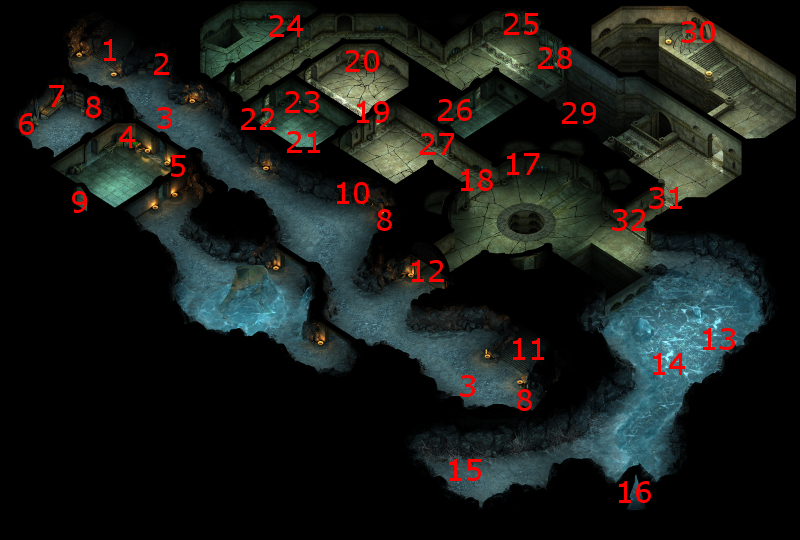
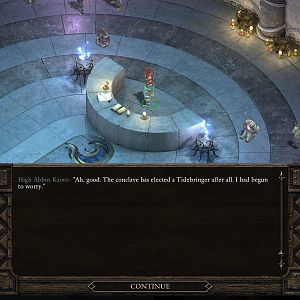
At #11 is High Abbott Kaoto. You will have to kill him sooner or later. It's a question of when. You can kill him now either if you've been slaughtering the rest of the Ondrites all along, or if you have been given run of the Halls but now select a dialogue option to attack him. Keep in mind that he is a powerful Monk who can use the Dichomotous Soul power, and is much more so when helped by his numerous retinue of Ondrites. You will get swarmed from all sides, so spells and powers that have a foe-only area of effect are adviseable, and don't hold back with them. Should you win, he will leave behind:
    You can now read his soul to learn the Sign of the Tide. That, and the little bit of information learned from the mural outside, is what you'll need to make progress.

    Also, the High Abbott's Key will be in a vase just in front of where he had been standing.

    *Note* You can also learn the Sign of the Tide from the Journal of the High Abbott, which is in a chest at #13. The chest itself is protected by a Storm of Holy Fire trap that is very hard to detect.

  7. The other possibility, if you enjoy the run of the Halls, is to continue to pose as the prophesied Tidebringer. Kaoto will indicate that you need to prepare for a ritual called the Recitation so that you can take his place. He indicates that information needed to complete the Recitation can be found at a mural outside (see above), a nearby Giftbearer, and the Library.

  8. Giftbearer Beasca is at #17. She'll make a large gem seemingly disappear into thin air. You can end up provoking her and the nearby Ondrites into attacking you if you indulge in too many Passionate responses. She'll reveal another clue, that all is gifted to Ondra and that Ondra causes the forgetfulness of all, if you question her about the seeming magic trick more calmly.

  9. The bookcase at #27 has The Giftbearer's Pilgrimage, which provides another clue for completing the Recitation.

  10. Once you have learn all three parts, return to the High Abbott and provide the following answers:

    • "I am Saman, the Flood."
    • "I give myself, ..."
    • "I have none, ..."

    Kaoto will now explain what's next. He wants you to venture to the Halls of Silence below and find a device called Ondra's Witness, which can be used to flood the Halls of Silence. The purpose is so that the Low Tide members below will drown, the current High Tide members will take their place as the new Low Tide members, paving the way for a new generation of High Tide members as part of the transitional process amongst Ondra's faithful. He also instructs you in the Sign of the Tide that you will soon need.

  11. The easiest way to the Halls of Silence will be through the stairs at #3.

  12. Halls of Silence

  13. You may have first ended up at stairs at any one of #1, #9 or #11 on the Halls of Silence map, depending on where you first entered from.

    Note that there will be large contigents of Ondrites stationed at spots marked #3. They will attack on sight if you've been previously slaughtering other Ondrites throughout the temple.

    They will still stop you and insist that you turn back even if you have the run of the temple. You can comply with their request and return to the Halls of Presence, or you can attack them, in which case the rest of the Ondrites throughout the temple will turn hostile as well.

    However, they will let you by peacefully if you properly completed the Recitation before High Abbott Kaoto, such that you can now tell them that you have Kaoto's permission to pass.

  14. The door at #12 requires a Wave Crested Key to open. You can find one either at the table nearby at #10, or by killing High Abbott Kaoto at #11 in the Halls of Presence.

    *Note* Alternatively, you can bypass the groups of Ondrites and the door at #12 completely if you use a Rope and Grappling Hook at #4 in the Abbey of the Fallen Moon so as to reach the cave opening at #5. That will bring you to the cave opening at #16 on the Halls of Silence map.

  15. The Ondrites in the central room will be docile. However, they will attack once you use the lever at #17 to open the door at #18.

  16. Farentis
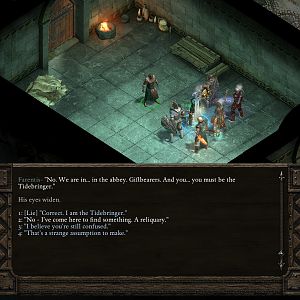
At #21 is where you'll encounter Farentis. He'll explain that completing the ritual that High Abbott Kaoto has set you involves a choice between choosing a high tide setting that will kill all the Low Tide brethren, or choosing an open gate setting that will allow the Low Tide brethren to escape. He makes it clear that he would like you to make the latter choice.

    Whether you agree with him then and there is not important. He will give you the Ornate Cracked Key regardless, which opens the door at #22.

  17. The symbols at #28 need to be manipulated during a scripted interaction in order to raise a water bridge at #29. The order is revealed by the mural at #18 in the Abbey of the Fallen Moon. The correct order is:

    • City in Flames
    • Tidal Wave
    • Barren Shore
    • Flourishing City

    The next step is to perform the Sign of the Tide during the scripted interaction, which can be learned either directly from High Abbott Kaoto at #11 in the Halls of Presence or by reading his Journal, which is at #13 in the Halls of Presence.

    Perform these steps correctly, and a water bridge will rise at #29 allowing you to get across the east.

  18. Here is what's for all intents and purposes a lever that involves a fundamental choice regarding your quest.

    You can choose to switch the lever to the open gate setting, which will allow the Low Tide brethren to escape and free themselves. Doing so will cause any remaining High Tide brethren to become hostile and attack you on sight, including High Abbott Kaoto.

    You can instead choose to switch the lever to the rising tide setting, which will cause most of the Halls of Silence to flood over, causing all of the Low Tide brethren within to drown to death.

    Either choice leads to all of the Low Tide brethren being gone for good, and you acquiring Ondra's Witness, an item you'll need to make progress.

  19. Now return to the Halls of Presence. If you like, you can inform High Abbott Kaoto (if he is still alive) that you have obtained Ondra's Witness. He will advise you to meet him upstairs. In any event, the stairs at #21 lead back out to the Abbey of the Fallen Moon at #21.

  20. If you have peformed the Recitation in a way that involved drowning the Low Tide brethren, and High Abbott Kaoto is still alive, he and several High Tide brethren will now be gathered about the Veil of Tears, which is at #23 on the Abbey of the Fallen Moon map.

    He will now want to back out of becoming Low Tide, to which Aggressive, Benevolent, Clever, Diplomatic and Rational replies are initially available.

    He will explain further, and becomes resolute on fighting you. You can recipocrate and attack him, and one of the dialogue options leading to that can earn Cruel disposition. Alternative, you can make either a Perception check of 15 or a Resolve check of 13 to convince some of Kaoto's allies to take your side, which can make the battle significantly easier. He and the others will drop the same items as if you had killed them earlier.

    Whether you had killed Kaoto earlier, or have done so now, it's a simple matter of approaching the Veil of Tears with Ondra's Witness in your inventory in order to make it dissipate and clear the way.

  21. Moreoever, some stairways that were not previously available now become accessible. The stairs at #27 of the Abbey of the Fallen Moon map now lead to #11, and vice versa. The stairs at #25 on the Abbey of the Fallen Moon map now lead to the stairs at #14 on the Halls of Presence map and vice versa.

  22. Now click on the skull of Abydon at #28. The scripted interaction will begin with you extracting a hot piece of metal from the skull, and then a vision of Abydon's avatar hurling his gigantic hammer at a moon on a collision course with Eora itself. Abydon dies absorbing the impact head on.

    The goddess named Ondra will then speak at length with you. The full range of disposition-based replies are available during the conversation, often at multiple points. Having the Philosopher background, Lore checks of 4 or 8, an Intelligence check of 14, and multiple Perception checks of 12 can help flush out additional details, but they are not vital.

    At some point, Ondra will reveal that the Eyeless she set loose on the world will need to be stopped and so she's willing to provide you limited aid. You will now get the Fragment of Abydon's Hammer. She wants you to have it reforged into a smaller version of Abydon's original hammer, then take it to a place called Cayron's Scar where you can use it to destroy the Eyeless.

    Having this conversation marks the end of the quest, and triggers the next quest, the Lair of the Eyeless.


Amazon.com
Amazon.ca
Amazon.co.uk
Sorcerer's Place is a project run entirely by fans and for fans. Maintaining Sorcerer's Place and a stable environment for all our hosted sites requires a substantial amount of our time and funds on a regular basis, so please consider supporting us to keep the site up & running smoothly. Thank you!

Disable all ads!