-

- Forums
- Chatrooms
- Gallery
- Gameplay Videos
- Upload
- Articles
- Mod Reviews
- Shop SP: Games, Movies, Books
|
|
Quests | Tasks | Bounties | Items | Characters Act 1 Areas | Act 2 Areas | Act 3 Areas | Act 4 Areas | Caed Nua | White March - Part 1 | White March - Part 2 | |
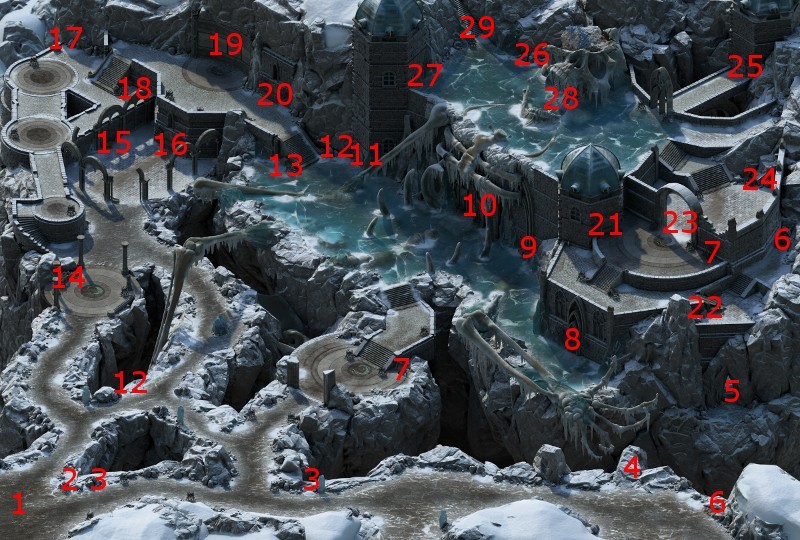
Abbey of the Fallen Moon
Ondra's faithful will be throughout the area. They will be of differing professions. Tidalfists are Monks that will frequently target spellcasters with their Flagellant's Path ability. They leave behind Monk's Outfits when killed. Crescentsworn are Fighters who can be looted for Plate Armor, Exceptional Swords and Exceptional Large Shields. Swordsworns are Paladins who can be looted for Plate Armor, Exceptional Swords and Exceptional Medium Shields. Faithbinders are Priests who can be looted for Fine Breastplates and Fine Morningstars. Mindgazers are Ciphers and leave behind Scale Armors and Fine War Bows when killed. Galesingers are Chanters and can be looted for Scale Armors and Excellent Crossbows.
You have two fundamentally different ways of approaching The Rising Tide quest. One way is to slaughter everything in your path to reach your goals. The other way is to infiltrate the Temple. If you prefer the latter, you will need to make one of a Lore check of 6, a Perception check of 13, or a Resolve check of 14 whenever you run into Ondrites as you make your way around.