Pillars of Eternity logo


Pillars of Eternity Online Walkthrough by David Milward


INTRODUCTION & ABOUT  |  WORLD MAP  |  WHITE MARCH MAP
General:  
Quests  |  Tasks  |  Bounties  |  Items  |  Characters
Areas:  
Act 1 Areas  |  Act 2 Areas  |  Act 3 Areas  |  Act 4 Areas  |  Caed Nua  |  White March - Part 1  |  White March - Part 2  | 
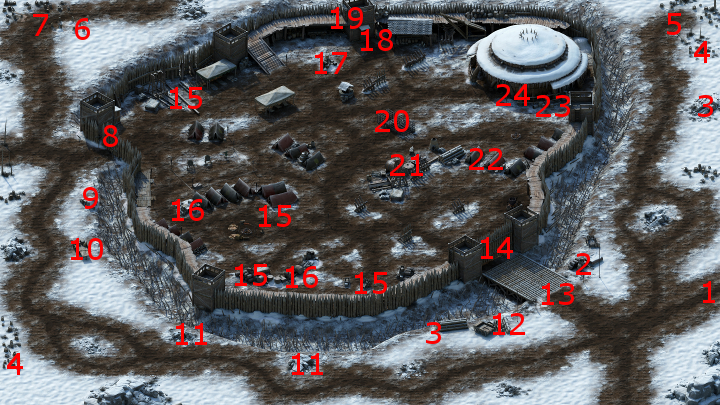
Disable all ads!

White March - Part II Areas:   Stalwart Village  |  Stalwart Mines  |  Luminescent Caves  |  Durgan's Battery  |  Durgan's Forge  |  Lower West Tower  |  Upper West Tower  |  Whitestone Hollow  |  Iron Flail Fort  |  Mowrghek Ien  |  Abbey of the Fallen Moon  |  Halls of Presence  |  Halls of Silence  |  Cayron's Scar  |  Ionni Brathr Fragment  | 

Iron Flail Fort

There will be Iron Flail soldiers of pretty much every class spread throughout the perimeter and courtyard of the Fort, and in bunches. Tread carefully and try to take on as few as possible at any given point of time. The mercenaries pretty much leave behind multiple instances of every imaginable armor, weapon or shield of Fine or Exceptional quality. They will also frequently have War Dogs, which leave behind Elder Wolf Fangs when killed.

Iron Flail Fort

  1. Here is the initial point of entry when the party first arrives at the Fort. It also provides access to the White March map.

  2. There will be a couple of containers here. One has a random food item. The other has a Rope and Grappling Hook, a random scroll and some coins.

  3. You will find Ryngyr Berries at these spots.

  4. There will be Tyn Hats at these spots.

  5. You will get attacked by a Snow Bear and a Menpwgra here. The Snow Bear will leave behind an Elder Bear Claw, while the Menpwgra will leave behind an Awakened Adra.

  6. You will find an Idle Soldier and a Villager here having a tryst. A Benevolent option is available if you want to assure them you're not going to hurt them, while Aggressive, Honest and Rational replies are possible when they become afraid of getting caught by the rest of the soldiers of the Fort.

    In any event, conversing with them reveals that it is possible to sneak in through the back gate at night.

  7. There is a hidden cache here that can be uncovered while in scouting mode. It will have a random magical item, plus a Vessel Bone, a Vessel Flesh and a Readceran Prayer Bracelet.

  8. The back gate is here. It is possible during night time for a character with a Stealth skill to use a Rope and Grappling Hook during a scripted interaction and then open the gate from within without alerting any of the soldiers. Attempting this action during day time or failing the Stealth skill check results in the soldiers being alerted and a fight immediately near the gate.

  9. This crate will have minor random items in it.

  10. This crate will have a couple of random potions in it, as well as Camping Supplies.

  11. There will be Brintwyn Bans at these spots.

  12. There will be some freshly cut logs here, which can be used to open the gate at #14.

  13. There will some Soldiers and War Dogs standing guard here. They will let the party back away once, but will attack if you press further. A Diplomatic reply is possible early in the intial conversation.

  14. Deyran
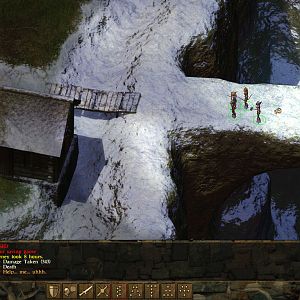
Here is the front gate. There are two ways to open it.

    One way is to use the logs from #12 to force them open, although that is likely to result in an injury to at least one party member.

    Another way is possible if you had previously completed the Ready the Cannons quest. You can signal Durgan's Battery to use the cannons to blow the gate away.

    However you do it, you will have to fight a large force of Iron Flail Soldiers as they come for the gate. The opening where the gate itself had been, however, is rather narrow and therefore affords you the opportunity to plant crowd-control spells over it as a bottleneck to your advantage. Note the example from the screenshot above where a Wizard's Sphere of Eora keeps all of the enemies in place behind the gate where I can continue to pound them with more spells.

  15. These containers will have random food items in them, and maybe some coins as well.

  16. These locked chests will have a random potion or two in them, and maybe some coins as well.

  17. A barrel here will have two sets of Camping Supplies in it.

  18. The door here leads to the top of the palisade at #19.

  19. The door here leads to the watchtower entrance at #18.

  20. The cage here will have a War Pup that you can have become your pet.

  21. The anvil here will have a Ring of Searing Flames.

  22. There will be a series of tents here. The one on the left will have a random high-tier gem (e.g. Emerald).

    The one in the middle will have the Cloak of an Eothasian Priest.

    The one in the middle will have A Letter Home.

  23. The barrel here will have a random potion and some coins.

  24. Here is the entrance to the Command Post.

    .


Amazon.com
Amazon.ca
Amazon.co.uk
Sorcerer's Place is a project run entirely by fans and for fans. Maintaining Sorcerer's Place and a stable environment for all our hosted sites requires a substantial amount of our time and funds on a regular basis, so please consider supporting us to keep the site up & running smoothly. Thank you!

Disable all ads!