-

- Forums
- Chatrooms
- Gallery
- Gameplay Videos
- Upload
- Articles
- Mod Reviews
- Shop SP: Games, Movies, Books
|
|
| Pillars of Eternity 2 Video-Based Walkthrough by David Milward |
Satahuzi
Captain Darmo
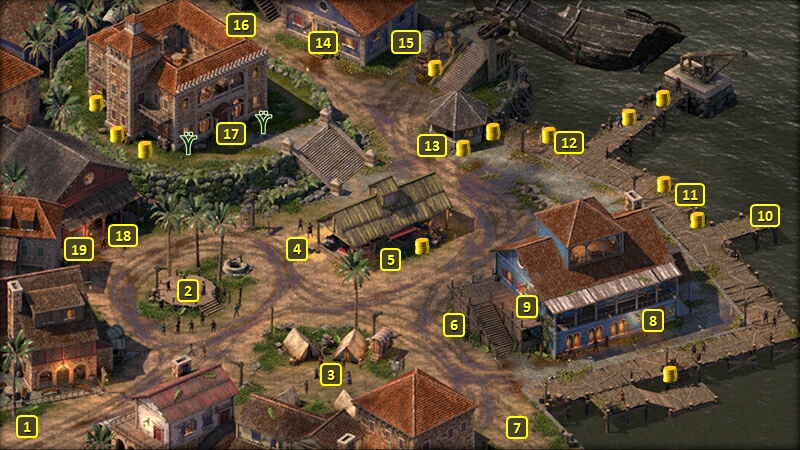
I am now at the door at #17 on the map of Port Maje Harbor. I go west and speak to Captain Darmo at #18, who informs me of fisticuffs between an Aumaua woman and a Vailian merchant. Now I go through the door at #19.
Rinco
First, I go into Stealth mode and pickpocket Candied Nuts from the child named Tari. It'll be one of the Food items that I'll want to set up the no Rest run, for both the Good and Evil parties.
Now I speak to Rinco while he's lying in his bed. He's been beaten badly by an Aumaua woman named Moheka, who also stole his coin purse that he'd like back. The conversation starts the Burning Bridges Task.
I leave the house, go to one of the exits on the edge of Port Maje Harbor, and then go to Satahuzi.
Mokeha
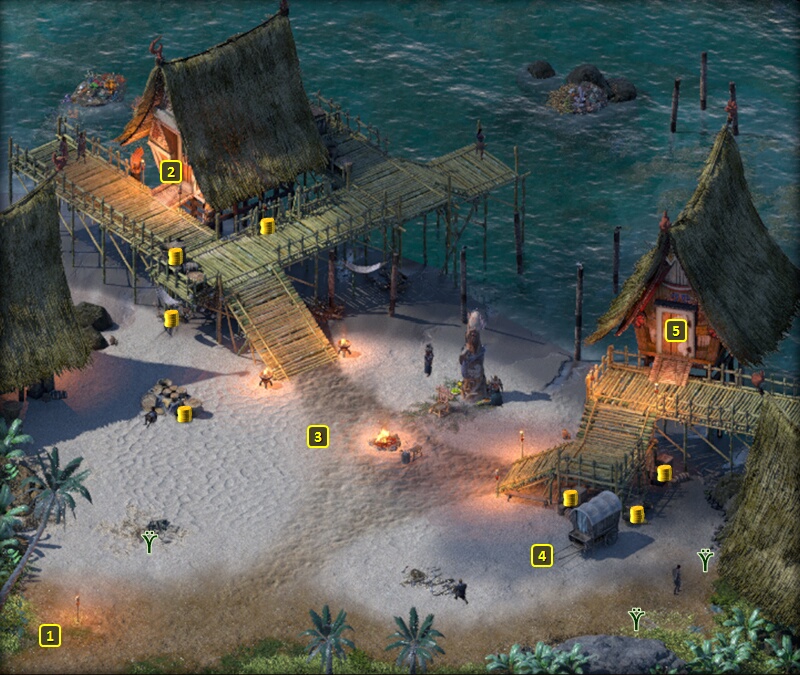
I start off at #1 on the map of Satahuzi. It's afternoon, so I work quickly as I only want to come here once for the sake of efficiency. I enter Mokeha's Lodge through the door at #5, and steal any items that I find there. I need to get that done before Evening, as trying to do it once Mokeha is back in her own lodge would force me to attack and kill her.
I then seek out Mokeha herself, who can either be found wandering about the village of Satahuzi during day time (or inside her lodge at #5 during night time). She's carrying Rinco's Coin Purse.
Dialogue options open up when you express a willingness to hear her side of the story. If you decide you don't like Rinco, you can choose the Passionate option that allows her to keep the Purse, which will get you the xp reward for completing the Task but won't earn any money.
Another course is to kill her for it. If you kill her during the day time, chances are you'll end up having to defend yourself against the entire village, including Storm Speaker Ikawha. That in turn can hurt your chances of building an alliance with the Huana if that's what you eventually want during later parts of the game. If you're set on killing her without making the whole village go hostile, it's best to wait until evening falls, and you can attack her inside her lodge without anyone nearby to see it. You can then loot Rinco's Coin Purse from her body.
It won't take much to get her to talk about the fight itself, although you also have choices between a combined Intellect check of 11, a Diplomacy check of 1, or a Bluff check of 1 that also earns Shady disposition.
As for convincing her to hand it over, one route may be to bring up that her fight can be viewed as an illegal assault by Port Maje authorities, since it opens up opportunities to gain influence with companions. Following up with an
Intellect check of 12 that also earns Rational disposition will earn influence with Xoti. Also bringing up that it was hardly a fair fight will also score influence with Eder. It will take little to convince her to hand the purse over afterwards.
Alliria brings up that Rinco is in danger of losing his home, and then follows up with a Benevolent dialogue option to convince Mokeha to willingly hand over the purse. A combined Intellect check of 11 and Diplomacy check of 1 would also have worked.
The trio now have enough xp to advance to their third levels of experience. Xoti takes two abilities. One of them is Mortification of the Soul. It allows her to self-inflict enough Raw Damage to gain two Wounds, and it doesn't cost any Mortification to do so. Can be useful if I need her to build up enough Wounds in a pinch in order to use one of the activated abilities she will acquire.
She also takes Two Weapon Style. I take this now, as she will spend a lot of time fighting with her Monk fists until she gets Twin Eels.
Eder takes Weapon & Shield Style. It adds +6 Deflection when using a shield, and adds the same to the Reflexes Defense as well. It's pretty much an obligatory choice for any shield-based tank.
He also takes Fighter Stances, and activates the Defender Stance. The Defender Stance increases Engagement by +3, and reduces Damage by 5% for each enemy Engaged. Keeping multiple enemies Engaged, and stacking the Damage Reduction from the Defender Stance with bonuses to Damage Reduction from several items is the very foundation of his Fighter-tank build.
Alliria takes Deep Faith. Faith and Conviction provides a stable +10 bonus to all Defenses. Deep Faith increases those bonuses as long as the Paladin builds up Favored Dispositions and avoids penalties from building up Disfavored Dispositions. And for a Kind Wayfarer that means an onus to build up Benevolent and Passionate Disposition, while avoiding Cruel and Shady Disposition.
*Evil* Mokeha
I simply have Eder go into Stealth and then pickpocket Rinco's Coin Purse from Mokeha.
Zarathos then pockets the money from Rinco's Coin Purse to conclude the Burning Bridges Task.
Kraken's Eye is the next destination for both the good and evil parties.