-

- Forums
- Chatrooms
- Gallery
- Gameplay Videos
- Upload
- Articles
- Mod Reviews
- Shop SP: Games, Movies, Books
|
|
Heritage Hill
Valtas Manor
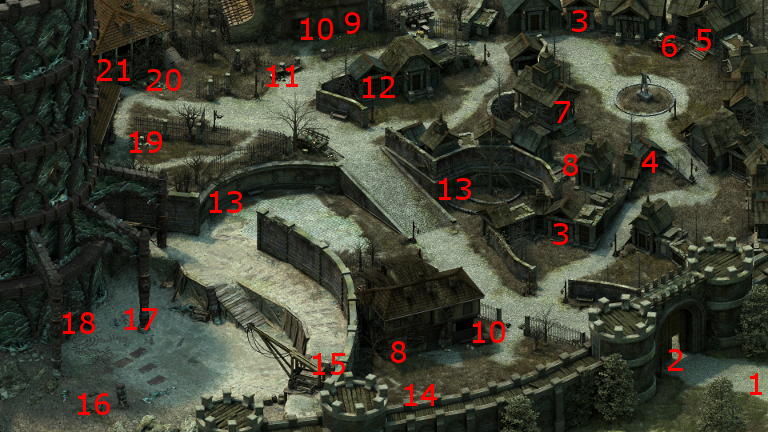
I fight my way through more undead in the middle street of the Heritage Hill district, until I reach the entrance to the Valtas Manor at #9.
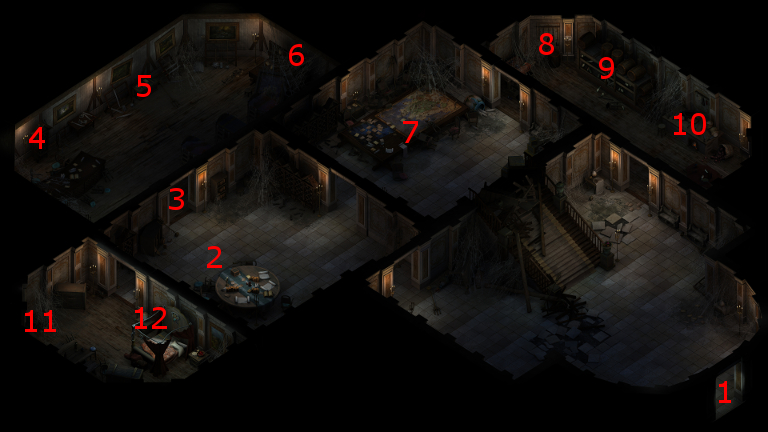
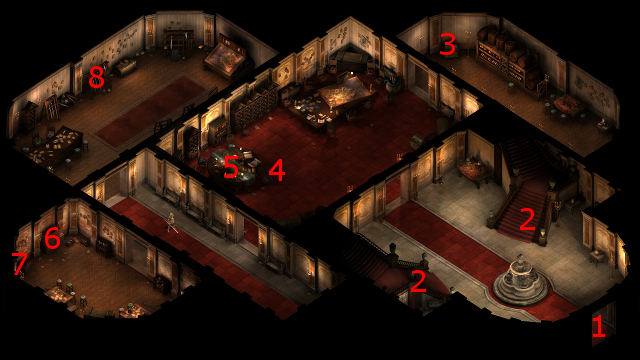
I start off at #1 on the map of the Valtas Manor. Some members of the Valtas family, now undead, are at #2 trying to convince somebody named Saeda to open the door. I kill them off easily.
The Valtas Manor Key is in a chest at #12, which I use to open the door at #3.
The chest at #4 has the Valtas Groundskeeper Letter, which hints that a key can be found near the kitchen oven.
A hole in the wall at #6 indicates that somebody escaped by digging her way out.
I kill several more undead in the room at #7. A large table in the room has Lord Valtas' Will, which suggests that the family owns a nearby mausoleum.
Clicking on the oven at #10 indicates that somebody actually made off with the Mausoleum Key.
Saeda
I rest up, and then grab the Camping Supplies near the entrance to the Manor.
The entrance to the Mausoleum is at #7 on the map of Heritage Hill. Inside will be a sarcophagus that has an Iridescent Spider Figurine, which I have Hiravias equip in one of his quick-item slots. *Evil* The evil party didn't bother with it, since by my recollection they've already got plenty of Figurines to go around as it is.
A little girl named Saeda will be inside as well. A Resolve check of 14 or a Perception check of 11 (which Alliria made) will reveal that some sort of bright light suggestive of either necromancy or Animancy erupted prior to the residents turning undead. Informing her that she can now safely leave will formally lead to the completion of the Safe Haven task.
Safe Haven
I return to the front gate to make sure Saeda is safe. The front guards congratulate me on the rescue, and I get a major boost to positive reputation with Defiance Bay.
Devil of Caroc advances to her 10th level, and selects the Superior Deflection talent in order to enhance her role as an off-tank.
To the Heritage Hill Tower
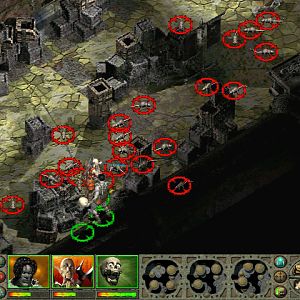
The party now travels towards the southwest corner, where they slaughter more undead.
The barrel at #16 has a Rope and Grappling Hook, which I'll be using pretty soon.
The entrance to the Heritage Hill Tower is at #18.
Heritage Hill Tower, Level 1
I click on the door to the tower, and use words learned during my encounter with the Shrouded Woman during the Never Far from the Queen quest to open it during a scripted interaction.
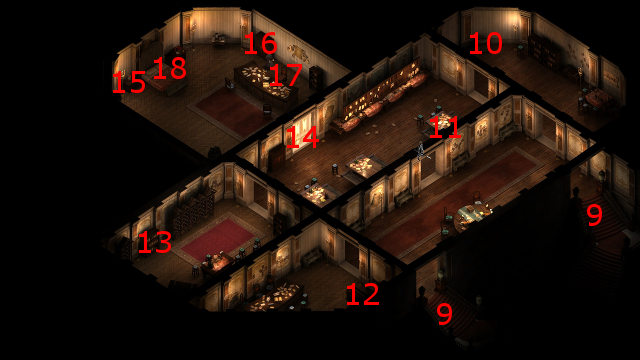
There are plenty of undead on this level, but I kill them without any problem. There are various notes and journal pages in the tables at #2 and #3, which provide insight to what happened.
The stairs to the next level are at #6.
Heritage Hill Tower, Level 2
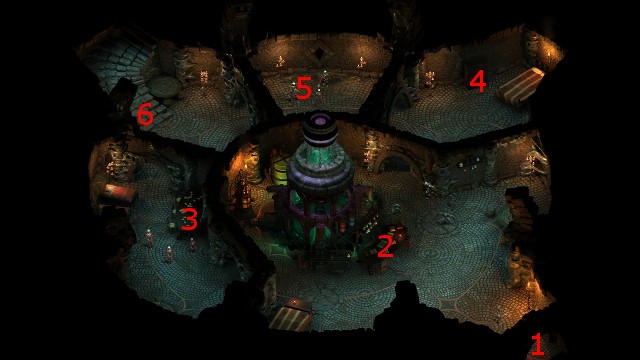
I am now at #7 on the map of the second floor of the Tower. There are plenty more undead to fight throughout the level.
There are a few more notes from Alhelm's Journal to found amongst the tables on the level. The table at #12 has a ring called the Sigil of the Arcane, which I have no use for, and a Letter from Icantha, which provides more insight into what happened.
The stairs to the top of the tower are at #14.
Aldhelm
I arrive at #15 on the map of the top of the Tower. I speak at length with Aldhelm, who has become an undead creature standing next to the Adra pillar at #16. He explains several things. One, the man who caused Alliria's Awakened condition also very likely turned on the soul machine at the top of the tower, causing the district residents to turn undead. Second, somebody named Icantha knows of runes that can be used to operate the machine. Third, Aldhelm offers to use the machine to empower Alliria if she brings him hapless living people to him for his sustenance. Whether or not you take him up on his offer is a fairly fundamental decision that affects the epilogue for the game itself.
A Grand Companion Adventure now becomes available. I insist on it being The Wax Maker companion adventure. I insist on that one, reloading if I have to, which I had to do a few times. Once I do get it, I assign Pallegina to it.
The reason for my insistence is that I want The Helwax Mold. The intention is to make a duplicate of the Purgatory sabre for Alliria, but not until it has been fully upgraded.
The video concludes with the good party leaving the tower and returning to the Heritage Hill district.
Icantha's Prisoners
The entrance to Icantha's House is at #21 on the map of Heritage Hill.
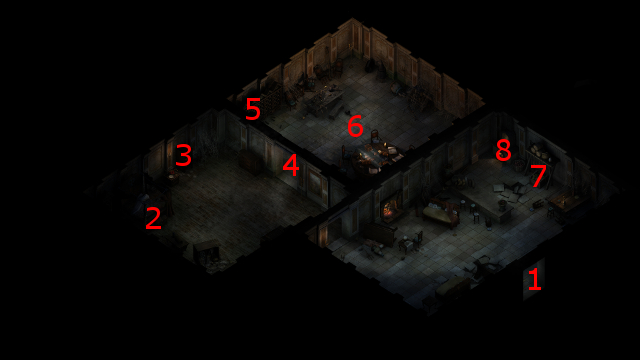
I end up at #1 on the map of Icantha's House. I avoid the northeast corner of the house for now, and go to the room to the west instead. I unlock the door at #4.
At #6 will be some human prisoners being held by Icantha. Alliria advises them to make for the front gate to reach safety. That choice means I won't get the same Might and Endurance boosting that Zakara will, but that's a roleplaying choice on my part.
A locked chest has a pair of gloves called Spiderfingers, but I have no use for them.
*Evil* Icantha's Prisoners
*Evil* Zakara selects the Deceptive dialogue option that tricks them into going to Aldhelm, who will kill and feed on them.
Icantha
Now I engage in an extended dialogue with a Fampyr named Icantha at #8. I eventually get what I need by appealing to her knowledge living on beyond her as a legacy. I learn two things. One, I learn how to operate the soul machine at the top of the tower, which is named Teir Nowneth. Second, I learn the Engwithan language in its entirety, which will help with other parts of the game in the future. I return to the tower.
Teir Nowneth
I make my way back to the top of the tower. I try to speak to Aldhelm more than once, but his mind is now completely gone so he attacks me. I waste him easily.
Now I click on the Adra Pillar at #16. I could simply turn it off, which would give me an xp reward and a major gain of positive reputation with Defiance Bay. But Alliria decides to go further and overload the machine with soul energy, destroying it permanently. This choice gets her the xp rewards and an extraordinary gain of positive reputation with Defiance Bay. *Evil* The third option, possible only if I had tricked Icantha's captives into going to Aldhelm, is shown below.
I leave the tower and make my way back to Brackenbury.
*Evil* Gift from the Machine
Zakara learns everything she can from Aldhelm, including how to use the machine to empower herself. She then betrays Aldhelm and destroys him.
I click on the machine to begin the scripted interaction. I select the empower oneself option. Zakara now has the Gift from the Machine talent, which gives her +1 to Might and +5% Endurance.
St. Garam's Spark
I arrive on the north side of Brackenbury. As I make my way to the southwest corner, I get attacked by several more Assassins. I deal with them easily enough, especially after Hiravias casts both Relentless Storm and Form of the Delemgan.
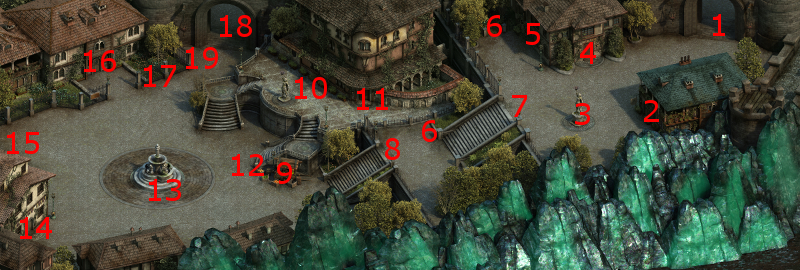
The entrance to Hadret House is at #14 on the map of Brackenbury. Waiting for me at the door will be a courier. She will give me a Pistol called St. Garam's Spark, as a token of appreciation from her patron for removing the curse on Heritage Hill. I have no use for it though, so I'll just sell it.
Undying Heritage
The party starts off at #1 on the main floor of Hadret House. Stairs to the upper floor are at points marked #2.
I inform Lady Webb (at #17) of recent events in Heritage Hill. Doing so marks the completion of the Undying Heritage quest, also progresses The Hermit of Hadret House quest.
The next destination for the evil party is Cliaban Rilag. It is Pearlwood Bluff for the good party.