-

- Forums
- Chatrooms
- Gallery
- Gameplay Videos
- Upload
- Articles
- Mod Reviews
- Shop SP: Games, Movies, Books
|
|
House Doemenel
Doemenel Doorman
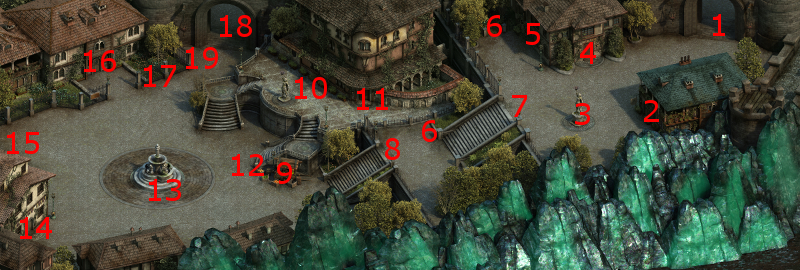
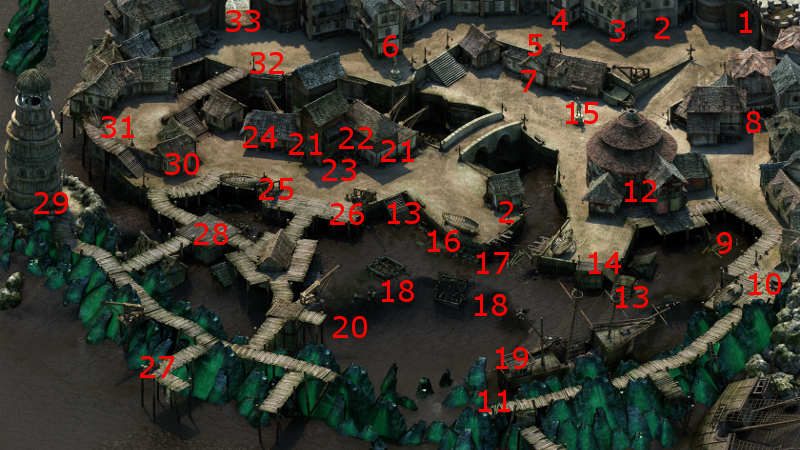
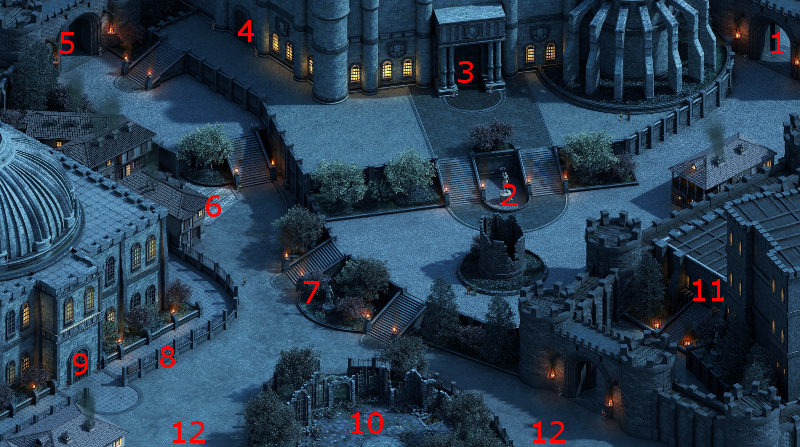
The entrance to House Doemenel is at #11 on the map of Brackenbury.
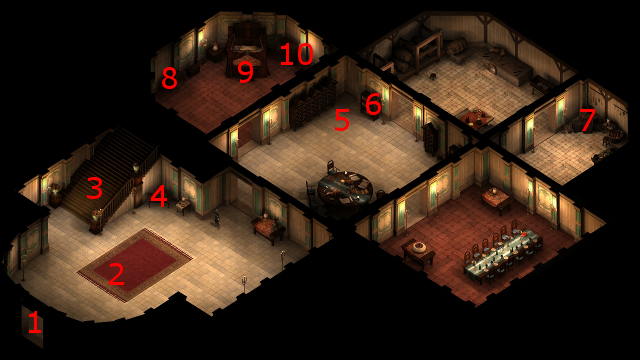
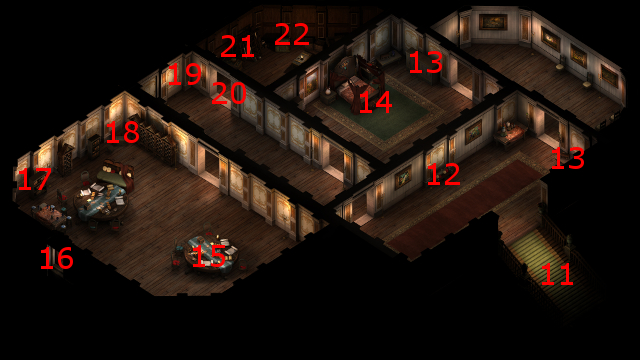
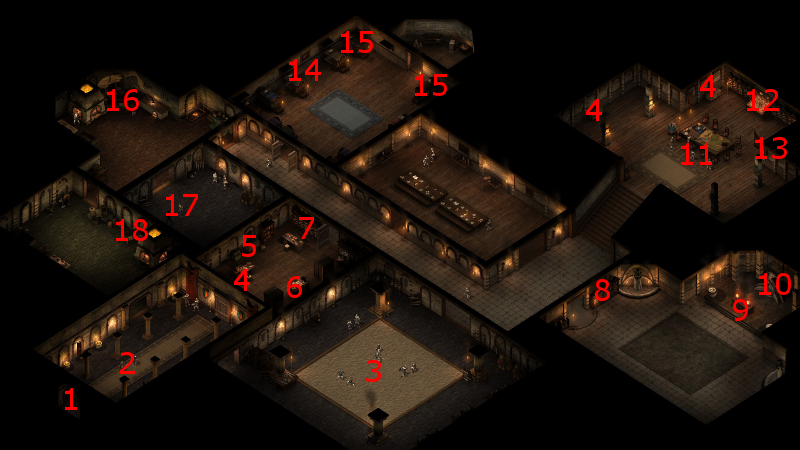
I start off at #1 on the map of the main floor of House Doemenel. The Doemenel Doorman is at #2. He won't let you go much further unless you cite a specific Doemenel contact or a specific order of business with House Doemenel that will justify you coming in.
I could attack him and slaughter all the guards, although that won't help my chances with a House Doemenel alliance.
Alliria gets permission by dropping Danna's name as a result of the quest called At All Costs.
An alternative was to drop Medreth's name as a result of the Cat and Mouse task.
A third alternative is to mention that you have arrived to see Bricanta Doemenel in the course of the Supply and Demand quest. Any of these possibilities will convince him to allow me free run of House Doemenel.
The stairs at #3 lead to #11 on the second floor map.
Bricanta Doemenel
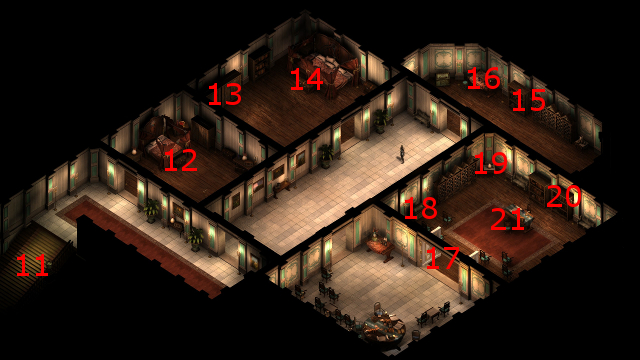
Bricanta Doemenel is at #16 on the map of the second floor of House Doemenel. She wants me to teach a lesson to somebody named Kolfecg. This dialogue triggers the Hard Feelings task. The video concludes with the party making its way to Ondra's Gift.
Kolfecg
The entrance to Kolfecg's house is at #4 on the map of Ondra's Gift. Your three basic choices are:
*Evil* Kolfecg
Zakara picks the Cruel option so as to outright murder Kolfecg.
Hard Feelings
Alliria informs Bricanta of the deed. The rewards are a moderate gain of reputation with House Doemenel, and 600cp.
Bricanta also makes her wares available for sale. The only item I bought from her was a pair of boots called Cat's Whisper, which only Rogues can use. The idea is, if the right quest calls for it, everybody in the party can sneak around with a number of ranks in the Stealth skill. I head downstairs.
*Evil* Bricanta is even more pleased when Zakara informs her of Kolfecg's death, but the rewards remain the same. The evil party has no use for any items that become available in Bricanta's special wares.
Abrecan Doemenel
Abrecan Doemenel will be at #5 on the map of the main floor of House Doemenel. His willingness to give me a job depends on having completed the quest called At All Costs to the satisfaction of his sister, Danna. Since I have that prerequisite, he wants me to retrieve a letter of instruction that could incriminate him, and preferably without harming his own men currently in possession of the letter. This conversation triggers the quest called A Two-Story Job.
I leave the House. Now that I got the minor companion adventure I wanted, I select the Forum stronghold upgrade for construction, which provides +4 to Prestige. I make my way to Copperlane.
Thieves' Letter
I make my way to the house at #33 on the map of Copperlane. The house itself is the Thieves' Hideout.
A group of thieves consisting of Langden, Dirty Rigbert, Deysay, Surica and Slecg will be about the north end of the room. Your objective is to get the letter that Abrecan wants from them.
It is possible to trigger the quest by coming here first. If you do, the Thieves' will most certainly attack you on sight. They will leave behind the Thieves' Letter, in addition to plenty of other mundane loot.
However, if you went to see Abrecan before coming here, it becomes possible to convince them to give you the letter willingly, which would be preferable from Abrecan's point of view. You need to select the option that drops Abrecan's name to make those options available.
Multiple options become available after mentioning Abrecan. Saying that there's no need for violence, or selecting the Rational option, will cause them to attack you.
The Clever option, the Diplomatic option, and the Might check of 16 that also earns Aggressive disposition, will convince the Thieves' to hand over the letter willingly. Alliria selected the Diplomatic option.
I loot whatever containers are in the house, and then head back to Caed Nua. I rest there, selecting the Hedge Maze resting option in order to acquire a +2 Stealth bonus. There is a specific reason why that will be explained soon.
I now return to Brackenbury. Construction of my Forum stronghold upgrade has been completed, which adds another +4 Prestige. I now add on as many hirelings that will add Prestige bonuses as I can. Since I got the last minor companion adventure that I wanted, it is now a priority to increase Prestige as much as possible. There are two reasons why. One reason is that I want a special merchant named Azzurro to make his way to Caed Nua, for which a higher Prestige score helps. The other reason is that I now want a grand companion adventure, for which higher Prestige also helps.
*Evil* Thieves' Letter
*Evil* Zakara decides to slaughter the whole lot of them for the Thieves' Letter.
But again, she lets the enemies gang up on her and knock her out, while Durance casts Revive the Fallen on her once there's only one or two Thugs left. The point as always is to make progress towards the last upgrade for St. Ydwen's Redeemer, which requires its wielder to be revived in combat 5 times.
Heart of White March
I return the Thieves' Letter to Abrecan. He now has another job for me, to steal a legendary jewel from the nearby Reymont Manor. He wants me to do it in a way that doesn't involve killing anyone in the manor.
There is a window on the west side of the Manor at #5 on the map of Brackenbury. Trying to climb the vines during the scripted interaction won't work. Only using a Rope and Grappling Hook will.
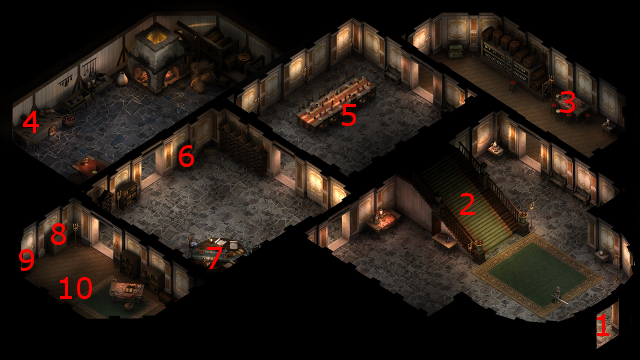
I start off at #16 on the map of the Upper Floor of the Reymont Manor. I loot the containers in the room, open the door to the east, and have Devil of Caroc wear the Cat's Whisper boots for their Stealth bonus.
Reymont Guards regularly patrol the hallway to the east. Devil of Caroc monitors the hallway, keeping just the right distance to both observe whether the guards are no longer in the hallway and avoid being noticed. What I wait for is a short yet distinct window of opportunity where Devil of Caroc can quickly run across the hallway, hit the lever #19 in order to open the door at #20, and regroup back into the west room.
Like I said, the window of opportunity where both Guards are gone from the hallway is distinct and yet short, so I can't do everything at once. Devil of Caroc repeats the process to loot the chest #21.
After that, she repeats the process to disarm the chest at #22, and pilfer the Heart of White March gemstone from it.
Now I close the door to the west room behind me, and make my way back down out the window at #16.
A Two-Story Job
I bring the Heart of White March to Abrecan and conclude the quest called A Two-Story Job. My rewards are 3,000cp and a major boost in positive reputation with House Doemenel.
Abrecan also advises me that his father, Gedmar, now has a job for me. I go to the stairs leading to the upper floor of House Doemenel.
*Evil* A Two-Story Job
Zakara completes the quest a far different way. First, she stops off at Caed Nua. She selects the Forum resting option in order to gain a +3 bonus to Intellect.
Now she goes to the Reymont Manor, the entrance to which is at #4 on the map of Brackenbury. Lord Reymont will be at #10 on the map of the first floor of the Reymont Manor.
But first, she temporarily borrows Aloth's leather armor, which has previously had a +2 Intellect enchantment placed on it. Between that and the Forum resting bonus, Zakara will now have an Intellect of 16.
She now hands over the Thieves' Letter to Lord Reymont. She gets rewarded with 2,000cp and a Ring of Unshackling. She also makes an Intellect check of 16 to get an extra 500cp.
This course of action effectively ends any possibility of a reward from Abrecan, or any ongoing alliance with House Doemenel. But her intentions are to ally herself with the Knights of the Crucible anyway.
Gedmar Doemenel
The Guards at #17 will now let me through now that I've completed the quest called A Two-Story Job for Abrecan. Gedmar Doemenel will be at #21. He wants me to assassinate Marshall Wenfeld in Crucible Keep. Alliria chooses a Stoic reply and later a Diplomatic reply that will both increase reputation with House Doemenel.
Gedmar also gives me the Dozens' Token, with the intention that I plant it in Crucible Keep to frame The Dozens, and have them and the Crucible Knights on each others' throats. This conversation starts The Changing of the Guard quest.
I go back down to the main floor. Abrecan wants me to avoid planting the Token as a frame-up, because he feels fear is more valuable to House Doemenel. The video concludes with the good party heading over to First Fires.
Marshall Wenfeld
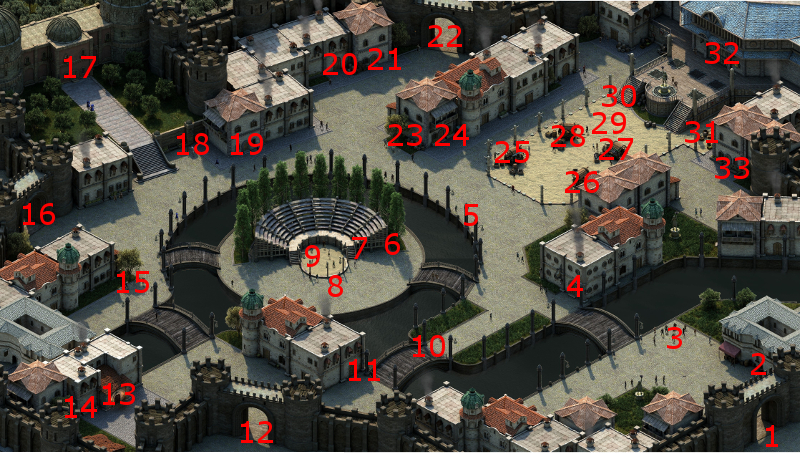
The entrance to Crucible Keep is at #11 on the map of First Fires.
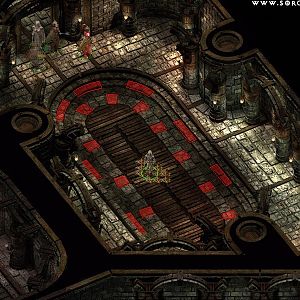
I head over to the Shrine of Abydon at #9 on the map of Crucible Keep. I wait until Marshall Wenfeld arrives, begins praying at the Shrine, and with no other Justiciars around. Once those conditions are met, I force-attack Wenfeld and kill him easily.
I loot his body for his loot. The Shrine at #9 also acts as a container, so I deposit the Dozens' Token into it to fall in with Gedmar's request. I make my way back to Brackenbury.
The Changing of the Guard
Alliria returns to Gedmar. She gains an extraordinary increase in positive reputation with House Doemenel for planting the Dozens' Token at the altar. It would only have been a major increase had I sided with Abrecan.
I also have three choices with respect to an additional reward:
Binding Rope
Alliria collects her loot from the rewards chest in the Great Hall of Caed Nua. The loot includes the Binding Rope belt, which is a reward for the Bound and Buried adventure.
Alliria wears the belt for the rest of the game. The Constitution bonus is obviously one of the key points, so as to increase her durability. The other key point is that any enemy that strikes her in combat is subject to getting Stuck for at least 3 seconds. Stuck inflicts a -20 penalty on Deflection, which means that she can in turn retaliate with an attack of her own that has the increased probability of inflicting a Critical Hit. And she herself will enjoy multiple bonuses to her Critical Hit Modifier. It's all about maximizing the chances of triggering her Strange Mercy power.
The good party rests up with the Forum bonus (+3 Intellect) and then travels to the Sanitarium. However, the evil party did this part significantly earlier, and has yet to do a series of quests originating in Crucible Keep with a view towards gaining a permanent alliance with the Knights of the Crucible, so that is next for them.