-

- Forums
- Chatrooms
- Gallery
- Gameplay Videos
- Upload
- Articles
- Mod Reviews
- Shop SP: Games, Movies, Books
|
|
| Pillars of Eternity 2 Video-Based Walkthrough by David Milward |
Southern Karatapu Island
*Evil* Derelict Vailian Ship
I sail north from Maje Island. I attack a Vailian Expert Captain. I start with Naval Combat at a distance, and use a couple shots of Grapeshot to reduce the Crew. I then board and defeat what's left of the crew. I thereafter board a Vailian Novice Captain.
A Derelict Vailian Ship is at #16. Looting it isn't worth it, since I'll just get mundane loot and a Rest will be triggered, cancelling out my bonuses. I instead sink it with Cannon fire.
*Evil* Deck of Many Things
The evil party goes west from the Derelict Vailian Ship, as there is an opportunity to take advantage of. A ship called The Deck of Many Things appears. Once it does, I change the core party composition to bring in Eder, Serafen and Maia, but keep Ydwin. I then board the vessel and go below deck at the invitation of Captain Thaenic.
There will be a few merchants with highly unusual items for sale. I begin with Zidacco, who's right at the door to the deck. One item I buy from him is the Gloves of the Dungeon Warden for Ydwin. The Lockdown power, which can inflict a long Stun effect on a single target, is interesting but it can only be used once per Rest. The real reason is the Accuracy bonus, which will enhance both Ranged Weapon Attacks and Cipher Spells.
The other item I buy from him is the Sash of Judgment for Maia. It increases her Damage by 10% against enemies above 50% Health, but enemies above 50% will themselves enjoy +10% Damage against her. That 10% Damage bonus will be more meaningful for a highly-damaging weapon like her Arquebus, and I don't mind the drawback for somebody who participates mostly in ship combat.
The next merchant is Captain Thaenic himself, who is on the east side. One item I purchase from him is the Ring of Prosperity's Fortune. It bestows on its wearer a chance to convert Hits to Critical Hits, and that chance increases the more money (cp) the party has. That makes it a perfect ring for Zarathos' build that includes both Berserker and Monk, and therefore strives to inflict Critical Hits whenever possible.
The other item I get is the Slippers of the Assassin for Eder. His build is about maximizing his opportunities for double-damage from Backstab (which he will soon get). And he'll do plenty of that through his Escape / Shadow Step tree of abilities. The boots provide another opportunity, turning him Invisible for 5 sec after killing an enemy.
Now I go to Sautara, who's to the west. I purchase the Sandals of the Water Lily from her, and for Serafen. The immunity to Dexterity Afflictions is nice. But the -10 penalty to all Defenses ties in with the theme of encouraging Critical Hits against him.
Bauble is the last merchant on the west end of the ship. I buy the Ring of Mule's Wit for Maia. It confers Resistance to Intellect, Perception and Resolve Afflictions, but at the cost of a -8 penalty to Intellect. The ring can be a good and solid one for a character whose abilities do not in any way involve either duration or area-of-effect. And her build is all about highly damaging single-target strikes from a distance.
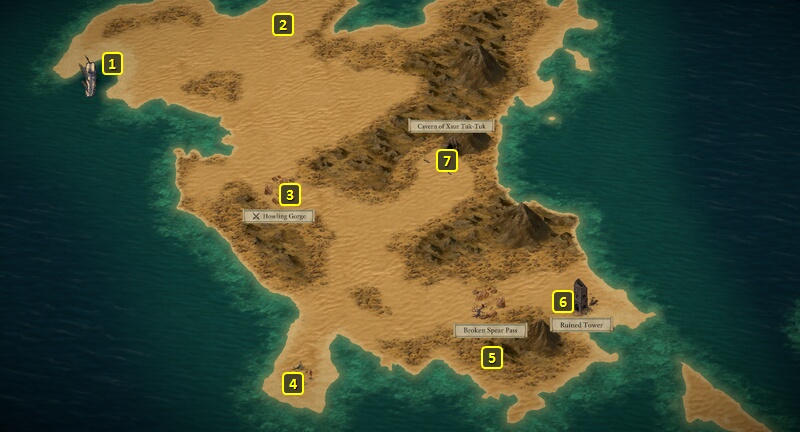
Now I sail to the Southern Island of the Karatapu Channel at #14 on the World Map. Mirke, Xoti and Tekehu rejoin as the core evil party.
Howling Gorge
I start off at #1 on the map of the Southern Island of the Karatapu Channel. I go to the Howling Gorge at #3, which involves a scripted interaction and potentially a fight against some Xaurips that worship a Drake.
First, you can have one of your characters make a Perception check of 13 to detect the presence of Wilder voices. Maia can also send Ishiza to scout ahead. Alternatively, a Cipher character can detect the presence of other minds in the vicinity.
After that, you can either go back the way you came to end the scripted interaction or continue forward and notice several Xaurips worshipping a Drake.
Now you have some more options:
Broken Spear Pass
Now I go to the Broken Spear Pass, which involves a scripted interaction. A Perception check of 12 by the Watcher will reveal that the sand seems animated.
If your Watcher character has a missile weapon or two as his or her current weapon set before starting the scripted interaction, you'll have the option to test the sand dune from a distance. The Sand Blights and Wurms will still attack you, but with the difference that they'll all be in front of you.
I simply loot the skeletons, which leads to my being surrounded and attacked by several Sand Blights and Wurms. But I have little trouble outlasting them.
A skeleton in the area has a pair of Healing Hands.
I loot some random items from the Ruined Tower at #6, and then enter the Cavern of Xaur Tuk-Tuk at #7.
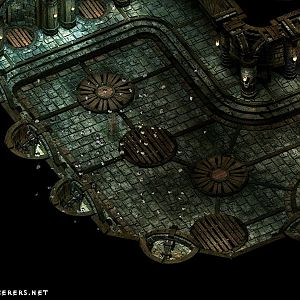
Cavern of Xaur Tuk-Tuk
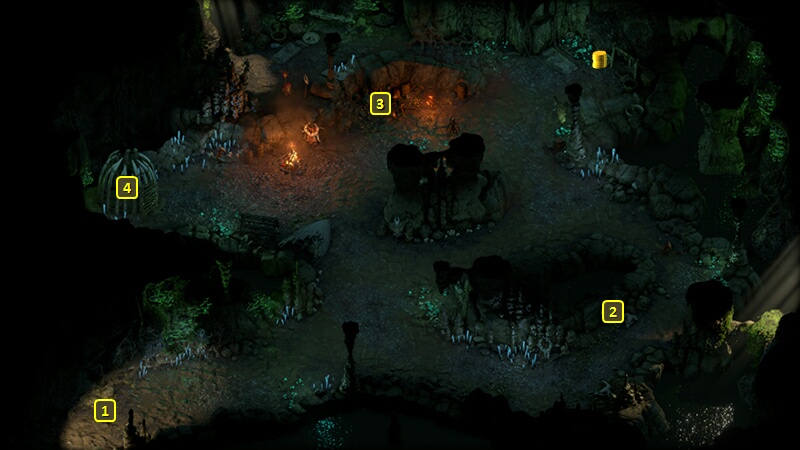
I am now at #1 on the map of the Cavern of Xaur Tuk-Tuk. Eder gains two abilities on his 9th level-up.
One of them is Guardian Stance. It upgrades Defender Stance so that any Disengagement Attacks he inflicts will also Prone the target that tries to disengage from him.
He also takes Superior Deflection. It's a passive that adds +4 to Deflection.
I now go east a bit and grab the Sigil of Atrophy Wardstone from #2. I go back to the entrance to avoid detection by any patrolling Xaurips. I use both the Sigil of Atrophy Wardstone and the Sigil of Dark Wardstone that I obtained earlier, which immunizes the party against the curses caused by their respective sigils. And they last until Rest.
Now I battle the horde of Xaurips at #3. Pallegina of course keeps everyone immunized against the Xaurips' poison with Shatter Their Shackles throughout the battle. Mirke starts off by hitting the Gunpowder Barrel with her Blunderbuss, which ends up destroying the Sigil of Atrophy as well. She also takes out the Priest from a distance as well. The battle otherwise relies on using healing resources when necessary and gradually outlasting the enemies.
Warchief Rauki leaves behind a Small Shield called Shimmer Scale. It can be potentially useful against Fampyrs with their Dominating Gaze, or creatures that rely on Fire attacks. But I didn't personally see the need, as I have other alternatives in mind.
I also let Mother Sharp-Rock out of her cage at #4 as an act of mercy. She joins my crew, albeit briefly.
*Evil* Zarathos doesn't even bother to break Mother Sharp-Rock out of her cage, and leaves her to her fate.
*Evil* Drakonis El Matar
I name the island "Drakonis El Matar" after leaving the Cavern. I return to my ship and sail for Neketaka. I take down a Deadfire Merchant Ship.
I also attack a Royal Deadfire Company Expert Captain as I get closer to Neketaka. I start by going up close and taking out 4 Crew Members with my Cannon Fire, and then board after that. Initially I let them come to me. Tekehu casts Nature's Balm on the party, and then uses Nature's Mark on the oncoming enemies. Ydwin uses Phantom Foes. I attack the Rogues as glass cannons instead of the Fighters whenever I can. Mirke and Xoti are at some point able to hold down the Fighters to a standstill. That gives Zarathos, Tekehu and Ydwin a chance to break off and jump onto their ship, attacking their Chanters and Sailors. Mirke and Xoti are able to overcome the Fighters as well, with help from the ship combatants. That means the party can regroup, and finish off the Expert Captain and Fighter and Chanter who are left.
I then go after the Vailian Expert Captain. I tried to get them with Magranite Flamethrowers, but they close in once they realized what I was going to do. I still managed to take out two of their Crew Members before the boarding battle starts. I make a dash for the Cipher and Sailor on their ship, and take them out. The ship combatants manage to take down the Sailors on the flanks of their ships. It then becomes a matter of ganging up and outlasting their Fighters and Goldpact Paladins.
I return to Neketaka, sell off my booty, and dock in Queen's Berth. I will now explore the Wakara Reef.