-

- Forums
- Chatrooms
- Gallery
- Gameplay Videos
- Upload
- Articles
- Mod Reviews
- Shop SP: Games, Movies, Books
|
|
| Pillars of Eternity 2 Video-Based Walkthrough by David Milward |
West Island of Wakara Reef
*Evil* Tuaha
I start by going after a Royal Deadfire Company Expert Captain, who was on his way to Neketaka from a little to the northeast. None of his Cannons have a range beyond 400m, so I jibe to put myself beyond that. I then turn portside. I will have faced two volleys, but don't suffer that much damage. I send a Grapeshot volley the other way. And again, Haeferic's Nose can take out at least two Crew Members at once. My Grapeshot takes out three Crew Members. A Sails Fire took out a fourth. So now I grab the opportunity to board them. It's still a pretty tough fight, but reducing the Crew by 4 made it within reach.
I return to Neketaka for repairs, continue southwest, and board a Vailian Novice Captain and then a Deadfire Merchant Ship. I sail south to Port Maje after that.
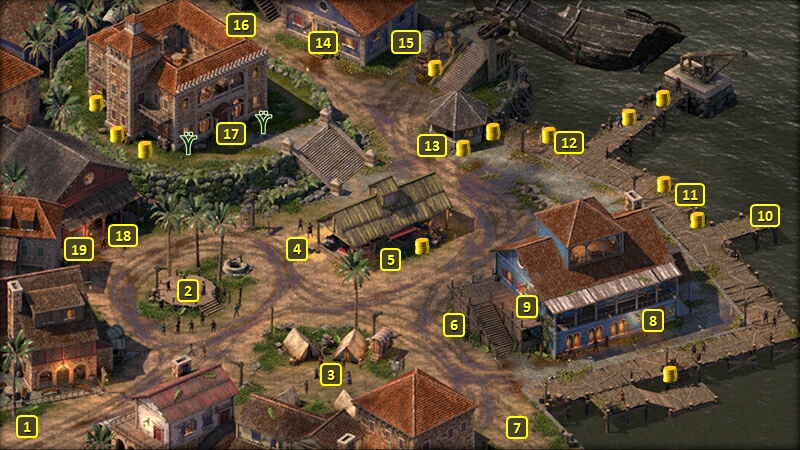
I arrive at #10 on the map of Port Maje. I go over to Tuaha at #6, as she is one of the contacts for purposes of Maia's personal Quest, The Courier's Calling. Tuaha is worried about a Huana spy stalking her, and would like you to take care of it. A dialogue option based on having the Rauatai background, or a combined Diplomacy 4 and History 3 check, can convince her to accept the Missive. Doing so will help complete the quest, although it will affect the endgame slides (which may be better for Port Maje itself in the long run). But Zarathos instead agrees to fall in with her request.
The Kaura Craftsman will frequently wander around points #2, #3 and #5. He'll also be wearing a conspicuous toothed-necklace that makes him stand out.
Zarathos makes an Insight check of 3 to notice the ink on his fingers, and identify him as Tuaha's stalker. A Bluff check of 3, or having Maia talk to him, can result in him willingly leaving Tuaha alone. But Zarathos prefers the Aggressive option that also leads to killing the stalker outright to ensure there's no interference with Tuaha's job.
I thereafter advise Tuaha of what for her is very good news. She also eagerly accepts the Missive from Maia. This is going to eventually result in Governor Clario and Stormspeaker Ikawha getting assassinated for purposes of the endgame slides. But Zarathos is out to spread death, misery and suffering wherever he goes, so it's all good.
I return to the ship after having a discussion with Maia. I also switch her out for Ydwin after returning to the ship.
Purakua
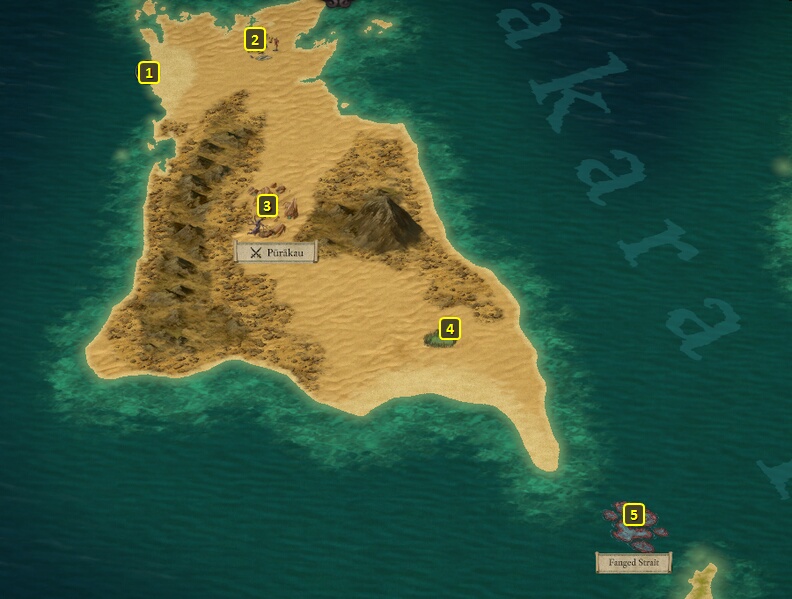
The good party came straight to the West Island after attacking a couple of ships, and lands at #1. They grab some Ammunition at #2, and then go to #3.
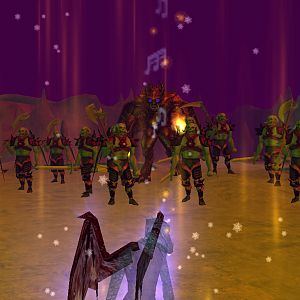
It is now time to battle Purakua and several Xaurips. They'll be near a Sigil of Darkness. All of my party is immunized to the sigil through a Sigil of Darkness Wardstone, except for Ydwin. So I send Eder ahead to get their attention and lead them away from the sigil. I outlast them with the help of my healing resources. Pallegina uses Shatter Their Shackles periodically during the early phases when there are still plenty of Xaurips and their poison attacks to worry about. She switches to using Rejoice my Comrades when I'm down to Purakua, to immunize the party against becoming Shaken or Frightened.
Purakua leaves behind two items. One is the Ring of the Solitary Wanderer. Its reduction of hostile effects only triggers when the wearer isn't near any allies. That may make it quite useful for a solo run, but it also means I have no use for it.
The other is an Amulet called the Token of Faith. Ydwin wears it for the rest of the game. The +2 bonus to Resolve helps to maximize her Deflection, which not only enhances her survivability as an off-tank but also maximizes her use of Riposte.
I get some Water from the Oasis and then return to the ship.
Fanged Strait
I sail a bit west and board a Vailian Novice Captain, and then a Deadfire Merchant Ship.
Now I go back east and to the Fanged Strait, at #5 just a little south of the West Island. Llendreth makes a Helmsman check of 3 to take the ship through the coral reef without any damage, along with morale and xp boosts for the Crew.
I sail back to Neketaka at #17 on the World Map. I board a Vailian Expert Captain and a Huana Novice Captain along the way. I sell off my excess goods once I reach port.
Bounty on Purakau
I enter Queen's Berth with a party of Serafen, Rekke, Fassina and Konstanten.
Konstanten gains Bloody Slaughter on his 9th level-up. It's a passive ability that provides a 20% chance of converting Hits to Critical Hits and +50% Critical Hit Damage, both against Near Death targets. This is a good ability to take when you have other abilities or benefits that trigger on landing the killing blow.
Rekke gains two abilities on his 9th level-up. One of them is Mob Stance. It upgrades Cleaving Stance so that he enjoys a 5% reduction of Recovery Time for every enemy that is within Melee range.
He also takes Armored Grace. The 25% reduction of Recovery Time will stack with any reductions applied by Mob Stance.
Fassina takes Purge of Toxins. It provides a single ally with complete immunity to any diseases or poisons for at least 30 sec. Its duration will be extended by her Rejuvenation Power Levels.
I go east and through the door at #24.
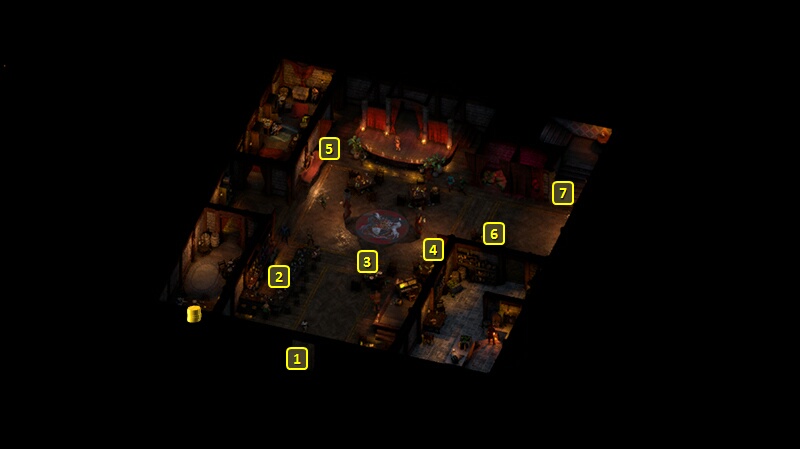
That brings me to #1 on the map of the main floor of the Wild Mare. I speak to Abocco at #3. I collect 1,500cp, 2,800+ xp and a minor gain in reputation with Neketaka as rewards for the Bounty on Purakau. I also accept the Bounty on Nomu the Marauder.
I then leave and buy up crafting ingredients in Periki's Overlook and Serpent's Crown.
Those ingredients include purchases of Lagufaeth Livers and Primal Waters. So now I add the Purifying enchantment to Fassina's weapon, The Spine of Thicket Green. It adds +10 to all Defenses vs. Disease or Poison Attacks.
*Evil* Bounty on Purakau
I bring in Aloth, Serafen, Maia and Rekke to collect the reward for the bounty, as they're falling behind on xp.
Serafen gets two abilities on his 9th level. One of them is Barbaric Smash. It will completely recoup the Rage cost for using Barbaric Blow should it also be a killing blow. Bloodthirst, which also erases Recovery for a brief period of time following a killing blow, makes Crushing Blow redundant. That makes Barbaric Smash the easy choice.
The other is Interrupting Blows. It has a 50% chance of causing an Interrupt on a Critical Hit, which makes it another staple for Barbarians.
Aloth takes Bull's Will on his 9th level-up. Many of his activated abilities will come through his Grimoire. And that means I can place a lot of emphasis on passives. So I start to accrue the ones that provide bonuses to Defenses, starting with this one that raises Will by +10.
I conclude by buying up crafting ingredients in Periki's Overlook and Serpent's Crown, putting my core party back together, and leaving town.
Now it is time to explore Neketaka Island.