-

- Forums
- Chatrooms
- Gallery
- Gameplay Videos
- Upload
- Articles
- Mod Reviews
- Shop SP: Games, Movies, Books
|
|
| Pillars of Eternity 2 Video-Based Walkthrough by David Milward |
Fort Deadlight
Pukestabber
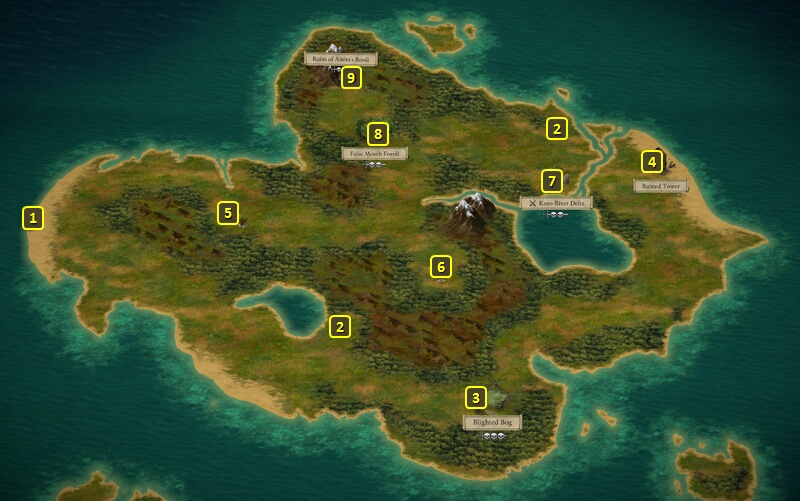
I sail northwest and collect some random items from a small island. I return to my ship, sail northwest, and approach Amira's Island at #7 on the World Map.
I switch out Aloth and Pallegina for Rekke and Fassina. The former is to help me make a Survival check in case I need it. The latter is to help me make the Arcana check that I intend to make.
I dock at #1 on the map of Amira's Island. I make my way to the Koro River Delta. A group of Pirates led by a man named Ranetti will be here, attempting to bury a cursed dagger named Pukestabber. There are a few options for getting it from him:
*Evil* Static Thunder
The evil party sails southwest from Neketaka, and enters a storm near Fort Deadlight at #4. I raise Rekke's weapon, Lord Darryn's Voulge, to the storm. That leads to its next Soulbound upgrade, Static Thunder. Static Charges that detonate after a Critical Hit will now also apply the Disoriented (-5 Perception, Flanked, +50% Recovery Time) Affliction to their targets.
I thereafter sail to dock in Fort Deadlight.
*Evil* First Meeting with Captain Aeldys
I come in through the front gate of Fort Deadlight, and am immediately greeted by First Mate Mabori. I agree to let him lead me to a meeting with Captain Aeldys.
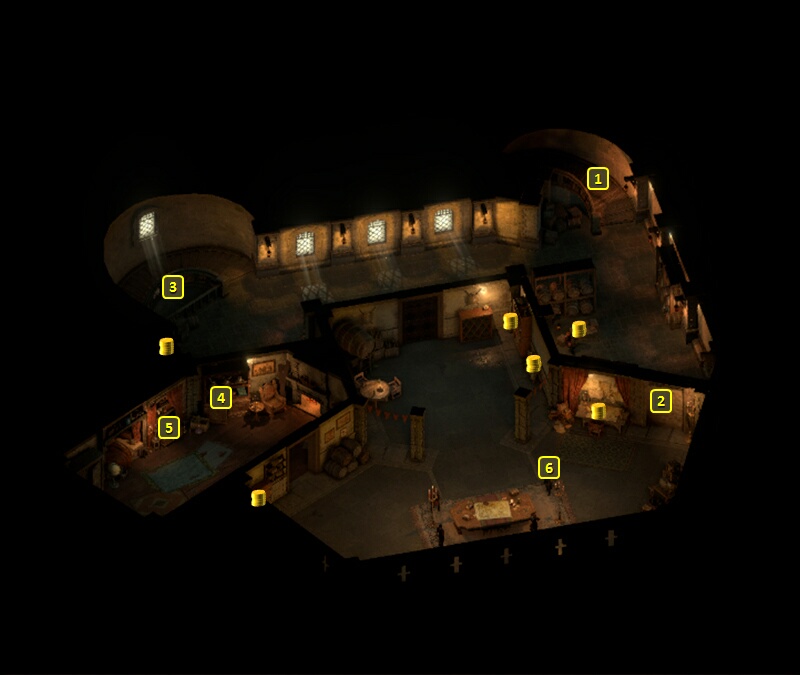
That meeting takes places around #6 on the map of the Deadlight Donjon. Notice that I do my utmost to avoid gaining any increase in reputation with the Principi during this conversation, and that includes avoiding any flattery or giving her Candied Nuts, and using the dialogue option about taking Benweth's place. The reason is that I want to obtain a certain armor for Xoti, and that means having enough negative reputation with the Principi until I get that armor.
The conversation itself also involves a request to help a contact of hers, and that also starts the Goods and Services Quest.
*Good* The good party likewise has its meeting with Captain Aeldys at this moment. The difference is they had the meeting, and went straight to Dunnage thereafter because they didn't have the same things to look after as the evil party did.
Rekke takes Barbaric Blow on his 8th level-up. It's a Full Attack with +20% Damage, +50% Damage on Critical Hit, a 30% chance of converting a Hit to a Critical Hit, and a +50% area of effect for Carnage. The obvious reason for Rekke to take it is to expand the area-of-effect of Carnage and thus spread the Static Charges from Lord Darryn's Voulge even further. Any concerns about expending Rage points can be mitigated when it gets upgraded to Barbaric Smash.
Both Tekehu and Xoti take Combat Focus. The Holy Meditation spell will help them accumulate Concentration over the course of a fight. But sometimes it's helpful to have at least one point of Concentration in place at the start of the fight, especially when they need to start the fight off with their buff spells and before Holy Meditation can really make itself felt.
Mirke takes Rapid Recovery, which increases the regeneration of Constant Recovery from +5 Health every 3 sec to +7 Health every 3 sec. And it will get prolonged endlessly by Salvation of Time at later levels.
I then go out through the door at #1.
*Evil* Ball Lightning
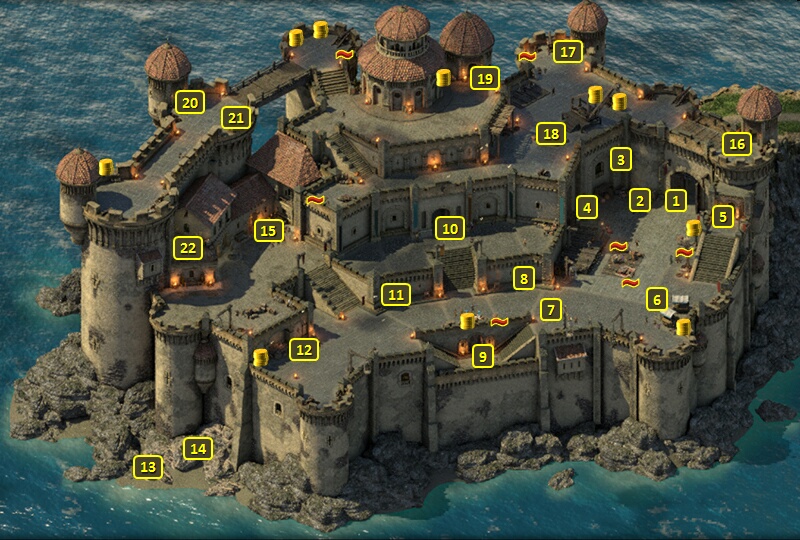
I start off at #19 on the map of Fort Deadlight. My next objective is to obtain the last upgrade for Lord Darryn's Voulge, which requires 30 Critical Hits. Critical Hits against inert objects like Barrels count.
I go west along the ramparts, and come across two sets of Barrels along the way. I have Rekke use Barbaric Blow (which has a chance of converting Hits to Critical Hits) on one of the barrels in each set. I am willing to reload until he gets a Critical Hit. I can't destroy each barrel in the set, as one exploding usually destroys the rest. I then make my way to the stairs at #20.
I end up at #19 on the map of the Deadlight Court. I go down the stairs at #16.
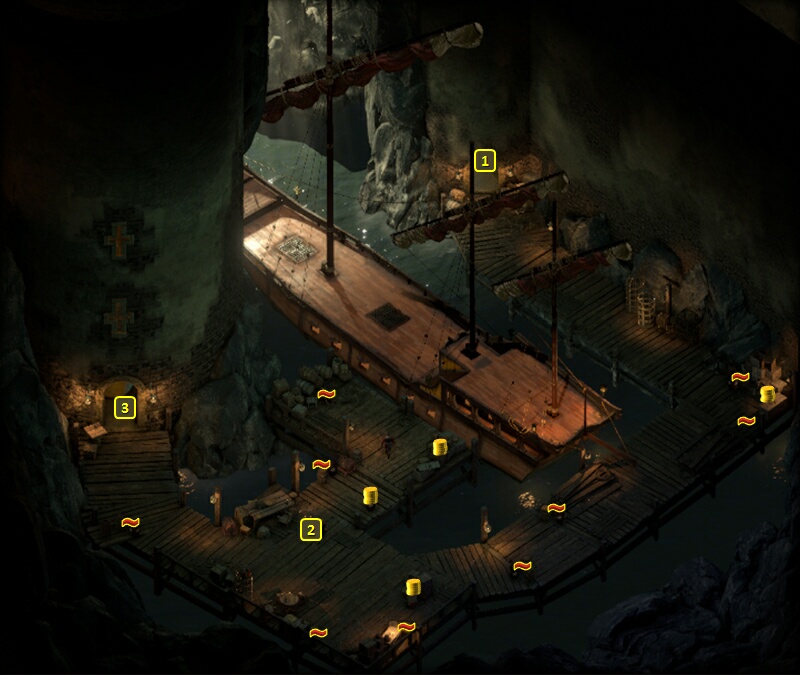
I end up at #3 on the map of the Secret Docks. I repeat the process on any sets of barrels until I make my way to the stairs at #1.
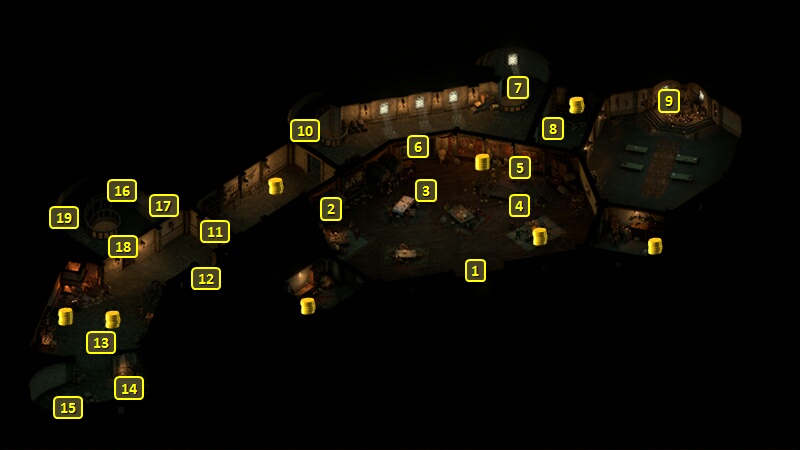
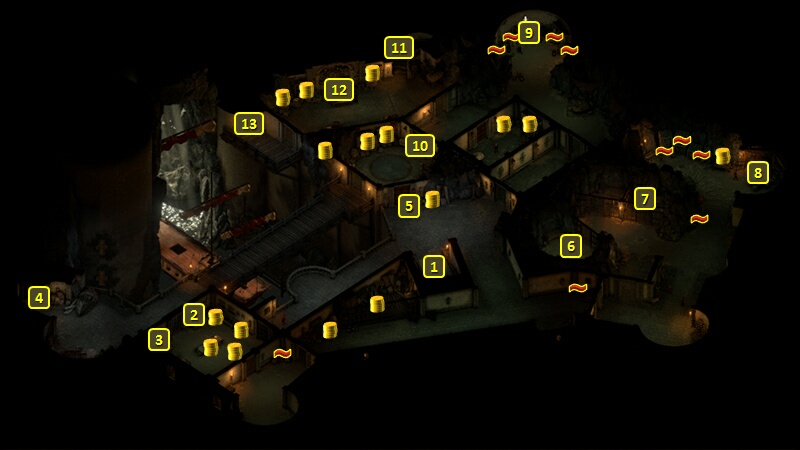
I will end up at #13 on the map of the Dungeon. I make my way to #9 and destroy the barrels there. I continue on to #8, and destroy any barrels I find along the way. And from there I go along the south side and destroy another barrel. I eventually go up the stairs at #1.
Now I do a sweep of the courtyard of Fort Deadlight, and eventually make my way to the front gate at #1. I'm a little short, 29 out of the 30 Critical Hits I need, when I leave.
I sail southeast and attack a Deadfire Merchant Ship. I make sure Rekke, using Disciplined Barrage and Barbaric Blow, gets the last Critical Hit he needs for the last upgrade for Lord Darryn's Voulge. That last upgrade means Superb-quality enchantment, and a Ball Lightning power that resembles Chain Lightning that can be used once per Rest.
Dunnage is my next destination.