-

- Forums
- Chatrooms
- Gallery
- Gameplay Videos
- Upload
- Articles
- Mod Reviews
- Shop SP: Games, Movies, Books
|
|
Hall of Revealed Mysteries
Fexa
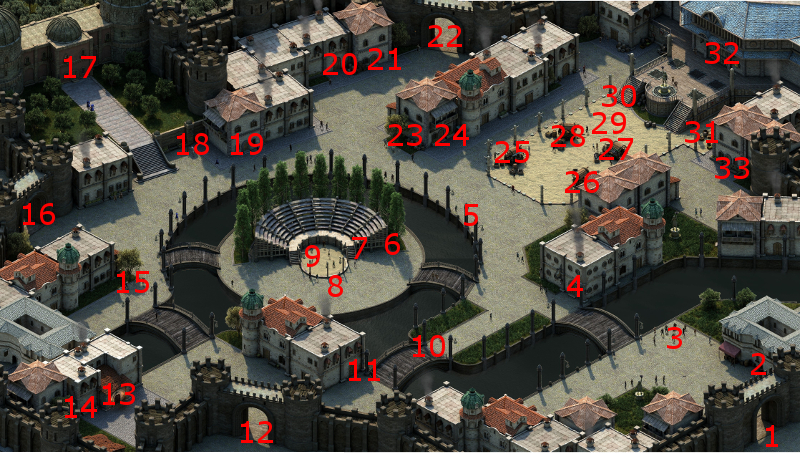
The entrance to the Hall of Revealed Mysteries is at #17 on the map of Copperlane.
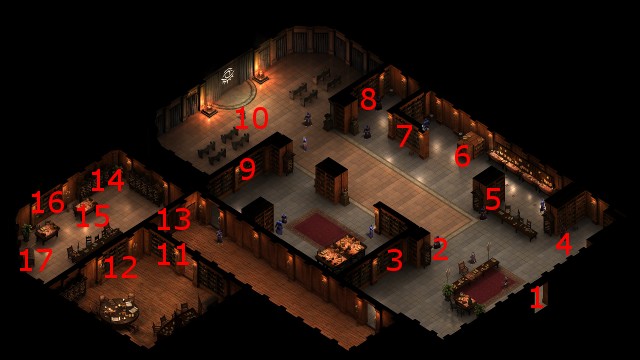
I will next be at #1 on the map of the Hall of Revealed Mysteries. Fexa is at #2, and is willing to answer some questions regarding the Hall as well as Wael's faith.
Grimda
Now I speak to Grimda at #10. She reveals that a treasured Scroll of Wael has been stolen from the Hall, thus triggering The Parable of Wael task.
She also drops a hint about the thieves being seen at a farmhouse on the road to Dyrford. I leave the Hall.
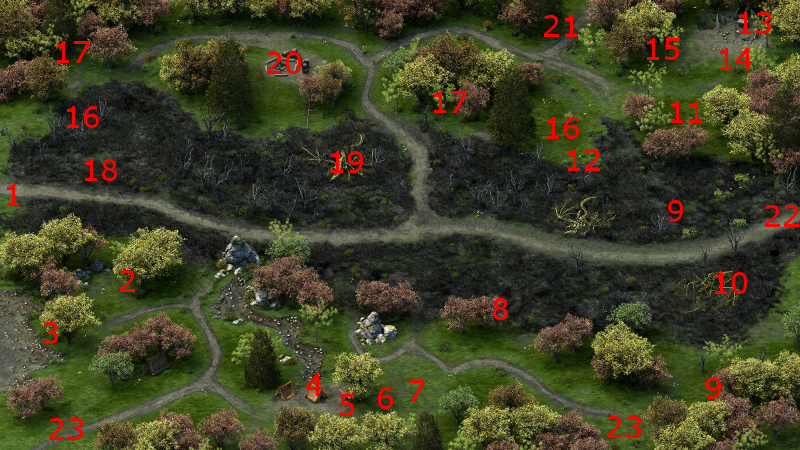
Scroll of Wael
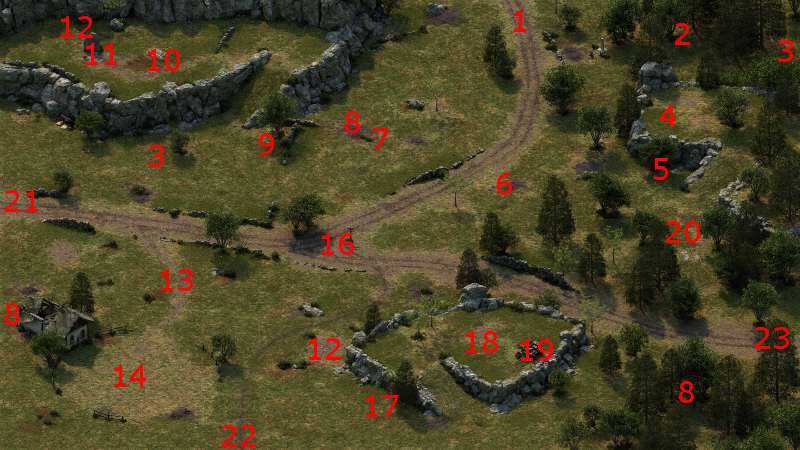
Now I travel to the Woodend Plains. A band of Thieves led by Iben, Venka, Eagar and Beacwof can be found at #14. They will attack on sight, but by now are not difficult to defeat. The three distinctive items they leave are:
7th Level
The good party now has enough experience to advance to their 7th levels.
Alliria gets the Inspiring Triumph ability, which adds +7 to all Defenses for all party members within a certain radius of the Paladin when the Paladin kills an enemy. It is a logical choice for a Paladin build that already revolves around an 'on kill' effect like Strange Mercy. Since the bonuses spring from the use of a Passive ability, they will stack with other Defense bonuses as well.
Kana acquires the Rime and Frost Followed the Footfalls of Karth chant. It leaves behind Frost traps that inflict Freezing Damage and the Hobbled effect on any enemies that step over them. Note that it does not inflict damage on enemies surrounding a Chanter. It will only affect a spot where the Chanter once had been but no longer is. It is therefore useful for tactics based on sending the Chanter ahead to lead enemies on to the rest of the party.
Grieving Mother learns two powers. One is Silent Scream. It inflicts damage on a single target and Stuns it, while inflicting Raw damage to all enemies within a 2.5m radius of the initial target. Can be useful in that it can both lock down an especially dangerous target, while inflict area-of-effect damage on nearby enemies at the same time.
The other is Going Between, which gives an ally 25% chances of reducing Critical Hits to Hits, Hits to Grazes, and Grazes to Misses. This can be a useful power for Alliria in particular, whose resiliency is not based on avoiding damage.
Sagani learns the Driving Flight ability. Upon a successful hit, the missile projectile will also strike a nearby second target for less damage. The damage on the second target isn't a big deal. The real point is to increase the chances of triggering the Returning Storm power of the Stormcaller bow.
The video concludes with the party making its way to Black Meadow.
*Evil* First Vision of Durance
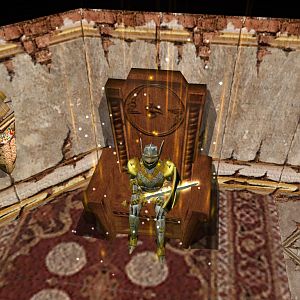
It is now Act 2, so Zakara camps outside. That prompts her to have a vision of Durance, who appears vague and blurry while holding his fiery staff. She speaks to him at length about the vision, and his role in using the Godhammer on Eothas.
Zakara does not intend to fall in with Wael's request. The reason is that she has racked up a fair amount of Deceptive disposition already, and that means she won't be able to collect a reward from Grimda if she hides the scroll at Wael's request.
The video therefore concludes with her returning to Copperlane and buying Camping Supplies from Peregund at #26 in Copperlane. The reason for going back to Copperlane instead of Black Meadow will be explained just below.
The Parable of Wael
The good party buries the Scroll of Wael underneath the Drake Skull at #10 on the map of Black Meadow.
I return to Copperlane, whereupon I am informed that the construction of the Barracks has been completed, and the Fellow of St. Waidwen wants to join Caed Nua as a hireling. I agree to the latter, and also order construction of the library.
After that, I stop off at the Goose and Fox to sell off my excess loot and rest up.
Now I return to Grimda. She would have been willing to reward me with a minor increase in reputation with Defiance Bay, as well as both a Footpad's Hood and the Key to the Elder Archive if I had brought the scroll to her instead of burying it at Wael's request. *Note* The key won't be used until a good deal later on.
However, I still get the reward despite burying the scroll because Alliria has at least 2 points in Honest disposition. Failing that, a Lore check of 6 would have worked as well. That completes The Parable of Wael task.
Sagani wears the Footpad's Hood on an interim basis.
*Evil* The Parable of Wael
Zakara returns the Scroll of Wael to Grimda and collect her reward. The reason is that if she had buried the scroll, Grimda would not reward her since Zakara has at least 2 points in Deceptive disposition. Note that even if she had 2 or more points in Honest disposition, the 2 points in Deceptive disposition would still trump the Honest disposition and result in no reward.
Aloth wears the Footpad's Hood for now.
The Copperlane Catacombs are my next destination.