-

- Forums
- Chatrooms
- Gallery
- Gameplay Videos
- Upload
- Articles
- Mod Reviews
- Shop SP: Games, Movies, Books
|
|
| Pillars of Eternity 2 Video-Based Walkthrough by David Milward |
Ukaizo
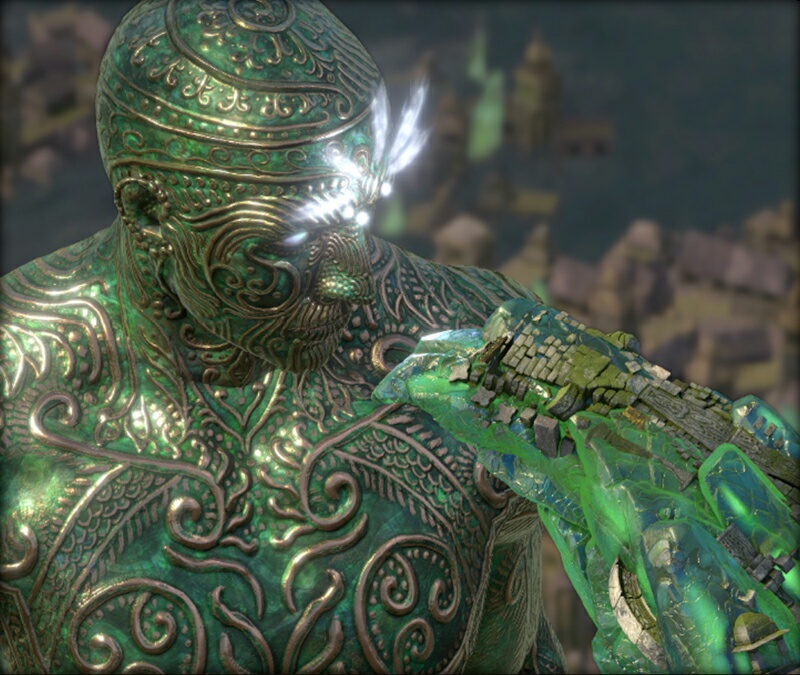
*Evil* Guardian of Ukaizo
The evil party arrives at #1 on the map of Ukaizo Harbor. If I step forward even a little then the Guardian of Ukaizo, a Dragon-like Construct, will show up.
One other thing, arriving at Ukaizo Harbor forces a Rest. So all my until Rest bonuses are now gone, but there's only two more fights left in the game.
So I actually have the opportunity to Rest before taking that step, and grab the opportunity to Rest with Food of my choice. Zarathos goes with his usual Hot Razor Skewers. Mirke now goes with Ekkevit, which I found in Harbinger's Watch and increases all of her Defenses by +7. Tekehu and Xoti go with their usual Captain's Banquet. Traps aren't so much of a concern anymore, so Ydwin goes with Mohora Wraps, which both boosts her Might by +4 and reduces her Recovery Time.
The Guardian is willing to entertain questions, but a fight is inevitable. It starts out the fight aided by a lot of Adra Animats.
It always has the Brilliant (+5 Intellect, +1 Power Levels, regain class resource every 6 sec.), Energized (+5 Might, +2 Penetration, Interrupt on Critical Hits), Intuitive (+5 Perception, 25% chance of converting Hits to Critical Hits) Inspirations active. Its breath weapon inflicts Raw Damage.
Bring it to 75% or less Health, and it summons two nearby Engwithan Titans to join the fight. These Titans can push back with their kick attack, knock down with their slam attacks, and score extra Raw Damage.
The other thing the Guardian does at 75% or less Health is sit in a kind of trance for several seconds. The result is that its one head gets replaced by two new heads. One head has a breath weapon that causes Burning Damage, and can both Push back and Prone victims. The other head has a breath weapon that causes Freezing Damage and Paralyzes victims.
At 50% the Guardian will summon a few Engwithan Hierarchs. The Saints can cast spells, and can Dominate victims.
At 25% the original head that could breathe Raw Damage re-emerges as a third head.
It has a LOT of Health, making this a very long fight. And its attacks can occasionally cause Injuries. A lot of healing and / or buffing will be needed for this fight.
The usual recipe of the Salvation of Time and Omnipotence loop suffices to outlast the Guardian and everything it throws at me. When the Engwithan Hierarchs show up, whichever Monk character is closest to a Hierarch will summon Dichotomous Spirits to pin down that Hierarch. I summon new ones as needed.
I collect any loot that gets left behind and head for the exit at #2.
Ukaizo Harbor
A consequence of ending the Resting bonuses on arrival for the good party is that Eder will be hungover after his resting bonus from Forgetful Night. That in combination with wielding a Pukestabber that hasn't been enchanted with Iron Stomach so as to provide immunity to vomiting, would normally mean that Eder would now be frequently vomiting. And that can mean interrupting his own attacks and leaving him vulnerable to enemy attacks. That was the point behind equipping Drunkard's Regret before I made the trip to Ukaizo. The ring itself provides the immunity to vomiting.
The good party has no chance to Rest as they're forced into their next fight on arrival. But the fight is much easier, only against two Engwithan Titans. Scyorielaphas took care of the Guardian of Ukaizo for me.
I likewise collect any loot I can and head for the exit at #2.
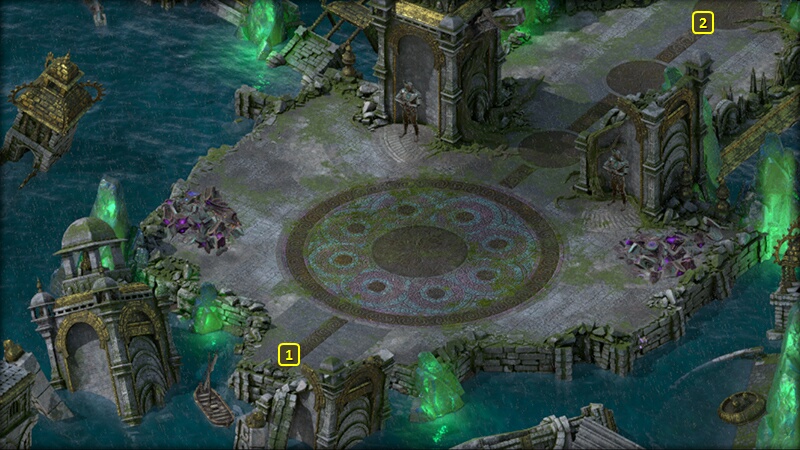
Grand Promenade
I arrive at #1 on the map of the Grand Promenade. I go east to #2, and have a private little conversation with each of my companions.
I thereafter go to the exit at #3.
*Evil* Grand Promenade
The equivalent video for the evil party.
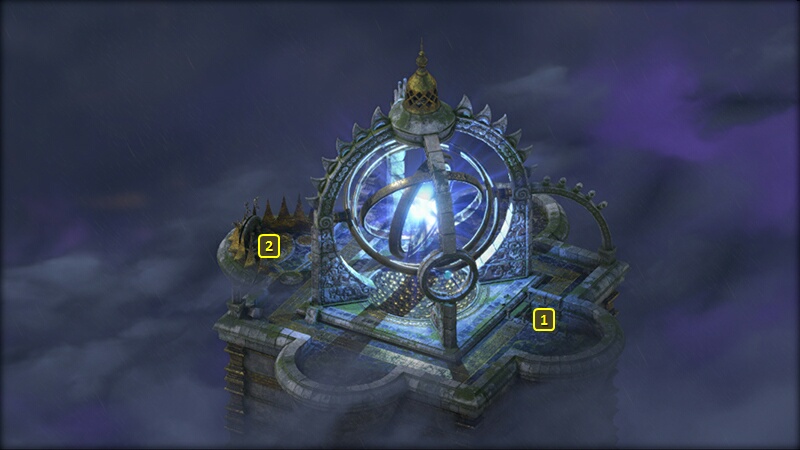
Ondra's Spire
I arrive at #1 on the map of Ondra's Spire. I hit the switch at #2 to turn off the storms. I notice a Huana party approaching in the distance.
Alliria also has another conference with the gods. I return to the exit at #1.
*Evil* Ondra's Spire
And again the equivalent video for the evil party.
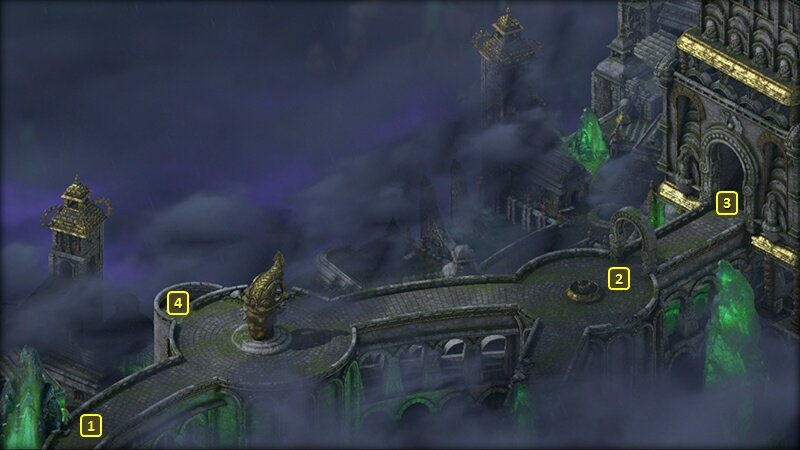
Queen Onekaza
I am back at #3 on the map of the Grand Promenade. I have one last fight before the end of the game.
Alliria loads up on Scrolls of Wilting Wind and Scrolls of Great Maelstrom. Aloth loads up on Concussion Bombs.
The last battle can be more difficult than initial appearances might suggest. The group you fight, whether it's Principi or Rauataian or Vailian or in this case Huana, will have at least a few Fighters who can use the Charge ability that can stun multiple party members. This battle can easily see your party stun-locked and unable to do anything.
So now I craft five Shark Soup and rest with my party members each consuming one of them. The resting bonuses provide immunity to all Constitution, Dexterity and Might Afflictions. This was the point all along of buying Spices whenever I could, and keeping any Aged Shark Meat I found.
The battle itself is against Queen Onekaza and numerous Huana. It's quite easy now that I've prepared for it. I ignore the Charges, and bombard them with bombs and scrolls until very little is left standing and can easily be mopped up.
I head for the exit at #4.
*Evil* Hazanui Karu
The evil party faces off against the Rauataians led by Hazanui Karu. The preparations are similar. I back Tekehu and Ydwin up against the very top of the stairs. The rest of the party forms a protective half-ring around them.
Tekehu loads up on five Concussion Bombs each in two of his quick-item slots, and five Stun Bombs each in his other two quick-item slots.
Xoti already has four Scrolls of Plague of Insects. I craft another, and put five into one of her quick-item slots.
She has one Scroll of Wilting Wind. I craft four more and put five in another of her quick-item slots.
I already have five Scrolls of Major Healing, so I put those in one of her quick-item slots.
I got some Adra Ban from my previous fight against the Guardian of Ukaizo. So I craft five Scrolls of Miraculous Healing and put them into her last quick-item slot.
Everybody now Rests with Shark Soup.
Zarathos goes on ahead to get Hazanui's attention, and then makes his way back. He and Mirke do little else other than attack whoever comes within range while maintaining the half-ring.
Xoti leads off with a Scroll of Plague of Insects once the Weathermages come into view. That strips them of any Concentration. And that in turn sets them up for Ydwin, who uses Amplified Wave whenever she has enough Focus for it. The Wave will knock the Weathermages off their feet, and keep their spellcasting to a minimum.
Xoti uses a Scroll of Wilting Wind on the enemies, including the Weathermages in the area of effect whenever she can. She will sometimes use a healing scroll instead when party members have taken enough damage.
Tekehu will toss out Concussion Bombs when there's a large number of enemies over a large area-of-effect. He also casts Relentless Storm and Chill Fog when there's a lot of enemies bunched around the party. He goes with Stun Bombs when there's fewer enemies but tightly packed around the party.
The Monks in the party summon Dichotomous Souls once the fight is down to around a few Fighters, and the Weathermages have been taken out by the bombardment strategy. It's only a matter of time.
The stairs at #4 lead to Moi Gweath.
Eothas
I travel to Moi Gweath and immediately begin the interaction with Eothas upon arrival. I fundamentally have 6 choices:
*Evil* Eothas
Zarathos convinces Eothas to empower Berath.
Epilogue
Highlights of the epilogue for the good party include the Vailians advancing in animancy even beyond the Engwithans and becoming the greatest power in the Deadfire, Eder taking Bearn under his wing, Aloth becoming Alliria's constant companion, Pallegina becoming the revered head of her Paladin order, and the Luminescent Fungus becoming a travelling entity.
*Evil* Epilogue
Highlights include the new Principi nation based in Ukaizo, Neketaka and the Huana falling apart, Stormspeaker Ikawha and Governor Clario getting assassinated as a result of Maia's mission, Ranga Ruana also getting assassinated, the Crookspur Slavers remaining entrenched in the Deadfire, the island of Kazuwari dying out, the Circle of Archmagi driving Concelhaut to the ocean's depths, and Xoti becoming murderous and insane.
*** THE END ***