-

- Forums
- Chatrooms
- Gallery
- Gameplay Videos
- Upload
- Articles
- Mod Reviews
- Shop SP: Games, Movies, Books
|
|
Valewood
Late for Dinner
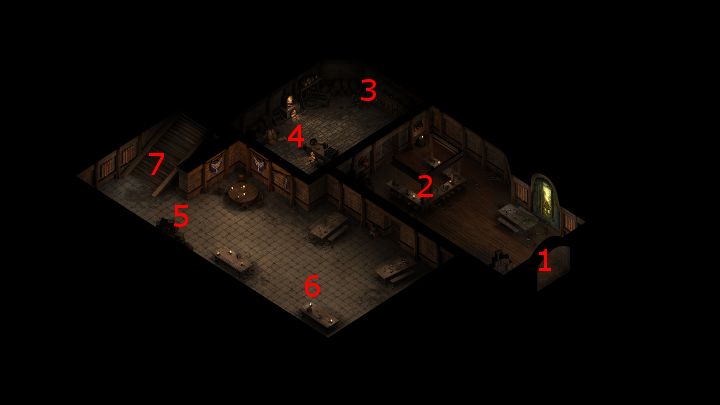
The entrance to the Black Hound Inn is at #10 on the map of Gilded Vale.
I speak to Pasca at #2 on the map of the first floor of the Black Hound Inn. At some point, I make note of the fact that Porridge is the only meal available for customers. That's when she lets on that her cook Tenfrith, has gone missing. Alliria agrees to look for him. This dialogue triggers the Late for Dinner task. Now I leave and make for the Valewood.

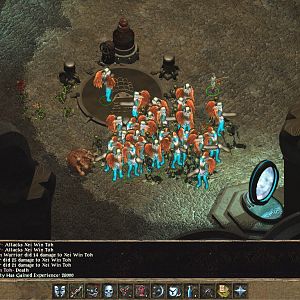
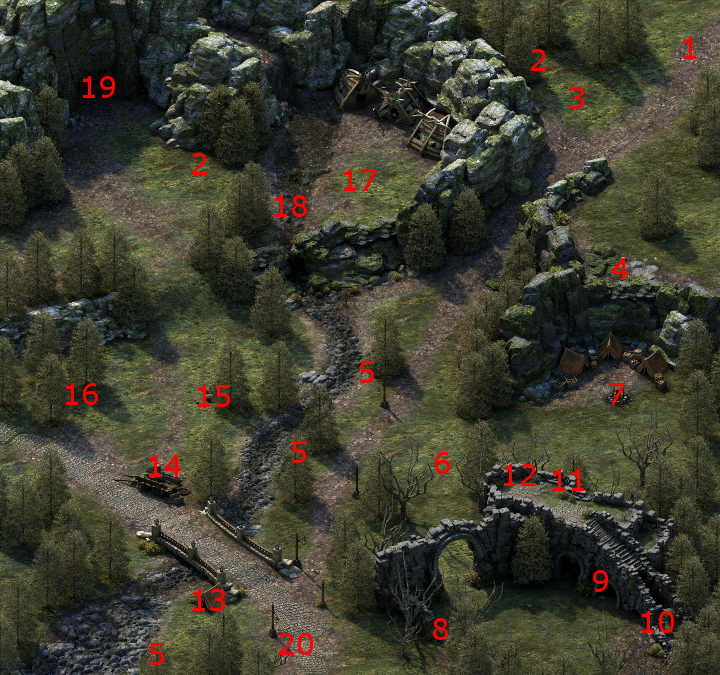
I start off at #20 on the south side of the map of the Valewood. I go north and kill off a Bandit at #6. I continue on to #7, which is the locatoin of a bandit camp. I kill off the Bandits pretty easily. Alliria uses Flames of Devotion not just to score extra damage, but also to heal minor damage suffered by her comrades as well.
I speak to Tenfrith, who thanks me heartedly and leaves. I get a minor boost to positive reputation with Gilded Vale.
My interim Rogue also now has enough experience to advance to his 2nd level. I select the Weapon and Shield talent for him. Now I collect what loot I can and return to the Black Hound Inn.
Pasca rewards me with xp and a moderate boost to reputation in Gilded Vale. She also indicates that Tenfrith wants to speak to me again.
Tenfrith rewards me with the recipe for Savory Pie and another boost to reputation with Gilded Vale.
Wolves' Hidden Stash
The good party rests up in the Black Hound Inn until it is just before the second day of the month. There's a specific reason why.
I make my way to the Valewood afterwards, where I begin at #20 on its map. To the east at #8 will be a trio of Wolves, whom I kill easily. I collect their hides and continue east.
At #9 is a hidden niche that will have an item from the "Valewood - Wolves' Hidden Stash" section of the random drop list. As it's now the second day of the month, I get the item I want, a Ring of Minor Deflection. I give it to my Orlan Rogue on an interim basis.
*Evil* The evil party waited it out until the 10th day to also get a Ring of Minor Deflection, this time for Eder.
Fulvano's Gloves
The wall at #10 requires an Athletics check of 5 to climb to the top. Alliria makes the check and climb.
I collect the plants at the top. The corpse at #11 has a Scrawled Letter that describes the fate of Fulvano, plus Fulvano's Gloves. I have my Orlan Rogue wear the Gloves on an interim basis, as he will benefit from the +2 Dexterity bonus. The corpse also has a few other odds and ends, plus Camping Supplies. I rest up and grab the Supplies.
The video concludes with the party climbing down and making its way back to the road.
*Evil* In the evil party, I held onto them for Durance when he joins.
Xaurips in Valewood
Now I remember to have the Rogue equip the Gloves. Also, at some point I decide to give Eder a Hatchet and transfer his Sabre to Alliria so that she has a Sabre and Axe setup.
I kill another Wolf at #15 without much trouble.
I also kill three Xaurips at #17, again without breaking a sweat. I go into scouting mode to discover a hidden niche in a nearby tent, from which I loot a few gems.
The video concludes with the party making its way back to the bridge.
Vengeance from the Grave
Now I speak to Nonton at #13. He relates that his friend was killed by a Bear in its cave, which is to the north and west at #19.
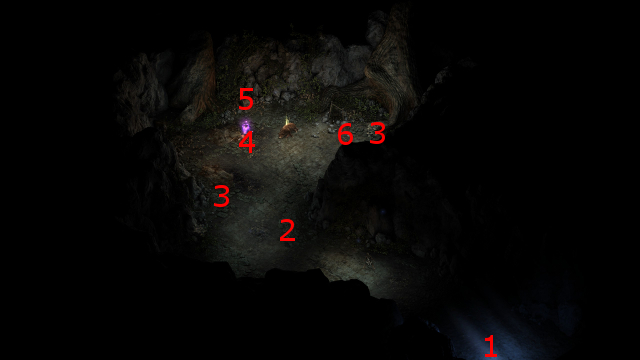
I enter the Cave and kill the Bear, plus another smaller Bear, with standard tank and flank tactics. I collect the Cave Corals and the Greatsword from the chest in the cave.
Now I speak with the spirit of Perly, which will be standing over his own dead body at #4 on the map of the Bear Cave. His last memories are of being betrayed and hamstrung by Nonton, and left to his death with the Bear. Alliria chooses the Benevolent reply that promises to seek justice for Perly.
Nonton and Ingroed will be in the house at #21 on the map of Gilded Vale.
Their motivation for leaving Perly to die in the bear cave was that Perly was domestically abusing Ingroed and she and Nonton ended up becoming attracted to each other. This can be discovered by a Diplomatic question or a Passionate question (also needing a Resolve of 14) if you're so inclined.
As for your options, leaving them and telling them to get out of your sight will not get you any rewards besides the usual xp bonus. Allowing them to leave in a more pleasant way will get you at least 50cp. Allowing them to leave with the Benevolent dialogue option will get you the xp bonus, the 50cp, plus a Ring of Minor Deflection, plus a moderate reputation gain with Gilded Vale.
The last choice is how Alliria handles the situation. She saves the Ring of Minor Deflection for Hiravias when he joins the party.
*Evil* Vengeance from the Grave
A couple of differences for Zakara. First, she mocks Nonton with the Cruel dialogue option.
Second, she selects the Aggressive option so as to murder both Ingroed and Nonton, and gets the additional Ring of Minor Deflection by looting it afterwards.
I will now travel to Magran's Fork.