This Quest starts when you are sent a missive from Flaune Elette when you enter Queen's Berth for the first time after completing the Main Quest called He Waits In Fire. She wants to make another attempt at teleportation through Adra pillars.
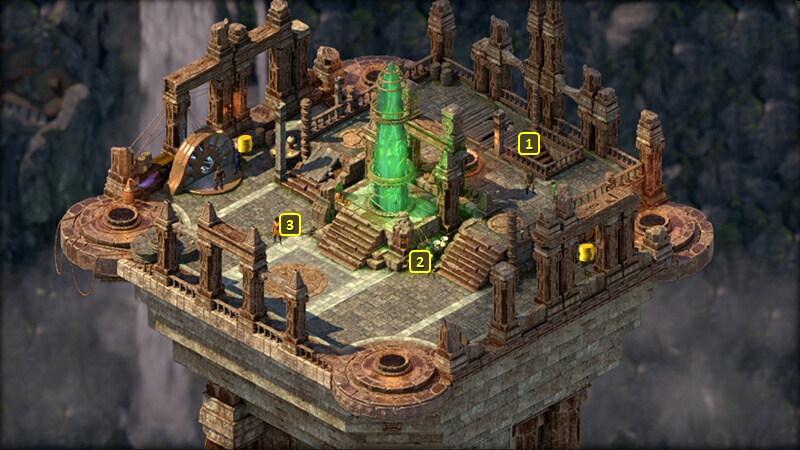
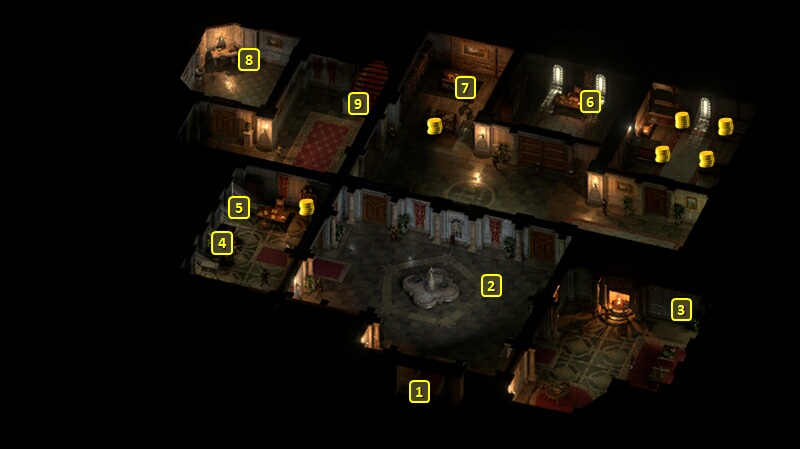
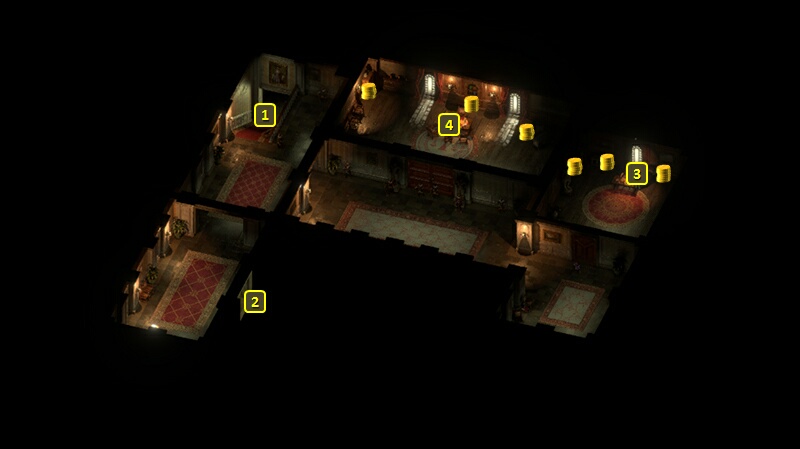
Speak to Flaune Elette at #3 on the map of the Rooftop of
the Spire of the Soul Seers. She's more optimistic about teleporting between adra pillars this time, based on more optimistic readings.
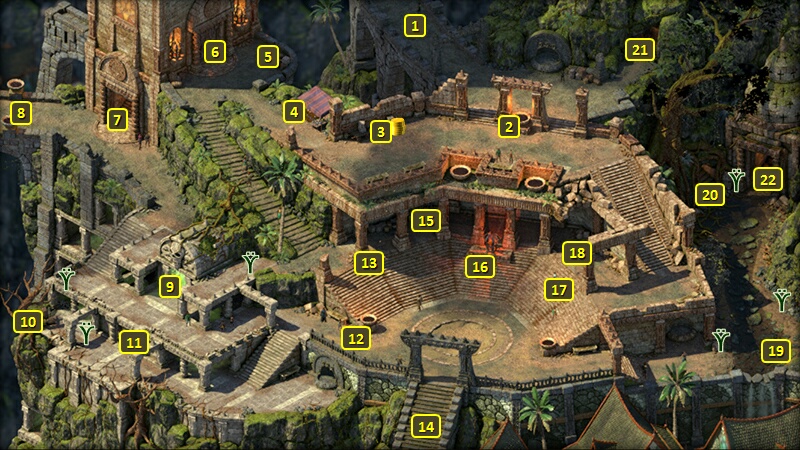
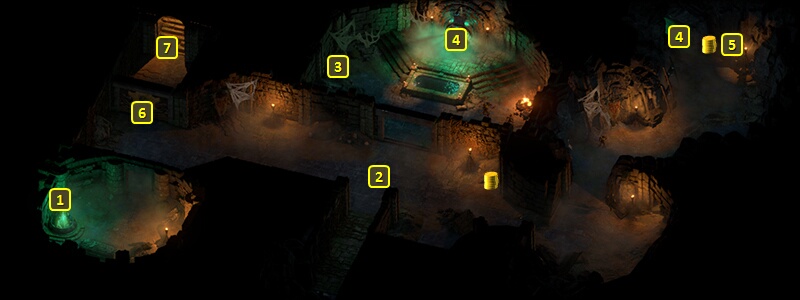
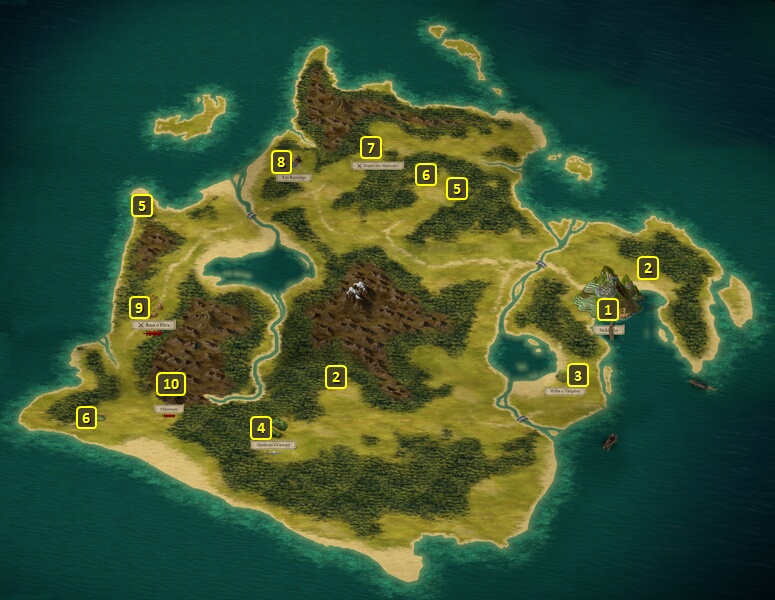
You could at this point simply leave through the exit at #8, which would bring you to #8 on the map of Neketaka Island. Be aware that there is a trap to the left of where you first entered here. Leaving now would be sufficient for purposes of completing this Quest.
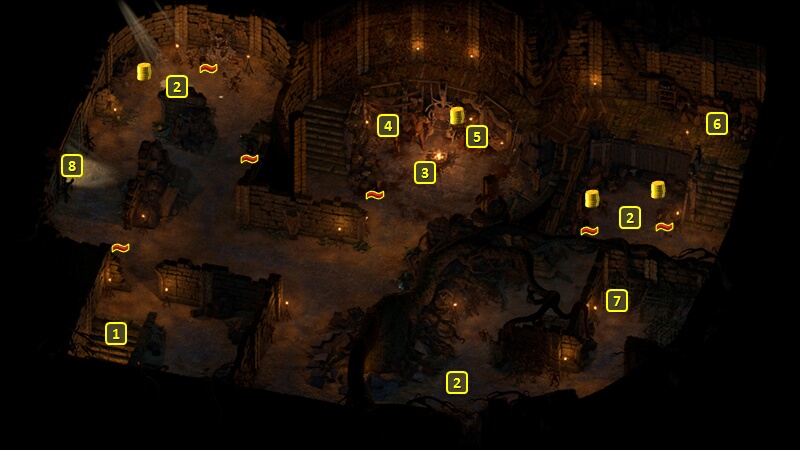
If you want to explore the place more thoroughly, there will be plenty of Xaurips and Grub Companions at points marked #2.
There will be several Xaurips here led by an Eoten at #3. The Eoten will leave behind the Cell Key after he is killed.
A Kuaru Trader will be held captive at #5. You can free him, and he's willing to give information about the place itself and how he ended up here.
Badema will be locked in a cage at #7. She can only be freed by unlocking the cage door with the Cell Key.
There won't be anything left to do here after that, so now you can leave through the exit at #8.
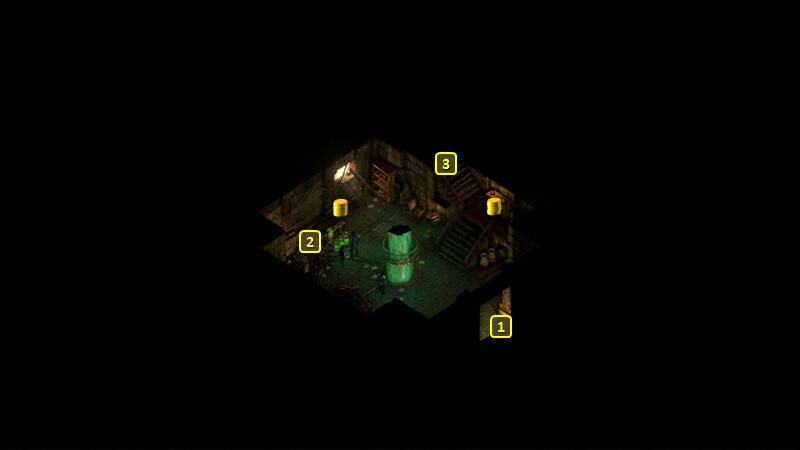
You'll now be at #10 on the map of Neketaka Island. Raoa o Hara is at #9. The scripted interaction features Xaurips having Grubs fight each other for entertainment.
You can approach openly, which opens up several options. The obvious one is to attack them and the Grubs. They'll leave behind an Ivory Wurm Figurine, Rune Powder, Razorgill Dust and a Superb Xaurip Quarterstaff among other items.
You can make an Intimidate check of 13 to scare them away. They'll leave behind the specifically mentioned items above and some coins.
A Sleight of Hand check of 9 or a Diplomacy check of 13 can convince them to offer you the Ivory Wurm Figurine to leave without further hostilities. You can at that point instead decide to attack them if you want.
A Ranger can make a Diplomacy check of 10 to ask if his or her Animal Companion can join in the sport. Going easy on the Grubs results in the System Shock Injury (-2 Perception, -3 Shocking Armor Rating). Acting the Grubs aggressively means no negative consequence.
You can also make a Stealth check of 8 to sneak up on them instead of approaching them openly. If you fail the Stealth check, everyone in the party can make an Athletics check of 11 to run away without a fight.
Successfully making the Stealth check means the Intimidate check of 13 and openly attacking them will still be available as options. But there's different options available from Stealth as well.
You can attack them from Stealth mode, which allows you to gain better and closer position on them before attacking.
A Druid can use Charm Beasts to get the Grubs to turn on the Xaurips, driving them away. You'll get the Ivory Wurm Figurine, Rune Powder, Razorgill Dust and a Superb Xaurip Quarterstaff among other items.
You can also make another Stealth check of 10 to avoid them altogether and sneak away.
A Druid (but not Tekehu) can use Charm Beasts on the Grubs. That will give you some options. Having the Grubs dance or crawl away has no result other than distracting the Xaurips. But that means you can either sneak up on them for the ambush, or having the Stealth check required to get away without a fight lowered to 4. Having the Grubs attack the Xaurips forces the Xaurips to kill their pets, and that means the Grubs won't be in the fight if you attack the Xaurips. The Intimidate check of 13 is also available after using Charm Beasts.
However you handle the scripted interaction, the way to Neketaka at #1 will be clear afterwards.
Return to the Spire of the Soul Seers. The Animancers here will have been slain, and you'll have to fight a Mercenary Cipher and a Mercenary Paladin.
Go upstairs to the Rooftop of the Spire of the Soul Seers. More Animancers here will have been slain, although Flaune Elette will manage to hide. You'll have to fight several more Mercenaries led by a Mercenary Paladin.
Speak to Director Castol at #4, and inform him of the attack on the Spire. You'll gain 13,500xp and a major gain of positive reputation with the Vailian Trading Company to conclude the Quest.
Director Castol tells you to speak to Luaeva Alvari. A Vote of No Confidence is the next Quest.
Sorcerer's
Place is a project run entirely by fans and for fans. Maintaining
Sorcerer's Place and a stable environment for all our hosted sites requires a substantial amount of our time and funds on a regular basis, so please consider supporting us to keep the site up & running smoothly. Thank you!
Supporting Sorcerer's Place
Has Sorcerer's Place been useful? If you'd like to show your appreciation
for our hard work on the site, and help us pay the bills the site generates
every month, please consider helping support SP.
Thank you!

 Go upstairs to the Rooftop of the Spire of the Soul Seers. More Animancers here will have been slain, although Flaune Elette will manage to hide. You'll have to fight several more Mercenaries led by a Mercenary Paladin.