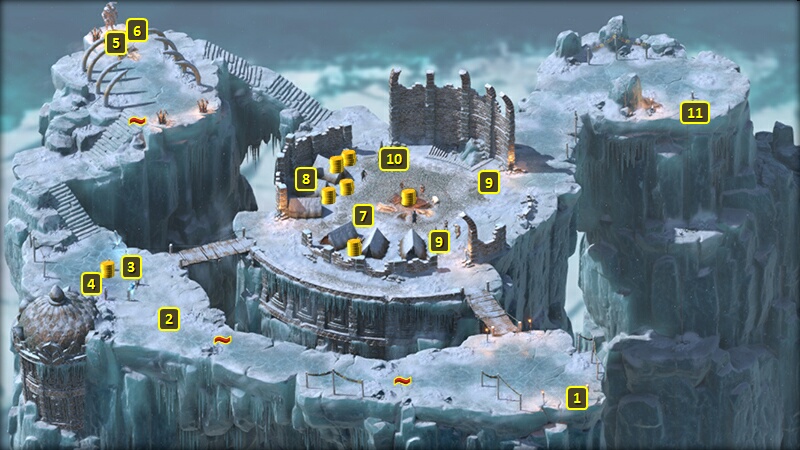
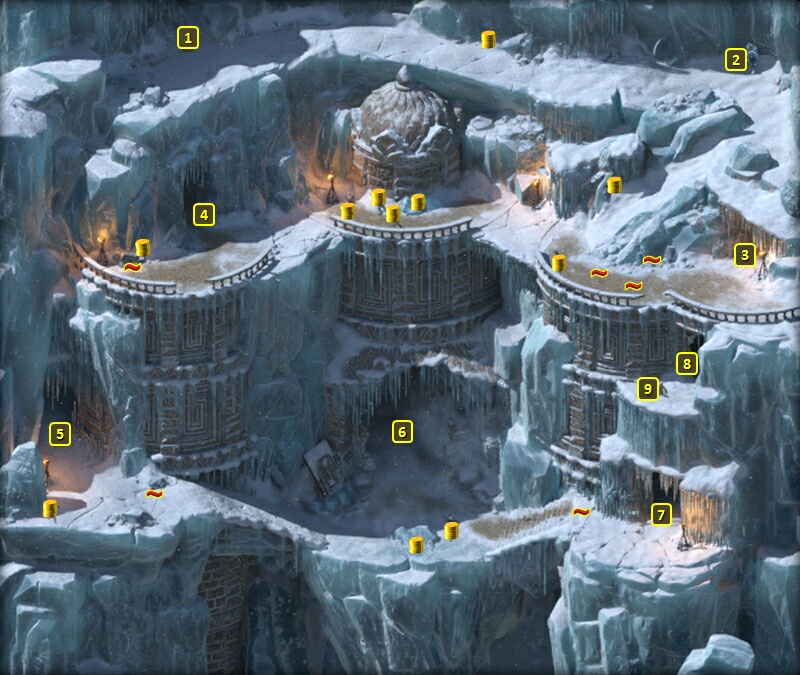
You start off at #1. At #7 is where you'll have to fight a cult of
Rymrgand, led by Champion-Ascendent Grymgaer. His cult includes several
Pilgrims of varying classes, as well as Bear Companions. Dealing with
this cult is the focus of The Higher-Ups
Task, but getting them out of the way facilitates completing this Quest
at the same time.
The fight is complicated by the presence of Sigils of Death at points
marked #9, and a Sigil of Pain at #10. One approach is to try and draw
the cult away from the sigils, and then destroy the sigils from a safe
distance afterwards.
There will be a rope and grappling hook at #11, and it leads down to
the Rimebound Temple
through a scripted interaction.
A Perception check of 14 on the way down reveals an object lodged in the
ice. You can have a character make a Might check of 16 to pull it out of
the ice. Making the check will result in a War Hammer called Glacierbane
going into your inventory then and there.
If you initially attempt to get the item but decide you can't make the
Might check, a couple of alternatives become available. Those
alternatives are to use either a fire-based spell (e.g., Fireball) or an
Immolator to melt the ice around
it. Glacierbane will drop
down to the bottom. That means you'll have to make your way to the Rimebound
Temple and then pick it up.
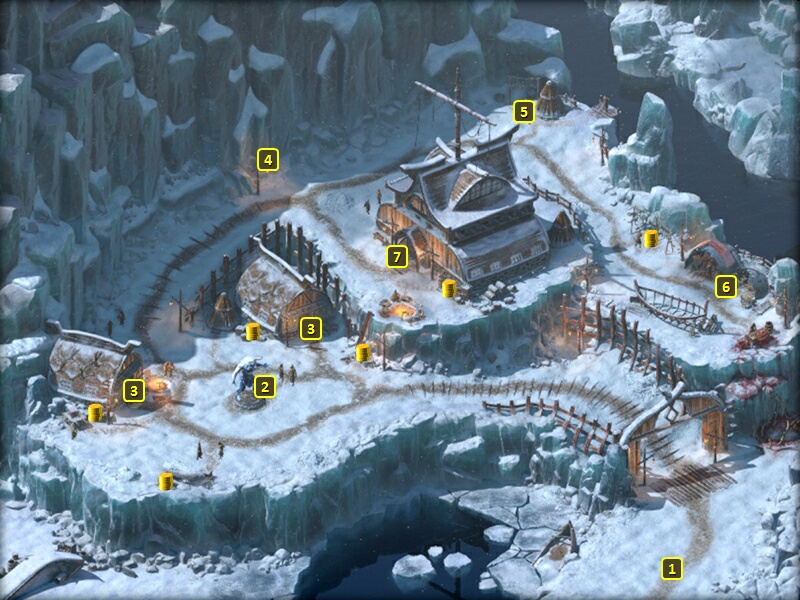
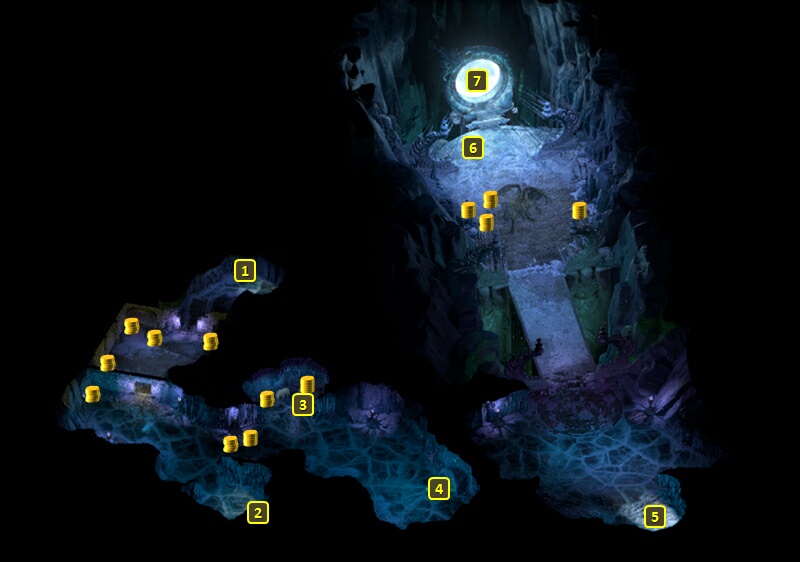
The most straightforward way is to head for the cave entrance at #4 on
the map of the Rimebound
Temple, disarming traps along the way.
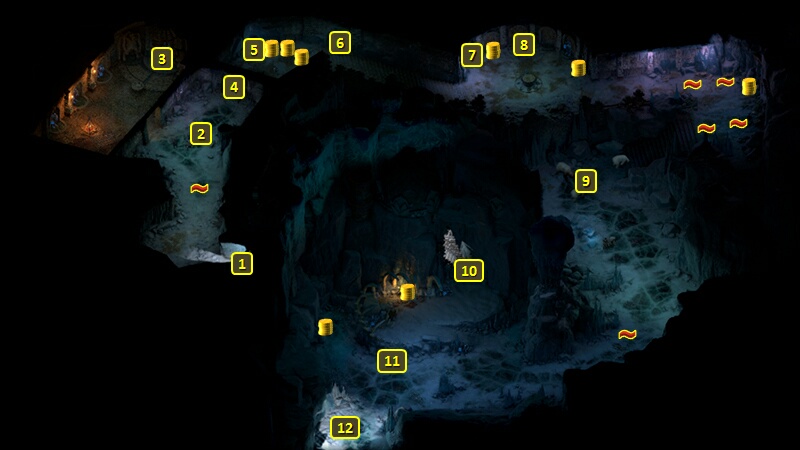
It will bring to you #1 on the map of the Temple
of Decline. A door leading out will be at #2.
You'll now be at #5 on the map of the Rimebound
Temple. Now you can go through the large door at #6.
Head to the north. You'll see the Dracolich again, as it gets sucked
into the portal at #7.
Click on the portal, and you'll end up speaking to Rymrgand. Rymrgand
wants you to enter the White Void through the portal (called the
Vytmadh) and permanently destroy the dracolich, whom he regards as kind
of a wart on his existence that he wants plucked out. The reason he
can't do it himself is that the dracolich has welded her soul to a
phylactery in the White Void that even Rymrgand himself can't destroy.
But to do that, you'll need an artifact known as the Eye of Rymrgand to
be able to safely enter the White Void.
Be advised that mocking him runs the risk of him inflicting Injuries on
you. Mocking him even more, or threatening to attack him even without
prior mocking, will mean a death sentence and game over.
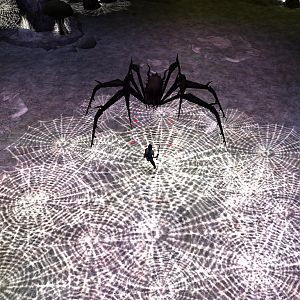
A little way ahead at #10 will be the Hoarfrost Imp, who is holding the
Eye of Rymrgand that you
need.
Trying to swipe it or pry it loose will awaken the Imp, and it will be
dead set against parting with the Eye
of Rymrgand.
Making an Intimidate check of 8 right away that also earns Cruel
disposition will provoke the Imp into attacking you, along with several
nearby Rime Constructs that will come to its aid. You can get the Eye
of Rymrgand from its dead body afterwards.
You can try and convince it that holding onto it will lead to misfortune
on account of holding onto something sacred to the Gods. That requires a
Religion check of 7 to start. Following up with either a History check
of 12 or a Religion check of 14 combined with the White That Wends
background will convince the Imp to willingly give you the Eye
of Rymrgand. The Intimidate check of 8 will provoke it into
attacking you.
You and try to trade for it. One pathway involves offering it the Stone
Idol from Harbinger's
Retreat, followed by either a Bluff check of 10 or an Intellect
check of 10. Either attempt will end up provoking the Imp into
attacking.
It will turn down an offer of 8,000cp. Attempting a Bluff check of 15
provokes an attack.
Offering 20,000cp, which also earns Benevolent disposition, convinces
the Imp to willingly part with the Eye
of Rymrgand.
Sorcerer's
Place is a project run entirely by fans and for fans. Maintaining
Sorcerer's Place and a stable environment for all our hosted sites requires a substantial amount of our time and funds on a regular basis, so please consider supporting us to keep the site up & running smoothly. Thank you!
Supporting Sorcerer's Place
Has Sorcerer's Place been useful? If you'd like to show your appreciation
for our hard work on the site, and help us pay the bills the site generates
every month, please consider helping support SP.
Thank you!

 You'll be back in the Temple
of Decline, but this time at #5.
You'll be back in the Temple
of Decline, but this time at #5.