This quest will start as soon as the Quest called To
Rise and Decline quest is completed.
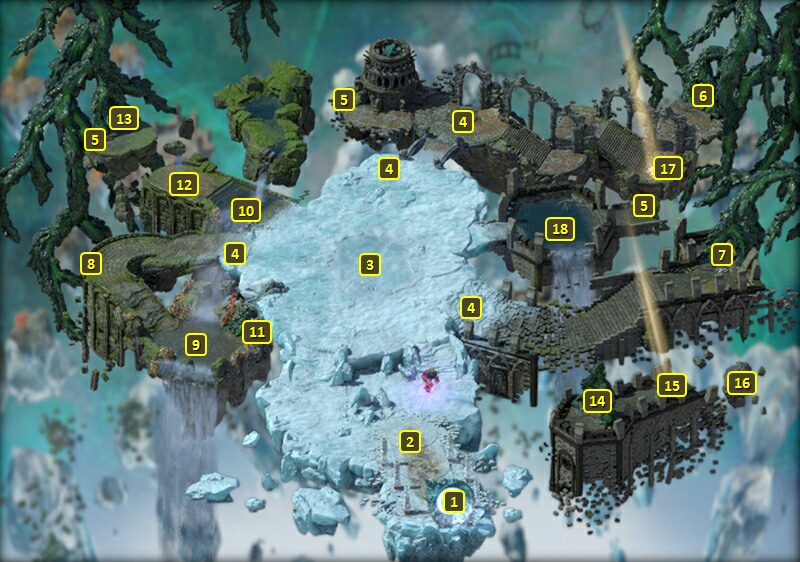
The Quest starts once you go through the Vytmadh and arrive at #1 in The Shattered Passage.
Go ahead to #2, and defeat the Scourge and Soul Collector that stand
before you.
Continue north and witness the Dracolich named Neriscyrlas tear apart
the soul of the Elven guardian named Rynhaedr. Neriscyrlas will speak to
you for a time and then crash through the ice at #3, leaving a large
gaping hole behind. That hole becomes the portal to the climax of the
Quest.
The fragments of Rynhaeder's soul will now appear as Wandering Souls at
points marked #4. Click on them to collect them to complete the reforging of
Rynhaedr's Soul.
Besides progressing the Quest, reforging her soul will also complete the
first upgrade for the Guardian's
Plate.
Rynhaedr will explain that it is now up to you to permanently destroy
the undead dragon, but recommends that you seek aid from souls in the
realms adjoining The Shattered Passage.
She will now appear on the north side of the hole or portal at #3, which
leads to Neriscyrlas' Lair. You
could click on it if you want to force your confrontation with
Neriscyrlas now, but the other realms offer some benefits (including
some unique and powerful items) that may be worth your while.
You can go through the portal at #8 to enter The
Bridge Ablaze in order to complete The
Bridge Ablaze Quest. Doing so could result in the soul of St.
Waidwen joining you as an ally.
You can go through the portal at #6 to enter The
Endless Queries in order to complete The
Endless Queries Quest. Doing so could result in the soul of
Inquisitor Naxiva joining you as an ally.
You can go through the portal at #12 to enter The
Drowned Kingdom in order to complete The
Drowned Kingdom Quest. Doing so could result in the soul of King
Wingauro you as an ally.
When you're ready, whether you want to complete the other Quests first or not,
click on the portal at #3. Rynhaeder will of course want to make sure
you're truly ready before stepping through. The ice will collapse
beneath you when you affirm that you are ready.
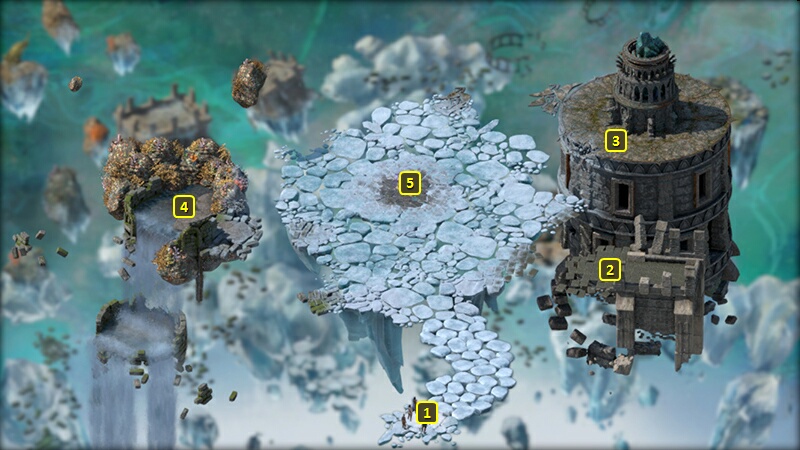
You'll be at #1 on the map of Neriscyrlas'
Lair. You may have allies here to help you in a fight against
Neriscyrlas, depending on how you completed other Quests. Note that they
can only use their powers if Neriscyrlas is close enough for it.
The soul of St. Waidwen will be at #2 if you convinced him to join you
as an ally during The Bridge Ablaze
Quest. He can use the Fire Storm spell.
The soul of Inquisitor Naxiva will be here if you convinced her to join
you as an ally during The
Endless Queries Quest. She can use a chains power that can
Immobilize the dragon.
The soul of King Winguaro will be here if you convinced him to join you
as an ally during The
Drowned Kingdom Quest. He can Daze the dragon.
Neriscyrlas will be waiting for
you at #5, and there's multiple ways to handle the situation.
The easiest way is to convince her that centuries of her undead state
must surely be wearying by now, and that it's time to embrace oblivion
and succumb to the White Void. She'll then end her existence
willingly. You won't need to make any skill checks to convince her of
it. You just need to keep pressing the point multiple times until she's
convinced.
The obvious way is to fight her. This can be a tough fight, even for
high level parties. She has a power similar to Llengrath's Safeguard
that she can activate at least twice during the battle, which will
boost her Armor Rating considerably. She can also use an enhanced
version of Concelhaut's Corrosive Siphon without limit in order to both
damage the party and heal herself. One type of strategy for her
emphasizes Interrupting the use of her powers. The other type of
strategy depends on either boosting the Penetration of your warriors, or
lowering her Armor Rating, or both.
Either killing her or convincing her to succumb to the White Void will
lead to the acquisition of both an Amulet called Neriscyrlas'
Hope and a Trinket called Whispers
of Neriscyrlas. *NOTE* Killing Neriscyrlas requires making an
Athletics check of 15 to get Neriscyrlas'
Hope from her dying body without sustaining an Injury.
A Wizard character can explore letting you take her phylactery with you
to facilitate an escape from the White Void. Note that you need to
explore the possibility of Neriscyrlas getting tired of her unlife and
possibly giving into oblivion, but then stopping just short of
convincing her, to even get your foot into the door for the possibility
of willingly giving you her phylactery. To pursue the taking the
phylactery possibility without first broaching the subject of wearying
of unlife will lead to a fight against her. Getting your foot in the
door after discussing weariness of unlife will also require a combined
Insight check of 13 and Arcana check of 13. Neriscyrlas is then open to
the idea, although whether she seals the deal depends on your reply to
her query as to your intentions. In my experience either the "explore
the world" reply, or the "it's what I do as a Watcher" followed by an
option that requires 3 points of Benevolent disposition, secures her
agreement. She then transfers herself inside her phylactery for your
taking.
The fourth possibility is to convince her to attack Rymrgand himself
head on. Either a Bluff check of 18 or an Arcana check of 17 will work.
Note that convincing Neriscyrlas to give you her phylactery, or
convincing her to attack Rymrgand, will lead to acquiring only Neriscyrlas'
Hope but not the Whispers
of Neriscyrlas.
You will either have to click on the altar at #3 to reach the next
level, or you will be automatically teleported there, depending on what
exactly you did with Neriscyrlas.
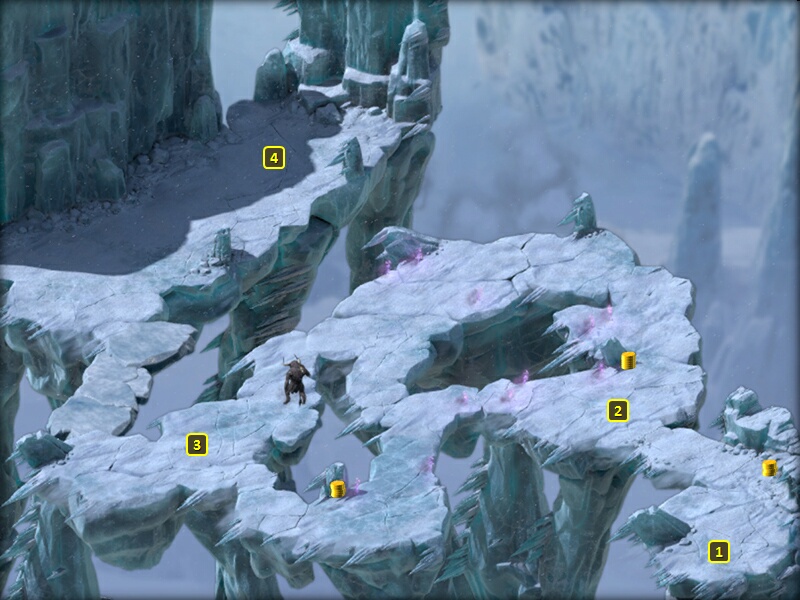
A Shambled Soul at #2 will beg you to take him along to hasten the end
of his suffering through oblivion. It's up to you whether or not you
accept his plea, but I'm not sure it has any in game consequence.
You will thereafter get attacked by a LOT of Shambled Souls. A couple of
Scourges will join in soon after.
A Warden of Decay will be at #3.
Rymrgand himself, in the
form of the Beast of Winter, will be waiting for you at #4.
If you convinced Neriscyrlas to attack him, you will now witness him
killing her off very easily. He will then attack you for not upholding
your end of the bargain, no matter what you may have to say.
If you have the phylactery, either because you killed Neriscyrlas or you
convinced her to give it to you, Rymrgand will now want it with the
intention of destroying it. It's up to you whether you give it to him or
not. If you had convinced Neriscyrlas to give you her phylactery
beforehand and now surrender it to Rymrgand, she will now scream in
hatred at you for your betrayal.
Rymrgand, whether you gave him the phylactery or refused it, will now
want you pledge your soul to him. That means your soul won't return to
The Wheel but instead the White Void. He'll return you to the Temple
of Decline if you accept the offer. You can instead offer him Ydwin as a sacrifice as an
acceptable compromise, which means permanently losing her as a sidekick
and some pretty severe reactions from everyone else in your party.
Refusing any agreement leads to a fight against him. He can use enhanced
versions of the Seven Nights She Waited and the Symbol of Rymrgand
powers. He can also teleport with a jump attack power like that of a
Barbarian. He also periodically summons Shambled Souls to help him.
Defeating him in combat not only convinces him to return you to the Temple of Decline, but also
gets you the Frostfur Mantle.
You can briefly return to The
Shattered Passage if you wish, although it is not necessary. If
you speak to Rynhaedr and you brought about the permanent end of
Neriscyrlas, then Rynhaedr will be pleased and fade away to oblivion.
Rynhaeder will be upset if you speak to her and admit that you carry
Neriscrylas' soul with you. She'll remain in the White Void to guard
against the eventual possibility of Neriscyrlas' return.
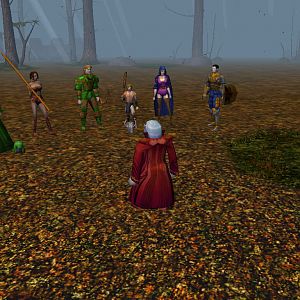
You'll end up at #4 in Harbinger's
Watch. A crowd of Harbingers will gather around you. Harbinger
Hafjorn will lead the discussion if Vatnir
is in the party. Vatnir will
lead the discussion if he's still alive but you did not recruit him as a
sidekick. No one will lead the discussion on their behalf if you killed
Vatnir.
Numerous possibilities exist for the conversation, although none of them
have any in-game consequence. You can make a decision about whether or
not Vatnir remains in your
party. You can show them Neriscyrlas'
Hope if you brought her soul with you in her phylactery, which
earns honest disposition. You can earn Shady disposition by telling them
that the ice will continue to overtake the world, or you can convince
them to return to the White That Wends.
Woedica will want to speak to you after that conversation. You can
right-click and use the Burned
Book of Law to speak with the Goddess of Law about recent events
(i.e., the end of the Beast of Winter expansion).
Sorcerer's
Place is a project run entirely by fans and for fans. Maintaining
Sorcerer's Place and a stable environment for all our hosted sites requires a substantial amount of our time and funds on a regular basis, so please consider supporting us to keep the site up & running smoothly. Thank you!
Supporting Sorcerer's Place
Has Sorcerer's Place been useful? If you'd like to show your appreciation
for our hard work on the site, and help us pay the bills the site generates
every month, please consider helping support SP.
Thank you!

 Neriscyrlas will be waiting for
you at #5, and there's multiple ways to handle the situation.
Neriscyrlas will be waiting for
you at #5, and there's multiple ways to handle the situation. Rymrgand himself, in the
form of the Beast of Winter, will be waiting for you at #4.
Rymrgand himself, in the
form of the Beast of Winter, will be waiting for you at #4.