-

- Forums
- Chatrooms
- Gallery
- Gameplay Videos
- Upload
- Articles
- Mod Reviews
- Shop SP: Games, Movies, Books
|
|
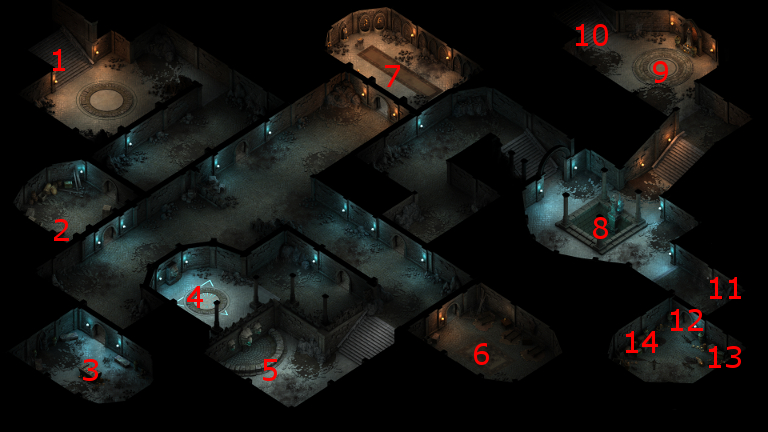
Temple of Eothas, Level 2
Temple of Eothas Lower Floor Chest
The party arrives at #1 on the map of the second level. Shadows will be a frequent foe throughout this level. Although their melee attacks can cause Daze, they're still fairly easy to kill when it groups of two or three.
There will be two chests in the room at #2. The one in the south corner will have a random weapon. The trapped chest in the north corner will have an item from the "Gilded Vale - Eothas Temple - Lower Floor" section of the random drop list. It is still day 16, so I get a Ring of Minor Deflection from it. I have Eder wear it on an interim basis.
*Evil* It's still day 8 for the evil party, so Zakara grabs a Ring of Minor Deflection for Durance.
Cloak of an Eothasian Priest
The room at #3 will have a few Shadows and a couple of Shades in it. Shades are like Shadows, but they can also use projectile attacks that can inflict cold damage. I keep the party out of the room for now. I begin by having Eder bring himself just past the door to get the attention of an outlier Shadow, then leading it back to the rest of the party so that I can easily kill it.
The rest will come at me en masse if they notice me, so now I make some preparations. First, Aloth is in distinct danger of getting killed since spirits can teleport past the tanks to get at him. I therefore tuck him into the room at #2 so that the spirits won't even notice him. Next, I have the Orlan Rogue plant a Fireball Trap that I had found earlier at the door.
Now I have Eder get their attention and lead them back to the party. They trip the Fireball trap and take some damage. Kana also hits them as they're oncoming with a Scroll of Fan of Flames that he had found earlier. Thereafter, he also periodically summons a Phantom to help out whenever he can. It's otherwise a matter of cutting them down one by one.
Both sarcophagi in the room are trapped. The one in the northwest corner has a random item and some coins.
The one of the south side of the room has a Cloak of an Eothasian Priest. A Phantom will attack once I take it, but I bring it down relatively easy.
For either the good party or the evil party, I have Durance wear the cloak on an interim basis.
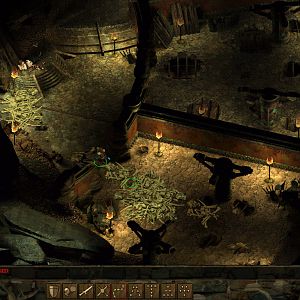
Phantoms and Shadows in the Temple of Eothas
There will be a couple of Phantoms and a few Shadows in the room at #7. I have Eder lead them out of the room. He holds up the Phantoms while the rest of the party takes out the Shadows, although he does take a beating doing so since Phantoms can Stun with their attacks. Luckily, Alliria picks him back up with her healing powers and victory follows as a matter of course.
Drain Wheel
There will be a few more Shadows and Shades in the room at #4. I leave Aloth well back. I also leave the party itself west of the door to the room.
I have the Orlan Rogue set a Fireball trap just inside of the door. Now I have Eder get their attention to lead them back, across the trap and the door. Durance casts a Consecrated Ground spell as they're oncoming. It's otherwise a matter of positioning my characters to minimize the danger of more vulnerable characters (i.e. Durance or the Orlan Rogue) getting targeted, while maximizing my own ability to gang up on the monsters and taking them as quickly as possible. Shadows will go down easier, so I make them a priority whenever I can. Kana also summons a Phantom whenever he can.
The room itself has a Drain Wheel, which I turn in order to drain the water from an adjacent room.
Gleaming Silver Key
Now I head to the room at #5. There will be a Black Ooze and a couple of Lesser Black Oozes. The fight is fairly easy, since Alliria is able to trigger her healing powers with considerable frequency.
I loot an empty robe in the room for the Gleaming Silver Key.
A Crumpled Note
The room at #6 will have several Shadows, which I defeat rather routinely. There will be a few containers in this room. One of them has a copy of the Eothasian Prayer. Another has a Crumpled Note, which provides some insight on making progress through the lower level.
The video concludes with me using the Gleaming Silver Key to open the door west of #6.
Oozes and Spirits in the Temple of Eothas
I continue north along the hallway and easily kill off a Shadow.
The room at #8 will have two Lesser Black Oozes, a Black Ooze, another Shadow, and a Phantom. I begin by having the Orlan Rogue set a Dart Trap at the stairs.
I have Eder go on and lead one of the Lesser Black Oozes back to the rest of the party, and away from the rest of the monsters, so that I can kill it off easily. The trap wasn't tripped.
Eder leads the rest of the monsters back to the rest of the party. It takes some work, plus help from summoned Phantoms from Kana, but I do manage to kill off the spirits and Lesser Black Ooze. It then becomes a matter of ganging up on the Black Ooze, which had been hanging back and using spit attacks.
The Pilgrim's Lasting Vigil
There will be a few Skuldrs, led by a pair of Skuldr Kings, in the room at #9. I let them come to me, while Aloth puts a Chill Fog over their approach. Durance adds a Consecrated Ground spell. I end up winning fairly easily as a result.
A statue on the east wall of the room has a helm called The Pilgrim's Eternal Vigil. I have Eder wear it, since he'll benefit from the bonuses to Perception and Resolve.
The stairs at #10 lead back up to the first level, but at a different point of arrival.
*Evil* Candles of Eothas
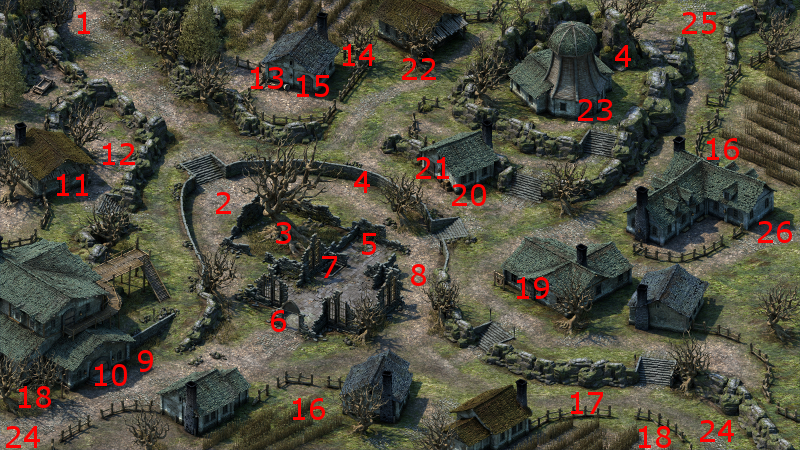
The stairs at #10 of the second level lead up to #20 on the map of the first level. The doorway at #22 will now open.
At #21 will be some still burning candles of Eothas. Eder will reminisce about a religious rite he underwent when he was younger.
Incidentally, a wall will open up on the east side of the room, allowing for a shortcut to the exit from the Temple itself.
Gaun's Share
I go back downstairs and hit the switch at #11 on the map of the Lower Level, which opens the door at #12. I loot the various containers in the room. The chest at #13 has a Prybar and a flail named Gaun's Share. I save the Flail for Hiravias when he joins the good party.
*Evil* I save the flail for Zahua.
Buried Secrets
*Evil* Buried Secrets
Zakara chooses the second route, by asking if he's about something, and choosing Aggressive replies the next two times, in order to provoke Wirtan into a fight and murder him. He leaves behind a Leather Armor and some gold. Going this course involves a minor loss of reputation with Gilded Vale.
My next destination is the Esternwood.