-

- Forums
- Chatrooms
- Gallery
- Gameplay Videos
- Upload
- Articles
- Mod Reviews
- Shop SP: Games, Movies, Books
|
|
Raedric's Hold
*Evil* Ceiling Hidden Chest
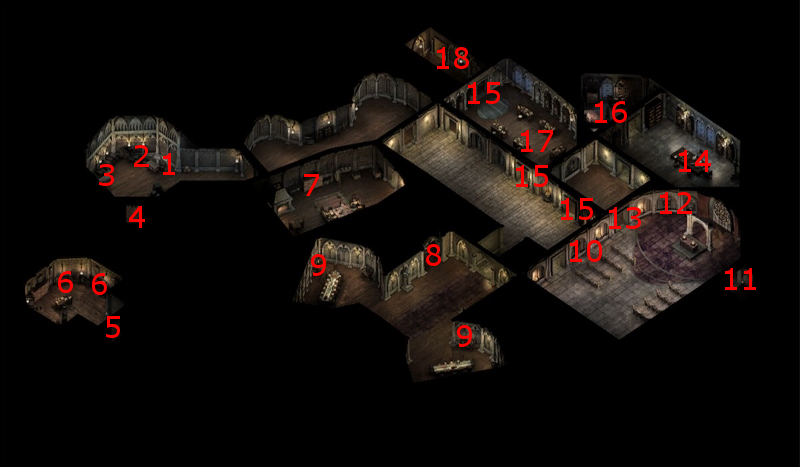
I show the next few parts from the perspective of the evil party. First, I rest until it is day 19 of the month. I then go to the stairs at #8 on the map of the Sanctuary.
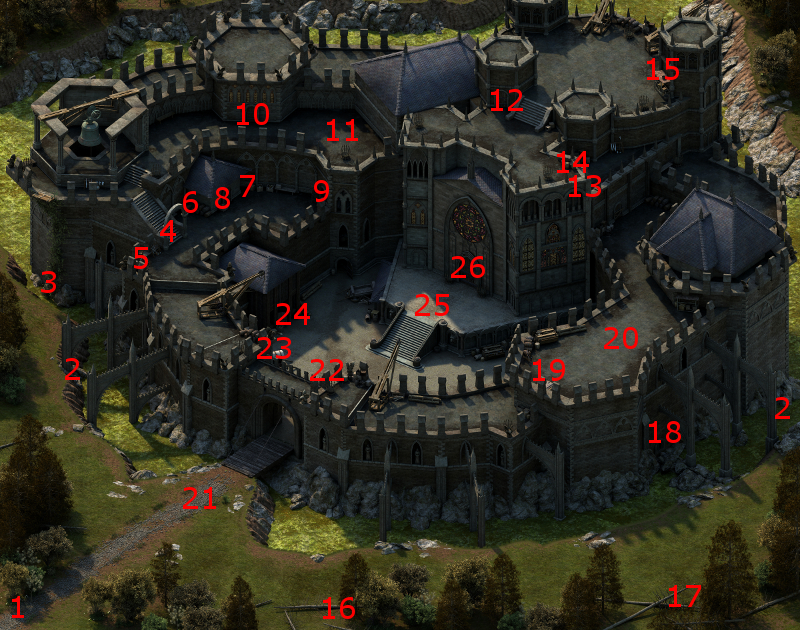
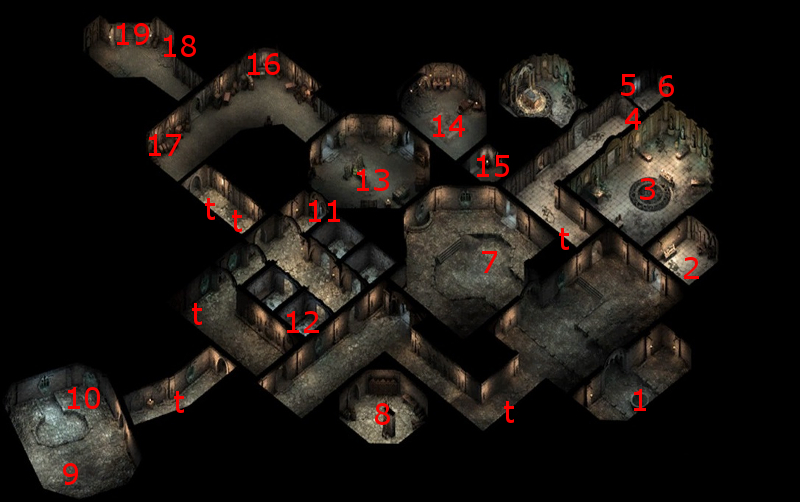
Now I'm at #12 on the map of the Keep Exterior. I grab random items from the crates at #13 and #14.
A hidden crate will have an item from the "Raedric Keep - Ceiling" section of the random drop list. It now has the Boots of Stealth, which may come in handy for situations where I want to sneak about.
The video concludes with the evil party going back down the stairs at #12, and returning to #8 on the Sanctuary map.
*Evil* Dungeon Ladder Chest
*Evil* Zakara rests up near Nedmar until it is day 5. The evil party then goes down the stairs at #1.
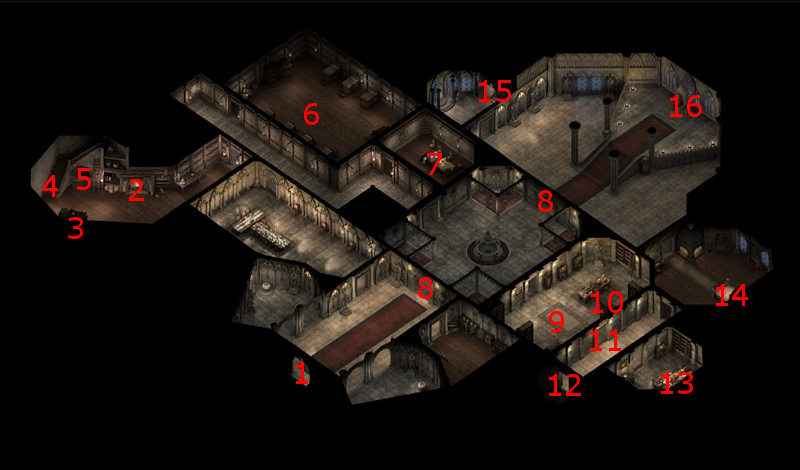
They are now at #4 on the map of the Keep. They go down the stairs at #5.
They are now at #19 on the map of the Dungeons. They make their way to the trapped chest on the east side of the room at #8. The chest itself will have an item from the "Raedric Keep - Dungeon - Lower Hidden" section of the random drop list. As it is Day 5, I now get a Blunting Belt from it. Zakara wears it, as one of the emphases of her build is to emphasize Damage Reduction instead of Deflection to last through her battles, and that ties in with the Battle-Forged power of Fire Godlikes. The Belt adds +5 Piercing and Slashing Damage reduction, so it's a natural fit for her build.
*Evil* Captain of the Guard
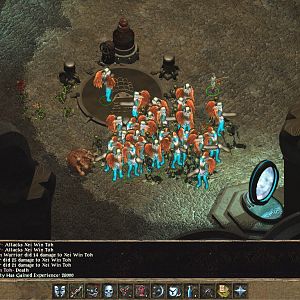
The evil party next goes up the ladder in the room at #8, and arrives at #19 on the map of the Keep Exterior. At #20 will be a few Guards, a few Sellswords, and the Captain of the Guard. Durance casts Blessing and Consecrated Ground. Aloth wears them down with multiple castings of Ghost Blades, and the battle is soon won.
The video concludes with the evil party making it all the way back to Nedmar to rest up.
West Wall
The good party cuts straight to this part after having cleared out the Sanctuary, and leaves the parts the evil party did previously for afterwards. It is also at this point that the evil party starts to follow the same path as well.
The party heads through the door at #4 on the map of the Sanctuary, and end up at #10 on the map of the Keep Exterior.
There will be a Priest of Berath, two Paladins of Berath, and a couple of Archers at #11. This can be a pretty tough battle. The Paladins can hit hard, and can get second or third winds either through their own Lay on Hands or from the Priests spells. I send Eder and Kana ahead, both to get on top of the Priest but also to absorb the initial onslaught of the Paladins. The Priest is the squishier target and yet can also keep the Paladins going, so I make him the prime target. I carefully send Alliria and the Orlan Rogue ahead so that they avoid the Paladins but get into position to attack the Priest. He goes down quickly.
After that, Alliria rips into the Paladins with her Flames of Devotion, while Kana summons a Phantom whenever he can. They go down as well. The Archers soon follows.
I gradually make my way to the door at #9, taking out the odd Guard or two along the way.
Courtyard
I will now be at the door just a little east of #24. I dig the party into a niche just right of the door, with Eder and Kana holding a shield wall while the rest of the party stays behind.
There will be a large force of Raedric's Guards at #22. I send Eder ahead to get their attention, and then regroup with the rest of the party.
Durance uses a sequence of Blessing, Consecrated Ground and Interdiction. Aloth sets up a Chill Fog in front of the party. He follows up with Grimoire Slams on as many enemies as he can catch. Kana summons a Phantom whenever he can.
Eder and Kana do most of the fighting, but Alliria and the Orlan Rogue will hit from the side against any enemy that curls around the tanks so to speak. I have all my warriors go into melee once the Chill Fog has dissipated and the enemy crowd has thinned out somewhat.
I repeat a similar process for the group at #25, this one lead by a few Paladins of Berath, with the tank wall taking position at the top of the stairs.
Sanctuary Armory
The party is pretty beat up, so it's time to get some rest.
But first, I climb back up to the west wall and go through the door at #8. It leads me to the armory of the Sanctuary. Inside will be a couple of chests, at points marked #6 on the Sanctuary map, that will both have random armors. One has a Fine Breastplate, which I have Alliria equip. The other has a Fine Large Shield, which I have the Orlan Rogue equip.
I now make my way back to Nedmar, the way that I had earlier come, and get some rest. Once that is done with, I return to the Courtyard.
Cletlan and Ludwin
I descend from the west wall and into the Courtyard itself. At #21 will be a pair of Guards named Cletlan and Ludwin, who are very easy to kill.
I now go to the large door at #26, which leads into the Keep itself.