Pillars of Eternity 2 logo


Pillars of Eternity 2 Online Walkthrough by David Milward

INTRO & ABOUT | CHARACTERS | COMBAT AND RULES | ITEMS | SHIPS
Quests | Areas | Mega Bosses
Disable all ads!

Main Game: Main Quests | Character Quests | Side Quests | Tasks | Bounties
Faction Quests: Huana | Principi | Royal Deadfire Company | Vailian Trading Company
Expansions: Beast of Winter | Forgotten Sanctum | Seeker, Slayer, Survivor

Seeker, Slayer, Survivor Main Quests: The Proving | The Rite of Passage | The Crucible | The Champion of the Hunt | The Hunter Hunted
Seeker's Face Quests: The Seeking Face | The Seeking Face's Hunt for the Adra Pearl | The Seeking Face's Hunt for the Fortuneteller's Ear | The Seeking Face's Hunt for the Haemneg's Handmaiden
Slayer's Face Quests: The Slaying Face | The Slaying Face's Hunt for the Luckless Coin | The Slaying Face's Hunt for the Titan's Heart | The Slaying Face's Hunt for the Hunter's Head
Survivor's Face Quests: The Surviving Face | The Surviving Face's Hunt for the Matron's Skull | The Surviving Face's Hunt for the Uncut Gem | The Surviving Face's Hunt for the Finger of the Exiled Queen
Seeker, Slayer, Survivor Side Quests: Potions of Plenty

Temple of Toamowhai

The Slaying Face

  1. This Quest starts after you have started The Crucible Quest, and have indicated a willingness to Engari at #10 in the Temple of Toamowhai to retrieve an artifact for the Slayer's Face.

    Engari will indicate that the artifact can be found in a place called Whakupoko Lowveld, and then open the door at #12 for you. It provides access to Kazuwari at #7.
  2. Kazuwari

  3. Pingaka Ravine is at #8, which has an unstable bridge that you'll need to cross in order to progress this Quest.

    You can safely cross it without checking on the condition of the bridge itself as long as the Watcher can make a Resolve check of 12 and a Dexterity check of 14, and then everyone in the party can make an assisted Athletics check of 8.

    Examining the bridge offers multiple opportunities to gauge its condition through skill checks. A Survival check of 13 indicates that the rope of the bridge can't hold up much weight. A Stealth check of 15 indicates that the wood is not of the sort that a scout would want to quietly cross over. A Mechanics check of 12 suggests that the bridge can be reinforced.

    Searching for an alternative pathway, after making either a Mechanics check of 14 or a Survival check of 14, indicates that there's no way forward but over the bridge.

    If you attempt to cross without reinforcing the bridge, and after making any skill checks that determine the bridge's condition, you can cross. The difference is that you only need to make the Dexterity and Athletics checks. You won't need to make the Resolve check.

    You can attempt to reinforce the bridge through your own labor. It takes two days, and your party members will end up Fatigued. But you can cross without any more skill checks.

    You can reinforce the bridge with certain spells, like the Wizard's Binding Web or the Druid's Tanglefoot. You can then cross without any more skill checks.

  4. Great Stelgaer
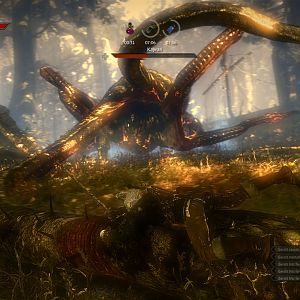
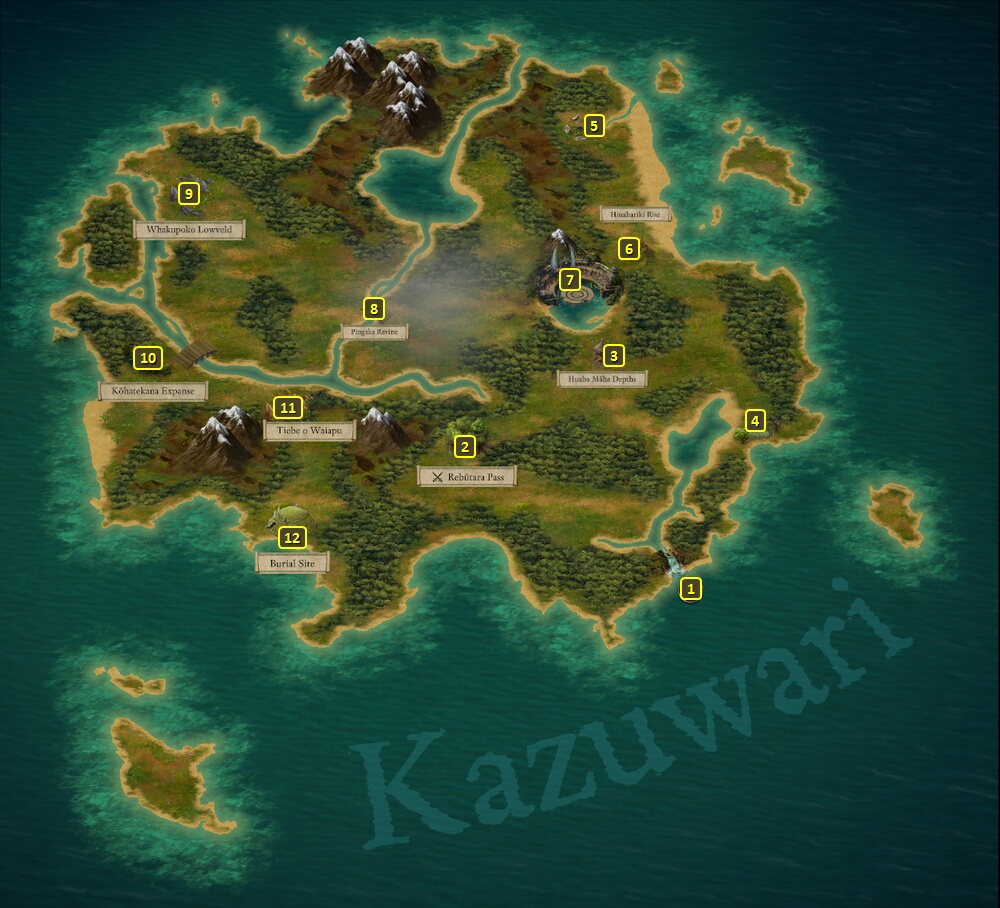
Whakupoko Lowveld is at #9. It starts off as a scene of several Kith lying dead and partially devoured. An initial Survival check of 10 reveals both Kith and Beast tracks. A Survival check of 13 that examines the Beast tracks will reveal that they were made by a Stelgaer. A Survival check of 12 that focuses on the Kith tracks will reveal an Orlan among them.

    You could from the outset move into the field. An Insight check of 13 will suggest you are being tracked by predatory animals. Approaching them openly will lead to a fight against a Great Stelgaer along with a few Savage Panthers and Savage Tigers. Defeating them leads to obtaining the Cindershard, the artifact that the Slayer Face wants. Alternatively you can make a Stealth check of 9 to hide from them. From there, you can either attack them from Stealth mode or make a Sleight of Hand check of 15 to steal the Cindershard and leave without a fight. Making an Athletics check of 11 to run for the line of trees won't put you in Stealth mode, but it will give you the choice of either attacking them openly or making the Sleight of Hand check of 15 to steal the Cindershard.

    The other two pathways are to follow the Beast tracks if you made the Survival check of 13, or follow the Kith tracks if you made the Survival check of 12.

    Making another Survival check of 15 after following the Beast tracks leads to discovering Stelgaer droppings. The party member who made the discovery may suggest patting the droppings on yourself in an effort to disguise your scent. You can vehemently reject the suggestion to earn Passionate disposition, or use the droppings on yourself and earn Rational and Stoic disposition. I'm not sure if that leads to any tangible benefit. From there you can either look for whatever made the tracks, which leads to the same options for the Great Stelgaer itself as described above, or you can instead follow the Kith tracks.

    Making a Survival check of 13 after following the Kith tracks reveals another scene of carnage, and two trails branching off. Examining the scene obtains 92cp, an Exceptional Dagger, an Exceptional Crossbow, and a Potion of Moderate Healing. An Explosives check of 9 reveals that somebody tried to use Sparkcrackers as a distraction. Using your Watcher powers to detect spirits won't lead to anything.

    Following the trail of the unwounded Kith reveals a body at the bottom of the cliff. An Intellect check of 9 reveals that he fell off the cliff. Searching his corpse obtains an Exceptional Arquebus, 49cp, a few Sparkcrackers and some Candied Nuts. You can then backtrack and follow the trail of the wounded Kith.

    Following the trail of the wounded Kith leads to finding a mortally wounded Dwarf. Discovering him means that from that point onwards you'll always have the option to search for the creatures that wounded him, which will lead to the same Stealth or Sleight of Hand or battle options against the Great Stelgaer as described above.

    Examining his wounds leads to a few more options. Using a Priest spell to try and heal him won't do him any good. You can use the Cruel option to force him to scream and draw the creatures out, which leads to the same options against the Great Stelgaer but may also earn disapproval from at least some of your companions.

    You can make a Survival check of 15 if you also have a Rope and Grappling Hook in your inventory to construct a snare. Follow up by lying in wait. If you let the animals come to the snare, it will trap the Great Stelgaer and cause the other cats to flee. Trying to calm and soothe it won't accomplish anything. You can kill it with weapons while trapped, or use an offensive damaging spell to kill it outright, in order to get the Cindershard. You can also have a character make an Athletics check of 11 to get the Cindershard out of its back without fighting it. You can at that point either kill it, or release the snare and let it run away.

    You can also have a character make a Mechanics check of 13 to construct a Burn Trap. Lie in wait and let the cats get themselves caught. From there you can attack them, but it just starts combat against them without any apparent advantage. You can also sneak up on them with a Stealth check of 9 to attack them from Stealth mode. You can also use an offensive damaging spell to kill them outright while they're in the trap. Any of these options will get you the Cindershard. Using the Druid's Charm Beasts or the Cipher's Domination powers won't accomplish anything.

    Whehami, the spirit of the Slayer Face, will speak to you after you obtain the Cindershard.

  5. Now return to the Temple of Toamowhai and give the Cindershard to the Pool of Memories at #11. Three new challenges become available which must be completed in The Crucible.

  6. Changeling's Dance

    You'll face off against a Mercenary Cipher, a Mercenary Fighter, a Mercenary Monk, a Mercenary Ranger, and a Mercenary Rogue. Now here's the catch. Each of your party members will take on the form of a monster you've encountered in your adventures. One becomes a Construct that can hit for Crushing Damage and use Fan of Flames attacks. Another becomes an Imp that can use spit attacks. Another becomes a Lagufaeth that can use Paralyzing attacks. Another becomes an Engwithan Saint that can use Minoletta's Minor Missiles without limit as its basic attack. And another becomes an Adra Ooze. You can't use your class-based Active abilities, but your Passive abilities remain in place.

    If you have more than four Companions in your roster, like the ones that you use for Ship combat, you may want to exercise some choice here. Choose the ones with the highest Health. Also, ones that have passive abilities that revive a character upon being knocked Unconscious (e.g.,, the Fighter's Unbreakable) can be a real boon here.

  7. A Trial by Fangs and Fur

    This is one of the more straightforward fights. Win a battle against a large number of Savage Panthers and Savage Tigers led by a pair of Great Stelgaers.

  8. Cult of the Naga Shaman

    Now it's win a fight against a large number of Poison Naga including a couple of Shamans. There will also be two Totems that can summon Bog Oozes, one on the north stage and the other on the east side. Two more Naga may periodically show up, so there's an incentive to cut your enemies down as quickly and efficiently as possible.

    You'll also get a Pet snake named Drago as a reward.

  9. Complete one of the Challenges, and two new Tasks become available. First is The Slaying Face's Hunt for the Luckless Coin, and then The Slaying Face's Hunt for the Titan's Heart.

  10. Furthermore, complete one of the Challenges, and an adventuring party called The Dragonstalkers will happen by. Their leader, Dekebar Drakesdoom, will speak rather dismissively towards you. You can actually fluster him if you can honestly claim to having killed four Dragons over the course of both Pillars of Eternity 1 and this game.

    The spirit of Whehami will speak to you after completing a second Challenge or one of the Tasks.

    Dekebar Drakesdoom will have another more respectful conversation with you after completing another Challenge or one of the Tasks.

  11. The Dragonstalkers
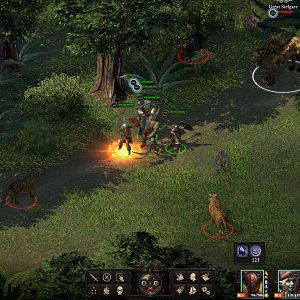
Completing two of the challenges means you now have the option to take on The Contest of the Slayer challenge. Accepting this challenge means choosing an exclusive alliance with the Slayer's Face, and precluding completion and/or continuation of either The Seeking Face or The Surviving Face Quests.

    The challenge itself is The Dragonstalkers. Dekebar Drakesdoom is himself a Fighter. His party includes a Wizard named Wise Aerlif, a Beckoner named Tunako the Tanager, an Orlan Rogue named Shrew, and a Ranger named Armansa the Lightfooted and his Wolf Companion. I tend to make Wise Aerlif the highest priority, since her spells can really create problems. That can mean putting summons on her, or temporarily keeping her out of the battle with something like the Cipher's Statis Shell. Tunako should also be a priority target, since his summons can also really create problems. Dekebor himself should usually be the last target, since he can keep himself going for a long time as a tank.

  12. You'll be returned to the Temple of Toamowhai if you win. Go to the Pool of Memories at #11. The Quest will be completed when Humaire and Engari both congratulate you on becoming the Champion of the Slayer. You'll also get a Soulbound Battle Axe called the Slayer's Claw.

    The Crucible Quest is completed at the same time, and The Champion of the Hunt Quest begins.

Amazon.com
Amazon.ca
Amazon.co.uk
Sorcerer's Place is a project run entirely by fans and for fans. Maintaining Sorcerer's Place and a stable environment for all our hosted sites requires a substantial amount of our time and funds on a regular basis, so please consider supporting us to keep the site up & running smoothly. Thank you!

Disable all ads!