Pillars of Eternity logo


Pillars of Eternity Online Walkthrough by David Milward


INTRODUCTION & ABOUT  |  WORLD MAP  |  WHITE MARCH MAP
General:  
Quests  |  Tasks  |  Bounties  |  Items  |  Characters
Areas:  
Act 1 Areas  |  Act 2 Areas  |  Act 3 Areas  |  Act 4 Areas  |  Caed Nua  |  White March - Part 1  |  White March - Part 2  | 
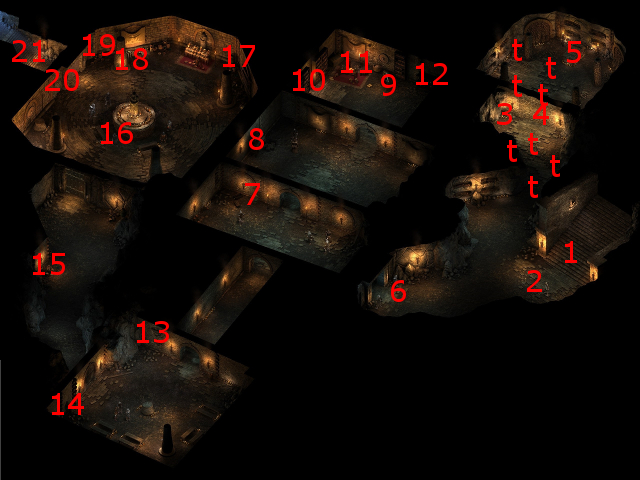
Disable all ads!

Act II Areas:   Copperlane  |  Copperlane Catacombs  |  Temple of Woedica  |  First Fires  |  Brackenbury  |  Sanitarium  |  Ondra's Gift  |  Lighthouse Ruin  |  Heritage Hill  |  Heritage Hill Tower  |  Cliaban Rilag  |  Searing Falls  |  Searing Falls Cave  |  Pearlwood Bluff

Temple of Woedica

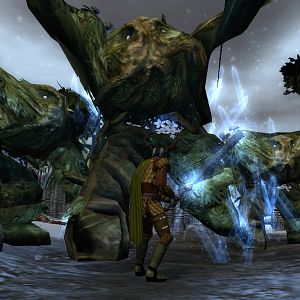
The Temple is filled with Mercenaries of varying classes and abilities. Some of them will be Fighters that come equipped with Brigandine Armors, Medium Shields, Open Helms and Swords. Others will be Rogues that come equipped with Hoods, Leather Armors, and a pair of Daggers. There will be a few Wizards that will leave behind Novice Grimoires, Wands, and Robes when killed. There will also be the odd Cipher that will be equipped with a Breastplate, Open Helm and War Bow.

Spots with traps will be marked with a 'T'.

Temple of Woedica

  1. This is the exit back out to the Copperlane Catacombs at #21.

  2. Here you will have a vision of the Older Robed Man you had encountered earlier at Cilant Lis. The vision will suggest that you were actually an associate of his during one of your previous lives.

  3. There will be a secret button on the floor at this spot. It can only be discovered while in scouting mode. Pressing it will open the nearby door at #4.

  4. This door can only be opened by pressing the button at #3.

  5. There is a trapped sarcophagus here that will have an item from the "Temple of Woedica - Secret Room North-East" section of the random drop list.

  6. Hafmcg, a Mercenary and Priest, will be standing guard here. If you want to complete the Never Far from the Queen quest in a way that does not require slaughtering everyone in sight, then you will need to bluff your way past him. That requires one of an Intellect score of 13, a Resolve score of 13, or a bribe of 350cp.

    If you do decide kill him along with the rest of the mercenaries, he'll be equipped the same as a Fighter Mercenary except that he carries a Battle Axe instead of a Sword.

  7. The urn here will have a random potion and some coins.

  8. The crate here will have several random food items.

  9. There will be an Initiate here. As long as you don't give an obviously dumb answer that betrays you have no idea what's required to be in good standing with the Temple (e.g. "What Hood?") then you'll be able to converse with him. In fact, you can trick him into giving you the passwords that may come in handy by suggesting that he practice the phrases to you.

  10. The bookcase here will have a book called The Fangs.

  11. A chest here will have a random weapon and coins.

  12. The bookcase here will have a book called The Queen That Was - And Still Is.

  13. There will be a hidden niche here that will have a random weapon or two, sometimes of Fine quality, a random scroll, and some coins.

  14. The Urn here will have a couple of random creature parts that can be used for crafting purposes.

  15. The urn here will have random gems and coins.

    It will also be about here that Aloth, if he is in the party, has some sort of hallucination. This event is one of the triggers for his personal quest, Two-Sided.

  16. Shrouded Woman
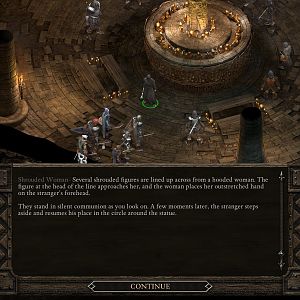
The Shrouded Woman will be here, along with several Shrouded Men. It is possible to get the Shrouded Woman to willingly provide three visions as part of the Never Far from the Queen quest.

    If you want to complete the quest that way, then you will be given an opportunity to don the Woedica Hood before entering the chamber itself, even if your character is a Godlike.

    If you enter the chamber without the Woedica Hood, or if you enter the chamber with the rest of the party, the Shrouded Woman and her minions will all attack you. If you enter the chamber alone, AND had put the Woedica Hood on beforehand, then she will drill you on the proper passwords. The proper passwords will always be the very first dialogue options if you had previously learned the passwords from the Initiate. Once that happens, the Shrouded Woman will share three visions, each of which trigger the next three main storyline quests. Those quests are The Man Who Waits, Through Death's Gate, and Undying Heritage.

    You could also fight them instead. Some of the Shrouded Men will be warriors who pack Great Swords and Plate Armors. At least a couple of them will be priests who pack War Hammers and Fine Brigandine Armors. A couple of others will be Wizards with Fine Rods and Fine Robes. The Shrouded Woman herself is a Cipher who carries a Fine Scepter and a Fine Robe. All of them also wear Woedica Hoods. The Shrouded Woman also leaves behind the Lead Key if killed.

    If it is a battle you want, tuck your party to the right of the door. Send one character ahead to bait them out and then regroup with the party. Hit them with your own spells and debuffs as they come out the door as a group. If you conclude the quest this way, you'll end up using your Watcher powers to communicate with the spirit of the Shrouded Woman to get the three visions. That will still make the next three main quests available.

  17. The Urn here will have random gems and coins.

  18. The switch here opens the door at #19.

  19. The vase here has a Torc of Defiance.

  20. The door here can be opened by hitting the switch at #17.

  21. These stairs lead up to the First Fires district at #10.


Amazon.com
Amazon.ca
Amazon.co.uk
Sorcerer's Place is a project run entirely by fans and for fans. Maintaining Sorcerer's Place and a stable environment for all our hosted sites requires a substantial amount of our time and funds on a regular basis, so please consider supporting us to keep the site up & running smoothly. Thank you!

Disable all ads!