Pillars of Eternity logo


Pillars of Eternity Online Walkthrough by David Milward


INTRODUCTION & ABOUT  |  WORLD MAP  |  WHITE MARCH MAP
General:  
Quests  |  Tasks  |  Bounties  |  Items  |  Characters
Areas:  
Act 1 Areas  |  Act 2 Areas  |  Act 3 Areas  |  Act 4 Areas  |  Caed Nua  |  White March - Part 1  |  White March - Part 2  | 
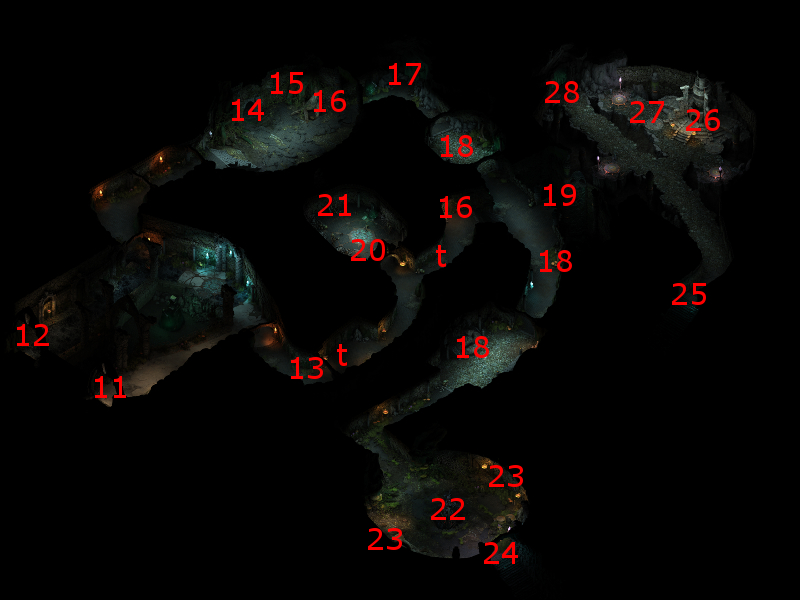
Disable all ads!

Act II Areas:   Copperlane  |  Copperlane Catacombs  |  Temple of Woedica  |  First Fires  |  Brackenbury  |  Sanitarium  |  Ondra's Gift  |  Lighthouse Ruin  |  Heritage Hill  |  Heritage Hill Tower  |  Cliaban Rilag  |  Searing Falls  |  Searing Falls Cave  |  Pearlwood Bluff

Cliaban Rilag

Cliaban Rilag, Exterior

  1. This spot will be the party's initial point of entry, and will also provide access to the World Map.

  2. The party can find St. Gyran's Horns at these spots

  3. The party can find Springberries at these spots.

  4. This corpse has the Orlan's Bramble Ring and another random item.

  5. Here is where you'll encounter the Dwarven Chanter named Songsmith Roska and his band of Sappers while pursuing the bounty on him.

  6. Here is the Looter's Camp. They will attack no matter what you say. Dialogue options based on Diplomacy and being a Priest of Magran are available, but only affect the specifics on the conversation itself. They leave behind a Padded Armor, a Fine Arbalest, a Fine Sabre, and an Exceptional Breastplate when killed.

    The tent will have Camping Supplies in it.

    There will also be a patch of loose mud at the south edge of the camp that has the Standard Readceran Piece, which is relevant to Eder's personal quest, Fragments of a Scatted Faith.

  7. Here you can jump across the bridge during a scripted interaction so as to reach the entrance at #8. The character with the lowest Athletics skill is likely to sustain an injury after the jump.

  8. The entrance here allows entry into the first level of the ruins at #11.

  9. Sleafhoate
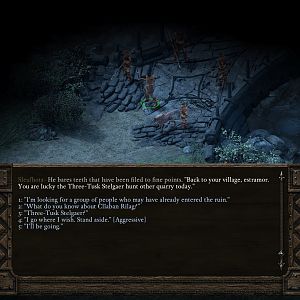
Here you will find a group of Glanfathan Warriors led by Sleofhota. You can either back out of a fight, possibly with a Diplomatic option, or choose to fight him. Trying to move past them and to the entrance beyond will also result in them attacking you.

    If you wish to avoid fighting them but still enter the ruins, the alternative is to jump across the bridge at #7 so as to take the entrace at #8.

    If you do kill them, they leave behind 2 War Bows, 3 Spears, 4 Hide Armors and a Fine Hide Armor.

  10. This entrance allows entry into the first level of the ruins at #12.

    Cliaban Rilag, Level 1

    There will plenty of Trolls, Forest Lurkers, Black Oozes and Swamp Slimes throughout the ruins of Cliaban Rilag. The Trolls leave behind Troll Skins when killed, the Forest Lurkers leave behind Awakened Woods, while the Black Oozes and Swamp Slimes leave behind Ooze Plasmas.

    Furthermore, spots with traps will be marked with a 't'.

  11. The door here leads back out to the exterior of Clian Rilag at #10.

  12. The door here leads back out to the exterior of Clian Rilag at #8.

  13. You will find a Skaenbone here.

  14. You will end up here if you went through the watery tunnel that starts at #28.

  15. You will find random gems in this web sac.

  16. You will find Settler's Arrows at these spots.

  17. There is a hidden debris here that can be uncovered while in scouting mode. It will have random gems.

  18. These spots will have the usual monsters, but led by at least a couple of Pwgras and a couple of Corrupted Druids. The Pwgras leave behind Awakened Woods when killed. Each Corrupted Druid can be looted for a Spears, a Hide Armor and a Hood.

  19. This vase will have a random potion and a couple of random gems.

  20. The door to this room is locked, but the door itself can be opened with the Mechanics skill. Several Animats will be on the other side of the door. They leave behind Engwithan Daggers, Engwithan Shields, Shattered Animat Armors and Binding Coppers when killed.

  21. This chest will have Sura's Supper Plate and the Tiny Animat pet.

  22. This room will have lots of Sporelings, and a few Dank Spores. It is advisable to lead the Sporelings away from the room so that you can kill them off first while the Dank Spores remain stationary. I then recommend taking out each Dank Spore one at a time with missile fire, as the room is also littered with a lot of traps throughout (too many even for 't's on the map in fact).

    All of the monsters will leave behind Sporelings when killed.

    There will also be a couple of corpses in the room that can be looted for random armor items.

  23. You will find Burned Ladies at these spots.

  24. The stairs here lead down to the second level at #29.

  25. The stairs here lead down to the second level at #40.

  26. Here is the Engwithan Machine that is relevant to the main storyline quest called Through Death's Gate. You can't interact with is directly, but you will get xp for discovering it.

  27. Here is an ashen effigy. Using your Watcher abilities to interact with it will mark the completion of the main storyline quest called Through Death's Gate.

  28. Here is the start of a submerged tunnel. Swimming through it will lead to two different choices when you glint some light halfway through the tunnel.

    One choice is to keep swimming on, which will lead to the party going directly to the other end at #14.

    Another choice is to designate either yourself or another party member to attempt to see what's at the other end of the glint of light. If that character can make a Constitution check, you'll end up obtaining the morning star called The Rose of Salthollow, and then you'll end up at the other end at #14.

  29. Cliaban Rilag, Level 2

  30. The stairs here lead up to the first level at #24.

  31. Animats will be at these spots. They leave behind Engwithan Daggers, Engwithan Shields, Shattered Animat Armors and Binding Coppers when killed.

  32. Phantoms will be at these spots. They will leave behind Spirit Residues when killed.

  33. Rain Blights will be at these spots. They will leave behind Primal Waters when killed.

  34. This vase will have random gems.

  35. A couple of Spectres and several Phantoms will be in this room. They will leave behind Spirit Residues when killed.

  36. This pool will have the Engwithan Key, plus a couple of random gems. They key can be used to open doors at spots labelled #39.

  37. There will be a few Will-O'-Wisps here. Theyh leave behind Spirit Residues when killed.

  38. There will be several Animats here, led by an Adra Animat. Besides the usual items, the Adra Animat will also leave behind an amulet called The Core.

  39. These racks will contain a random armor item or two.

  40. You either need the Engwithan Key or a decent Mechanics skill to open the doors at these spots.

  41. The stairs here lead up to the first level at #25.


Amazon.com
Amazon.ca
Amazon.co.uk
Sorcerer's Place is a project run entirely by fans and for fans. Maintaining Sorcerer's Place and a stable environment for all our hosted sites requires a substantial amount of our time and funds on a regular basis, so please consider supporting us to keep the site up & running smoothly. Thank you!

Disable all ads!