Pillars of Eternity logo


Pillars of Eternity Online Walkthrough by David Milward


INTRODUCTION & ABOUT  |  WORLD MAP  |  WHITE MARCH MAP
General:  
Quests  |  Tasks  |  Bounties  |  Items  |  Characters
Areas:  
Act 1 Areas  |  Act 2 Areas  |  Act 3 Areas  |  Act 4 Areas  |  Caed Nua  |  White March - Part 1  |  White March - Part 2  | 
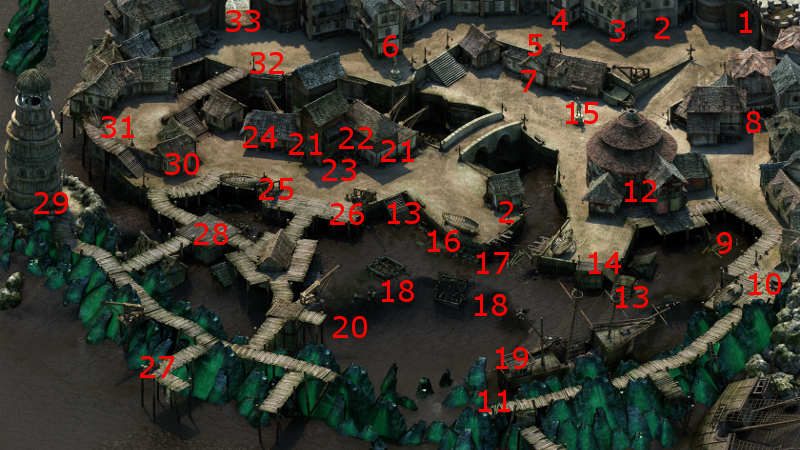
Disable all ads!

Act II Areas:   Copperlane  |  Copperlane Catacombs  |  Temple of Woedica  |  First Fires  |  Brackenbury  |  Sanitarium  |  Ondra's Gift  |  Lighthouse Ruin  |  Heritage Hill  |  Heritage Hill Tower  |  Cliaban Rilag  |  Searing Falls  |  Searing Falls Cave  |  Pearlwood Bluff

Ondra's Gift

Ondra's Gift

  1. Here is the initial point of arrival if the party travels from elsewhere within Defiance Bay.

  2. Containers at these spots will have random food items.

  3. There is an abandoned house here that will have a few vagrants inside. There will be a random narcotic or two on the table within.

  4. Here is Kolfecg's House.

  5. Here are Asuna Maemiel and Branwen Gwyne, whose soul histories can be read by your Watcher abilities.

  6. There is another Abandoned House here. The containers within will have a Hammer and Chisel, Camping Supplies, a random scroll and some coins.

  7. Here is the entrance to Odda's House. There are two containers in her house that will have random food items. She also provides the Brave Derrin task.

  8. CurndFor those of you with ambitions to enchant armors and weapons to Exceptional, Superb, or even Legendary quality, the plant components are easy enough to find. There are only so many creature parts that will allow the crafting of Superb or Legendary items, but at least they'll be in set locations. It's the gem components that may prove difficult to secure. There may be a few high-grade gems out there during your adventures like Rubies and Sapphires, but they are hard to come by and few and far between.

    If you want those kinds of gems ready on demand, a merchant named Curnd will run shop here only at night. And even then, getting access to his wares is not a given. But there's more than one way to secure that access.

    One way is to intimidate him with a Might check of 15. That will add a point towards Aggressive disposition.

    The other way is to obtain the Tattered Note pursuant to The Smith's Shipment quest. The note reveals the password "Yc Nybeon Eyldfeon" that will convince him to willingly grant access to his wares.

  9. Here you will find the soul of Derrin, who is relevant to the Brave Derrin task.

  10. Here you will find Walder "Three Fingers", "Lefty" Lisc, and the rest of their gang of Thugs as part of the All Hands on Deck task.

  11. Here are Hikami and Jerrith Lexingtale, whose soul histories can be read by your Watcher abilities.

  12. Here is an entrance to a brothel and tavern called the Salty Mast.

  13. It is possible to go further down these stairs and into the shallows, but only when the sun is up.

  14. An assault on a Nobleman will take place here. It is relevant to the Supply and Demand quest, but it will take place whether or not you had previously accepted the quest.

  15. The same Thugs that assaulted the Nobleman at #14 will be here afterwards. They will attack you regardless of anything you have to say. They will drop the Rusty-Bronze Key as part of the Supply and Demand quest.

  16. There will be a random alcoholic beverage in this crate.

  17. The Engwithan Scepter Base will be in this crate.

  18. Animats and Rain Blights
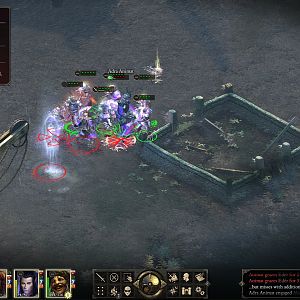
At each of both of these spots will be a couple of Animats and a couple of Rain Blights led by an Adra Animats. This is a great spot for upgrading the Greenstone Staff, if you're so inclined. The idea is to head in, have your staff-wielder kill off a Blight with the Staff while the rest of the party stays passive or uses healing spells, and then retreat to rest up at the Salty Mast. You can repeat for the other Blights so that you can rack up Blight kills for one of your Staff upgrades. You can save the Animats for when you're ready to fulfill the last upgrade for the Staff.

    The Animats will leave behind Copper Bindings, Shattered Animat Armor, Engwithan Daggers, and Engwithan Shields. The Adra Animats will leave all of that behind as well, plus Awakened Adras. while the Blights leave behind Primal Airs and Primal Waters.

  19. The Engwithan Scepter Spike will be in this crate.

  20. The Engwithan Scepter Shaft will be in this crate.

  21. Here are the entrances to the Vailian Trading Company. There will be a few items that can be looted, like coins and potions and the odd armor or weapon.

    Master Verzano is inside and offers the quest called At All Costs.

  22. Here is a merchant named Cartugo. His more distinctive items include:


    He also sells plenty of potions, scrolls, and creature parts. He also sells the Beagle Dog and Calico Cat as pets.

  23. A barrel here will have a minor random item in it.

  24. Pallegina
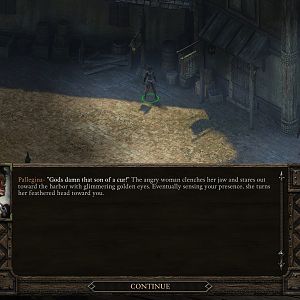
Here is where you'll encounter Pallegina for the first time. You won't actually be able to get her into your party until you've completed the quest called At All Costs.

  25. Here are Mors Somnus and Omahdon, whose soul histories can be read by your Watcher abilities.

  26. Here is Imatl, who provides the Clandestine Cargo task.

  27. Here is Marceno, who provides the All Hands on Deck task.

    The locked crate nearby has an Opal and a Pearl.

  28. Here is Niah, who offers The Wailing Banshee quest. She'll give you the Lighthouse Key to start the quest.

  29. Here is the entrance to the Lighthouse Ruin. You cannot get through unless you first obtain the Lighthouse Key from Niah at #28 as part of The Wailing Banshee quest.

    Once you resolve the quest, the first floor of the ruin becomes a tavern called The Wailing Banshee. It offers all of the usual services besides rooms to sleep in. A chest in the room will also have a book called Those Lost in the Flood.

  30. Here is the Ramshackle House, the door to which can be opened by the Rusty-Bronze Key as part of the Supply and Demand quest.

    Aside from the occupants, a couple of containers within will have random food items. A hidden cache that can only be discovered while in scouting mode will have a couple of Pearls in it.

  31. Here is Bragan, who may have relevance to the Brave Derrin task.

  32. Here is Kwherezimian, whose soul history can be read by your Watcher abilities.

  33. Here is exit which provides access to the World Map. If you exit Ondra's Gift from here, you will also make Heritage Hill accessible.


Amazon.com
Amazon.ca
Amazon.co.uk
Sorcerer's Place is a project run entirely by fans and for fans. Maintaining Sorcerer's Place and a stable environment for all our hosted sites requires a substantial amount of our time and funds on a regular basis, so please consider supporting us to keep the site up & running smoothly. Thank you!

Disable all ads!