Pillars of Eternity logo


Pillars of Eternity Online Walkthrough by David Milward


INTRODUCTION & ABOUT  |  WORLD MAP  |  WHITE MARCH MAP
General:  
Quests  |  Tasks  |  Bounties  |  Items  |  Characters
Areas:  
Act 1 Areas  |  Act 2 Areas  |  Act 3 Areas  |  Act 4 Areas  |  Caed Nua  |  White March - Part 1  |  White March - Part 2  | 
Disable all ads!

Act I Areas:   Encampment  |  Ruins of Cilant Lis  |  Cilant Lis  |  Valewood  |  Gilded-Vale  |  Temple of Eothas  |  Esternwood  |  Raedric's Hold  |  Magran's Fork  |  Anslog's Compass  |  Black Meadow  |  Madhmr Bridge  |  Caed Nua  |  Dyrford Village  |  Dyrford Crossing  |  Dyrford Ruins  |  Woodend Plains  |  Aedelwan Bridge

Raedric's Hold Sanctuary

Raedric's Hold, Sanctuary

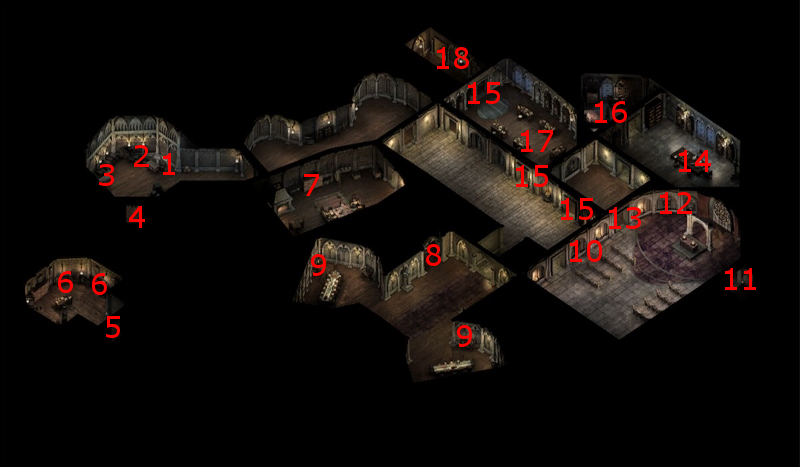
This area will have plenty of enemies patrolling about. There be will be some Acolytes of Berath, who will typically drop Clubs and Padded Armors. There will also be Priests of Berath and the odd High Priest of Berath about as well. They drop Maces, Small Shields, Padded Helms, and Robes when killed. There will also be a few Temple Guardians and Paladins of Berath. They drop Greatswords, Plate Armors, and Full Helms when killed.

That's a lot of enemies to take on, if you're up to it. However, there will be a way to get around without getting attacked, which I'll describe just below.

  1. These stairs lead down to #5 on the map of Raedric's Hold Keep.

  2. A barrel here will have a random weapon plus three Berathian Priest Robes. Characters having these robes will not be attacked by the devotees of Berath on this level. That, by itself, however is not quite enough. Once in a while a Paladin of Berath or an Acolyte of Berath or a Priest of Berath will have some suspicions and interrogate the party on the spot. Very often a Resolve check of varying degrees, 12 Resolve at minimum or 18 Resolve at the highest, will suffice. Once in a while a High Priest will get suspicious, in which case you need an Intellect check of at least 12 to deflect suspicion. So in summary, having all six party members equipped in Berathian Priest Robes, and your Watcher character having at least 18 Resolve and 12 Intellect, suffices to give you complete free run of the Sanctuary level.

  3. This barrel has another three Berathian Priest Robes, allowing a full party to travel about the Sanctuary.

  4. This door leads to the ceiling of Raedric's Hold at #11.

  5. This door leads to the ceiling of Raedric's Hold at #8.

  6. The chests at these points will have random armor items, often of Fine quality.

  7. There be a cache here that will have a random scroll, a random potion, and some coins.

  8. This door leads to the ceiling of Raedric's Hold at #12.

  9. There will be random food items at these points.

  10. An eye socket in the skull here will have a random gem or two.

  11. The stairs here lead to the Dungeons at #6.

  12. If you go into scouting mode near this skull, you'll discover a button in its eye socket that can open the door at #13.

  13. This secret door is opened by pressing the hidden button at #12.

  14. Nedmar
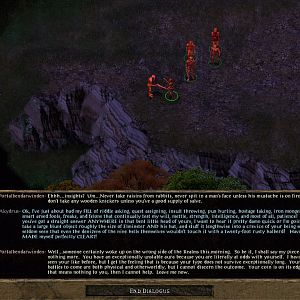
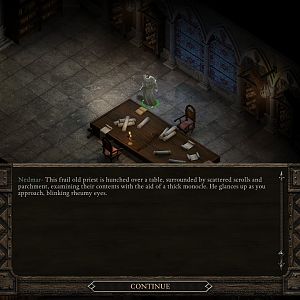
The party will encounter a Priest of Berath here named Nedmar. He offers a way of reaching Lord Raedric without battling everything in sight as part of the Lord of a Barren Land. It requires that you had previously rescued Giacco alive from the Dungeons. He'll then willingly provide you with the Burnished Steel Key, which will allow you to open doors marked #13. That in turn will allow you to reach the Keep of Lord Raedric's Hold through the stairs at #16.

    You could kill Nedmar for the Key, particularly if you're going the way of slaughtering anything and everything in the Hold. However, even if you're going this way, if may be better to leave Nedmar alive. If you've gotten on his good side by having rescued Giacco, he'll allow you to rest in his room without expending any camping supplies. That will allow you opportunities to rest for free in between any battles.

    The bookcases in his room will have the Berathian Scripture, and Admeth Hadret, Part 2: Rebellion. The chest in his room will have a random sroll or two, plus some coins.

  15. The doors here can only be opened by the Burnished Steel Key, which is carried by Nedmar at #12.

  16. The chest here will have a book called Aedyre Custom, plus a random scroll.

  17. There will be an Acolyte of Berath and a Priest of Berath in this room. The containers in this room have a few books, the Berathian Scripture, the Many Faces of Berath, and the The Dyrwood, Part 5: The Proliferation of Animancy.

    There will also be a Scrawled Note, which may drop a hint on how to reach Nedmar.

  18. The stairs here lead to the Keep at 15.


Amazon.com
Amazon.ca
Amazon.co.uk
Sorcerer's Place is a project run entirely by fans and for fans. Maintaining Sorcerer's Place and a stable environment for all our hosted sites requires a substantial amount of our time and funds on a regular basis, so please consider supporting us to keep the site up & running smoothly. Thank you!

Disable all ads!