Pillars of Eternity logo


Pillars of Eternity Online Walkthrough by David Milward


INTRODUCTION & ABOUT  |  WORLD MAP  |  WHITE MARCH MAP
General:  
Quests  |  Tasks  |  Bounties  |  Items  |  Characters
Areas:  
Act 1 Areas  |  Act 2 Areas  |  Act 3 Areas  |  Act 4 Areas  |  Caed Nua  |  White March - Part 1  |  White March - Part 2  | 
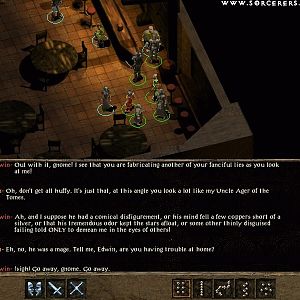
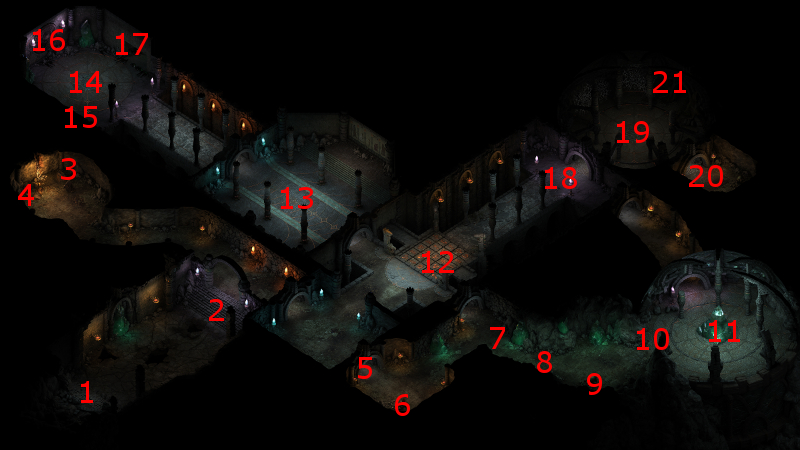
Disable all ads!

Act I Areas:   Encampment  |  Ruins of Cilant Lis  |  Cilant Lis  |  Valewood  |  Gilded-Vale  |  Temple of Eothas  |  Esternwood  |  Raedric's Hold  |  Magran's Fork  |  Anslog's Compass  |  Black Meadow  |  Madhmr Bridge  |  Caed Nua  |  Dyrford Village  |  Dyrford Crossing  |  Dyrford Ruins  |  Woodend Plains  |  Aedelwan Bridge

Ruins of Cilant Lis

Ruins of Cilant Lis

  1. Here is the where the party initially enters the Ruins after having been forced to flee from the Encampment, but the way back is blocked now.

  2. If Heodan was injured during the previous encounter with the Glanfathan Hunters, he'll want to stop here and rest. He'll also provide you with one set of Camping Supplies. Calisca will want to press onwards. You will be presented with two choices.

    One choice is to rest up and earn Benevolent disposition points. Doing so will cause Calisca to leave, with the Full Waterskin and she will die as a result of several traps that lay north ahead. Note also that resting at any time afterwards will also cause Calisca to leave with the Full Waterskin and die one way or another (more on this later).

    The other choice is to refuse the request to rest up, and earn Rational disposition points. That means Calisca will remain in the party, although Heodan will still have his Bruised Ribs injury.

    Note that if you managed to make the earlier Lore or Intelligence check with Heodan, then he won't press for resting at this point. Although Calisca will still leave the party with the Full Waterskin if you ever rest at any point.

  3. This urn has a Small Shield and a Torch. The Torch may come in handy when bypassing a part of this dungeon.

  4. This container has:

    • Two Camping Supplies - If you are playing on Hard difficulty, you can only have two Camping Supplies at any one time. However, you can pick up one here, use the one that Heodan gave you, and come back here later for the extra.
    • A Mace
    • A Hammer and Chisel.

    The Hammer and Chisel is a quest item that can be used in another part of this dungeon.

  5. Here is a Xuarip who is potentially but not necessarily hostile. You could avoid a fight by choosing a dialogue option that avoids fighting him and earns Benevolent disposition points.

    You could also choose the dialogue option that will pick a fight with him and earn Aggressive disposition points at the same time. Note also that if you kill him, he'll leave behind a Xuarip Spear.

    If you want to access the container at #6, you'll either have to kill the Xuarip or find a way to permanently placate it. An item that can be used to placate the Xuarip can be found at #8.

  6. A Hunting Bow and two Lockpicks can be found in this urn.

  7. A corpse lies dead here. It can be looted for:


    The Gem can be used to uncover a treasure cache elsewhere in the Ruins.

  8. A Skuldr Whelp will attack the party here. It shouldn't be hard to kill, and will leave behind Skuldr Meat after it does.

    The Meat itself can be used to placate the Xuarip at #5 so that you can loot the urn at #6 without having to kill the Xuarip, if you're so inclined.

  9. The container here has a Hatchet.

  10. Here is a wall that impedes further progress to the cavern from beyond, at least from this direction. There is more than one way to bring down the wall. One way is to use the Hammer and Chisel from #4. Another way is for a character with a Might score of at least 16, like Calisca, to force it down.

  11. Three Starved Skuldr Welps will attack the party in this cavern. They can emit a screech that can stun party members. One way to approach the fight is to have Calisca stand her ground at the entrance, and let other party members hang back and hit the Skuldr at a distance with missile weapons or spells. One of them leaves behind a Skuldr Ear

  12. Cilant Lis Tiles
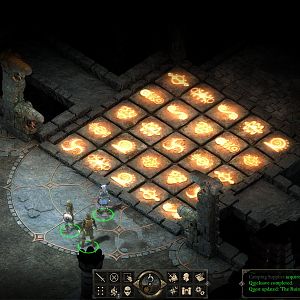
Here is the central room that has several glowing tiles. The tiles are in fact traps that inflict Burning damage on anyone who steps on them. This is where Calisca will get herself killed if she had left the party earlier.

    There is more than one way to get past the tiles. One way is to bring down the way at #10, go through the cave at #11, and ultimately go around the tiles and avoid them completely.

    Another way is to light the Braziers at #13 (more on that later).

    Another, and the preferable way if you can, is to go into Stealth mode and then use the Mechanisms skill to disarms all of the traps. The skill rank in Mechanisms that is needed varies, with some of them needing 1 or 2 in Mechanisms, and the odd one requiring 3. If you're having trouble, you may want to use the Lockpicks that are available at #7 or from the Encampment.

  13. There will be several Braziers in this room. If you light all of them, some of the tiles at #12 will be turned off, in effect creating a safe path that the party can walkthrough. There is more than one way to light the Braziers.

    If your main character is a Fire Godlike, then he or she can light the Braziers on his or her own. The other way is to equip a Torch as a weapon, and then light the Braziers.

  14. Two Lesser Black Oozes will attack the party in this room. they will each leave behind an Ooze Plasma.

  15. This container holds a Pollaxe.

  16. Ooze Face
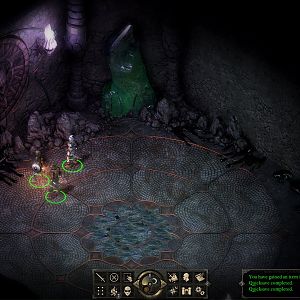
Here is a stone face that is partially covered over with ooze. You can click on it and use the Full Waterskin to wash away the ooze. Doing so will reveal that the stone face has a gemstone in one eye socket, but is missing a gem for another eye socket.

    The next step is to insert the Engwithan Relief Gem into the empty eye socket. Doing those two things will reveal the treasure cache at #17.

  17. Here will be another Lesser Black Ooze that will also leave behind an Ooze Plasma. A container in the alcove has:


  18. A couple of Spear Spiderlings will attack the party here. They shouldn't be difficult.

  19. A couple of Spear Spiderlings, plus a Famished Spear Spider, will attack the party here. Remember, have Calisca or another tanking character absorb the onslaught. Have Heodan or other characters attack from either a distance or from their flanks. The Famished Spear Spider will leave behind a Spear Spider Leg.

  20. A Helm can be found lying here.

  21. Here is the exit to the outdoors of Cilant Lis


Amazon.com
Amazon.ca
Amazon.co.uk
Sorcerer's Place is a project run entirely by fans and for fans. Maintaining Sorcerer's Place and a stable environment for all our hosted sites requires a substantial amount of our time and funds on a regular basis, so please consider supporting us to keep the site up & running smoothly. Thank you!

Disable all ads!