Dragon Age logo

BioWare


Dragon Age: Origins Online Walkthrough by David Milward


INTRODUCTION  |  GETTING STARTED  |  NPCs  |  ORIGINS  |  RECIPES |  ITEMS   
Areas in the original game:  
Brecilian Forest  |  The Camp  |  Circle Tower  |  Denerim  |  The Final Battle  |  Haven  |  Landsmeet  |  Lothering  |  Orzammar  |  Ostagar  |  Redcliffe  |  Ruined Temple  
Areas available as Downloadable Content:  
Honnleath  |  Return to Ostagar  |  Warden's Keep 
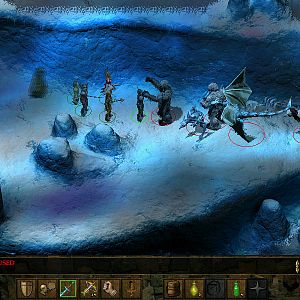
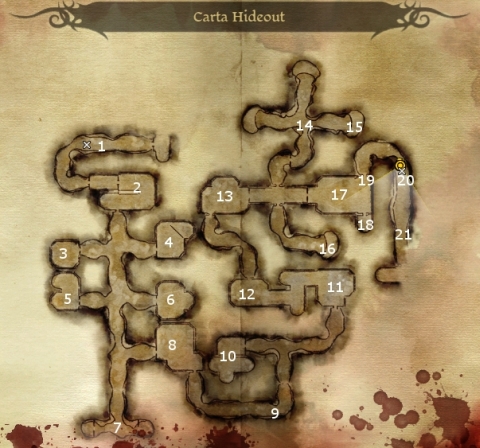
About the Walkthrough  |  About the Maps  |  About the Author  |  About Playing the Game  |  Where to Begin
Disable all ads!

Orzammar: 
Aeducan Thaig  |  Anvil of the Void  |  Assembly Chamber  |  Cadash Thaig  |  Caridin's Crossing  |  Carta Hideout  |  Dead Trenches  |  Deep Roads  |  Diamond Quarter  |  Dust Town  |  Frostback Mountain Pass  |  Hall of Heroes  |  Harrowmount's Estate  |  Ortan Thaig  |  Orzammar Commons  |  Proving Grounds  |  Royal Palace  |  Shaperate  |  Tapster's Tavern  

Carta Hideout

Carta Hideout

  1. Here your initial entry point, and the way back to Dust Town.

  2. Here is the Carta Doorman. He'll ask for a password. No matter what you say, one thing is inevitable, combat.

  3. Here you'll have to fight several of Jarvia's thugs coming through the door. As usual, their doorway makes a fine choking point to set up crowd-control spells followed with offensive spells. The room itself will have a crate and a chest with a random item. There will also be a book that provides a Codex Entry relevant to the "Jammer's Stash" quest. The entry suggests a method of availing one's self of Jammer's Stash, but only in you bring the three cheapest items from other lockboxes. Taking something other than the cheapest item from a box may result in severe injury to the taker.

  4. Here you'll have to fight a few more of Jarvia's Thugs, along with a Qunari Mercenary.

  5. Here will be more Dwarven thugs for you to fight.

  6. Here will be a few more Dwarven Thugs, along with a Qunari Mercenary and an Elven Mercenary (Mage). In here, you'll also find Kanky's Common Box, which holds the Custom Emerald Ring, the Custom Gold Ring and the Custom Silver Ring. The Silver Ring is the one you want to avoid getting injured, and for Jammer's Stash.

  7. There will be a very large group of Jarvia's thugs in this room. Again, the door way presents a perfect opportunity for crowd-control spells followed by offensive spells. Various containers in this chamber will have random items.

  8. Plenty more of Jarvia's Thugs for you to kill here.

  9. Around here will be a tripwire trap. There will also be a couple of Barrels with random items in them.

  10. This room also has a tripwire trap in it. You will also get attacked by several of Jarvia's Thugs and Assassins (who can approach by stealth for sneak attacks), led by the Carta Jailor. The Jailor will leave behind the Jailor Key from his body. This key allows you to open the jail door in order to free a nearby Dwarven prisoner named Leske.

  11. Here you'll get jumped by a few Carta Assassins. There's also a few barrels in this room with random items.

  12. Here you'll have to a lot of Carta Thugs, along with several Archers, and a Qunari Assassin. Note that there will be a few leghold traps between you and the Archers. There will be several containers with random items in this room as well.

  13. However, also in here is Jammer's Common Box, which as an Iron Letter Opener, a Steel Letter Opener, and a Red Steel Letter Opener. The Iron Letter Opener is the one you want to avoid a lasting injury as part of the Jammer's Stash quest.

  14. In this room you'll have to battle several Carta Thugs and an Elven Mercenary (mage). This room also has the last Common Box as part of the Jammer's Stash quest. The Box has a Fluorspar Trinket, Garnet Trinket, and a Malachite Trinket. The Garnet Trinket is the one you need.

  15. There will be a lot of Carta Thugs here, and what they are guarding is apparently the livestock pens for the Carta. Tame versions of various animals that you may have seen will be here in the caverns.

  16. Here is Jammer's Stash. To open it, you'll need the Custom Silver Ring, the Iron Letter Opener, and the Fluorspar Trinket. Inside will be a fair amount of gold, a random item, and the Longrunner's Cap (Reinforced).

  17. Here you'll get ambushed by a few Giant Spiders. There is also a chest nearby that has a random item.

  18. JarviaHere is where you'll meet Jarvia. No matter what dialogue options you choose, a fight will be inevitable. This can be a dangerous fight. Jarvia is herself a high-level Assassin with a lot of Health. She also has a lot of thugs to help her out. To make matters worse, the room itself is littered with several tripwire traps that can explode for a lot of damage. So stay back and don't rush forward. Litter the area with storm spells if you have them, or offensive spells if you don't. By all means, melee any that come forward, but use missile weapons for any that are staying back. Jarvia will leave behind a couple vials of Concentrated Soldier's Bane, the Longrunner's Cap (Reinforced), the Pushback Strikers (Drakeskin), and a Carta Key.

  19. The chests in this room will contain a few random items, as well as the Spiked Maul (Red Steel) and a Love Letter.

  20. You need the Carta Key to open this door.

  21. Here is a tunnel leading to Janar's armory at #3 of the Carta Key. Janar will be startled to see you at first, especially since you've figured out his previous ties with the Carta, but it won't effect his willingness to do business with you.


Amazon.com
Amazon.ca
Amazon.co.uk
Sorcerer's Place is a project run entirely by fans and for fans. Maintaining Sorcerer's Place and a stable environment for all our hosted sites requires a substantial amount of our time and funds on a regular basis, so please consider supporting us to keep the site up & running smoothly. Thank you!

Disable all ads!